If your business collects sales tax QuickBooks Online can calculate the tax automatically. But it’s important to get everything set up correctly.
In this blog post, we’ll walk through the process of automatically setting up sales tax in QuickBooks Online, as well as editing sales tax settings and adding additional tax agencies.
We’ll also cover how QuickBooks calculates sales tax on invoices. Finally, how you can record the sales tax payments you make.
Quick Instructions:
Set Up Automatic Sales Tax:
- Click Taxes in the left-side menu
- Select Sales Tax
- Click the Use Automatic Sales Tax button
- Verify your business address and click Next
- Check off if you collect tax in other states and click next
- Close the setup screen
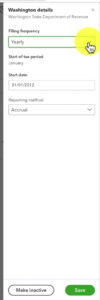
- Enter your filing frequency and click Save
Apply Sales Tax to an Invoice/Sales Receipt:
- Add products/services to your invoice or sales receipt
- Click the check box under the TAX column for any taxable product/service
- Make sure the correct tax rate is selected in the tax rate drop-down
- Click Taxes in the left-side menu
- Select Sales Tax
- Click View Tax Return to the right of a tax agency
- If needed, add any adjustments
- Click the Record payment button
- Fill in the necessary fields
- Click the Record payment button
Keep reading for a complete walkthrough with screenshots:
Automatically Set Up Sales Tax
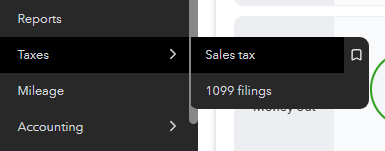
To set up your sales tax in QuickBooks Online first click Taxes in the right-side menu. Then select Sales Tax.
If this is your first time setting up taxes you’ll see a screen that looks something like this:
Click the green Use Automatic Sales Tax button.
It’s going to take you through a few setup screens.
Asking you…
- To verify your address
- If you collect tax outside your state
When it’s finished you’ll get a screen prompting you to create an invoice. I suggest clicking the X in the upper left corner, we’ll get to that in a moment.
I suggest closing that screen because the setup isn’t fully finished yet. When you close the screen you’ll be prompted for information on your filing frequency.
QuickBooks gives you information on filing frequency requirements. Honestly, I wouldn’t trust them.
Do a Google search. Find the website for your state’s Department of Revenue, and double-check. This is something you want to get right.
After selecting your filing frequency click the Save button.
You’ve now got the basics set up but there are still some things you can change if needed.
Sales Tax Settings
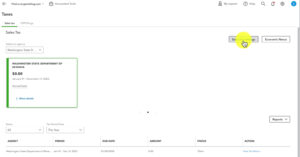
On the Sales tax screen in the upper left side click the Sales Tax Settings button.
In the settings, you’ll see a list of Tax agencies. If you click the Edit link to the right of an agency it’ll open a pop-up where you can edit:
- Filing frequency
- Start date
- Reporting method
Unless you 100% know for sure that you need a custom rate I suggest leaving that alone.
QuickBooks will automatically calculate your tax according to the tax agency you selected.
Adding an Additional Tax Agency
If, in the future, you need to start filing sales tax in a different state it’s easy to add a new tax agency.
From the Sales Tax screen click the Sales Tax Settings button in the upper right. Then on the Edit settings screen click the Add agency button in the upper right.
This opens a pop-up where you can select the agency you need. Enter the information, and save.
How to Apply Sales Tax to an Invoice
Applying sales tax to an invoice is easy.
You can have both taxable and non-taxable items on an invoice.
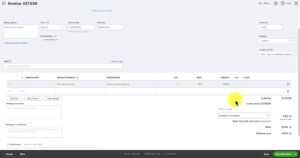
When creating an invoice in the products/services section you’ll see a TAX column.
If a product/service on an invoice is taxable you check off the box in that column for that particular line item.
Towards the bottom right, below the order subtotal you’ll see a drop-down for the tax rate. It will automatically say “Based on location” and use the Location of sale box to get the tax rate.
You can also click that box and select a different tax rate if needed.
Here is an example of an invoice with a tax rate based on location:
See the Math
Curious how QuickBooks calculates the tax?
Below the calculated tax rate is a blue link that says “See the math.” When you click that link a pop-up appears showing you just that. How QuickBooks did the math to calculate the tax.
Sales Tax Reports
Let’s take a quick look at the information QuickBooks provides us about our sales tax.
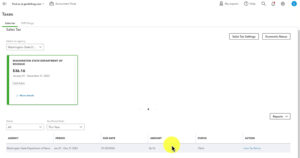
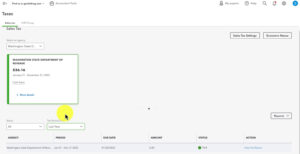
First, navigate to the Sales Tax screen (Taxes -> Sales Tax in the left-side menu). Towards the top of the screen are tiles for each agency you’re tracking sales tax for. Below the agency name is the amount you owe and the period that covers.
The agencies also appear as a list at the bottom of the screen. You’ll find how much you owe in the AMOUNT column. Along with the due date and the status.
Tax Liability Report
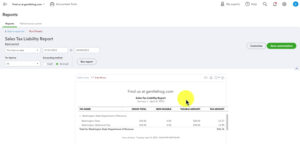
To the right, you’ll see a Reports button. Clicking it shows you a drop-down list of sales tax-related reports.
Let’s open the Tax Liability Report to get some extra information. This report shows some extra details on your tax liability.
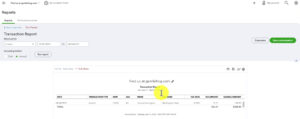
Clicking any of the numbers under GROSS TOTAL will open a transaction report showing the invoices and sales receipts used to calculate that total.
Record a Sales Tax Payment
QuickBooks will let you know that you owe sales tax but it can’t pay it for you. You’ll need to record the sales tax payments you make.
To do this you’ll start at the Sales Tax screen (Taxes -> Sales Tax in the left-side menu).
In the list of agencies at the bottom of the screen click the View Tax Return link in the ACTION column.
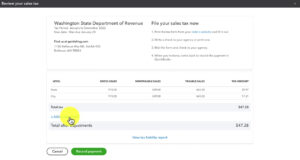
This will bring up a summary of what you owe. You can click the View tax liability report link to see more information (see above for information on the Tax Liability Report).
Add Adjustment
If you need to increase or decrease the amount of money you owe in sales tax you can add an adjustment.
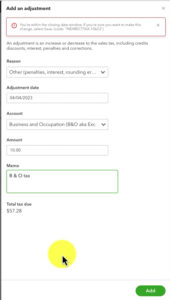
Click the +Add an adjustment link.
This will open a pop-up where you can enter the details for the adjustment:
- Reason – the reason you’re adjusting the amount
- Adjustment date – when you’re recording this adjustment
- Account – The account in your Chart of account this discount maps to
- Amount
- Memo – optional
It will show you the adjusted total tax due. When you’re done click the Add button in the lower right.
Record Payment
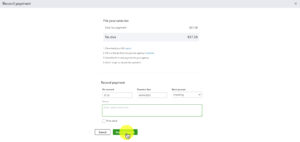
When any adjustments have been made and everything’s good to go click the green Record payment button to continue.
This is not authorizing any money to leave your bank account. You’re just letting QuickBooks know about a payment that was or is going to be made.
Fill in…
- Tax amount – how much you paid
- Payment date – the date you paid
- Bank account – the account the money came out of
- Memo – optional
You can check off Print check to print a check for this payment.
When you’re ready click the green Record payment button.
After recording your payment the status for the period you paid will update to Paid.
You now know how to set up sales taxes, track sales tax and record your sales tax payments in QuickBooks Online.
If you need help with sales tax outside of QuickBooks I suggest checking out Avalara or Tax Jar.
☕ If you found this helpful you can say “thanks” by buying me a coffee… https://www.buymeacoffee.com/gentlefrog
Below are videos if you prefer to watch a walkthrough.
If you have questions about sales tax in QuickBooks Online click the green button below to schedule a free consultation.








2 Responses
Hi Rachel! How does this work for retail businesses with POS systems?
Hi Elaizah,
It’s going to depend. The POS should be tracking sales tax, but it could also be syncing invoices and the sales tax gets calculated in QBO.
If you need help figuring out how sales tax in QBO works with your POS you can schedule a 15-minute meeting and Rachel can take a look at it with you: https://www.gentlefrog.com/meeting/
-Jess