In QuickBooks Online, you have two ways to record a sale. A sales receipt or an invoice. In this blog post, we’ll go over sales receipts. When to use them and how to create them.
Quick Instructions for Creating a Sales Receipt:
- Click the +New button in the upper left corner
- Click Sales receipt under CUSTOMERS
- Fill in the sales receipt as needed
- Click the green Save button
Keep reading for a complete walkthrough with screenshots:
Why Use a Sales Receipt
Sales receipts have two main uses. The first is to record a sale when a client pays at the time service is rendered. (An invoice is used when payment is collected later).
Sales receipts are also used to record sales at the end of a day/event when you want to track what was purchased.
For example, you set up a booth at a local farmer’s market. You sell various products throughout the day.
At the end of the day, you could create a deposit noting how much you made. Or, you can create a sales receipt.
Creating a sales receipt allows you to track how much of each product you sold at the fair. Something you cannot do using a deposit.
Another reason to use Sales Receipts versus just recording sales as a single deposit is that you can run useful reports.
Sales by Product/Service Summary Report
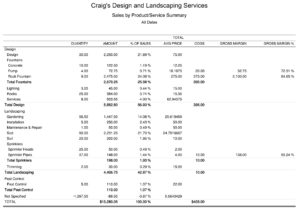
This report will only be useful to you if you track all sales of your various products/services. Here’s an example of this report:
It shows you:
- Quantity – How many units you’ve sold
- Amount – The total dollar value sold
- % of Sales – What percentage of your total sales is this product?
- Avg. Price – The average price you’ve sold a product for
- COGS – How much you pay for the product
- Gross Margin – How much money you make on the product (COGS – Amount)
- Gross Margin % = Gross Margin ÷ Amount * 100
How to Create a Sales Receipt
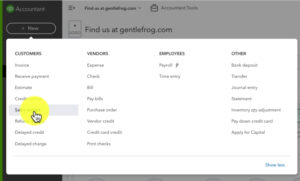
To create a sales receipt click the +New button in the upper left corner.
Then select Sales Receipt under CUSTOMERS.
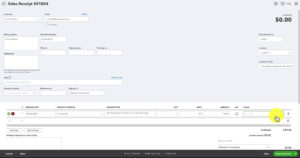
In the top section of the Sales Receipt screen you can enter the following…
- Customer – Who purchased the items
- Email – For emailing a copy of the sales receipt
- Sales Receipt date – When the products were purchased
- Shipping information – if applicable
- Tags – For tracking within QBO
- Reference no. – Optional
- Payment method – How they paid
- Deposit to – What account the money is deposited into
- Sales Receipt no.
- Location – If it’s turned on
- Location of sale – important if you charge sales tax
In the bottom portion of the Sales Receipt is where you add the products/services that were purchased.
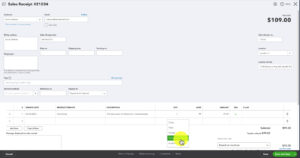
Here’s an example:
What Happened Behind the Scenes
Every transaction you create in QBO has a corresponding Journal entry. You can view this by clicking the More in the gray bar across the bottom of the screen (you’ll only see this after the transaction is saved). Then click Transaction Journal.
What the journal entry shows you is where the money all went.
Here’s an example of what it looks like:
In my example, $109 is debited into the account Payments to deposit. This may be Undeposited Funds for you.
$99 of those funds is credited to the account Services and the rest is going to two tax accounts. As with all journal entries, the debits equal the credits.
You now know why you’d want to use a sales receipt versus an invoice or deposit and how to create one.
☕ If you found this helpful you can say “thanks” by buying me a coffee… https://www.buymeacoffee.com/gentlefrog
If you have questions about sales receipts in QuickBooks Online click the green button below to schedule a free consultation.

