In this blog post, I’ll show you how I’m using the software SaasAnt to upload expenses into QuickBooks Online.
I’m using SaasAnt Transactions for QuickBooks Online. This software allows you to use Excel, CSV & IFF data to bulk import transactions into QuickBooks Online.
Quick Instructions:
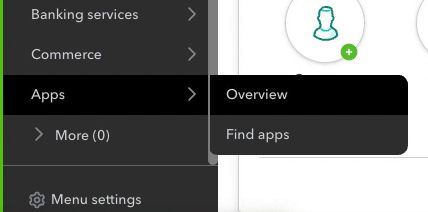
- Click Apps -> Overview in the left-side menu
- Click SaasAnt
- Click New Import in the left side menu
- Click BROWSE FILE
- Select the file to upload
- Click CONTINUE
- Select the Sheet from your file
- Select the QuickBooks Entity to upload the data to
- Map Fields
- Click IMPORT TO QUICKBOOKS
- Click UPLOAD
Keep reading for a complete walkthrough with screenshots:
Login Into SaasAnt
This is assuming you already have a SaasAnt account.
SaasAnt is a QuickBooks Online app. From within QuickBooks in the left side menu click Apps -> Overview.
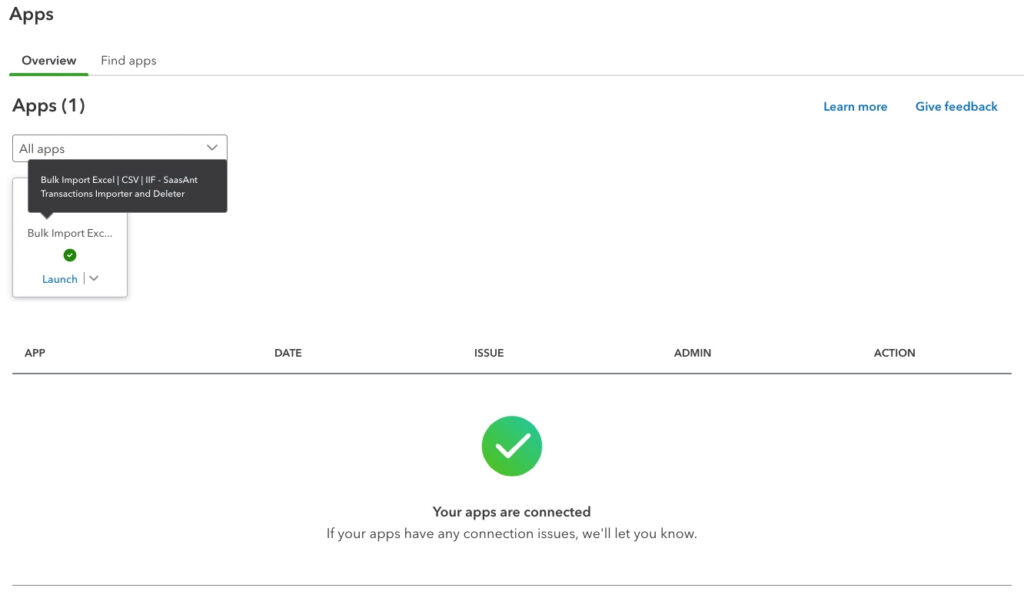
You’ll see all the apps you have connected to your QuickBooks. I’m using a sample file and I only have SaasAnt connected so that’s all I see.
Click on the SaasAnt block to open the app.
I’ve already been working in SaasAnt with this file, so I will be skipping the initial setup.
The Data
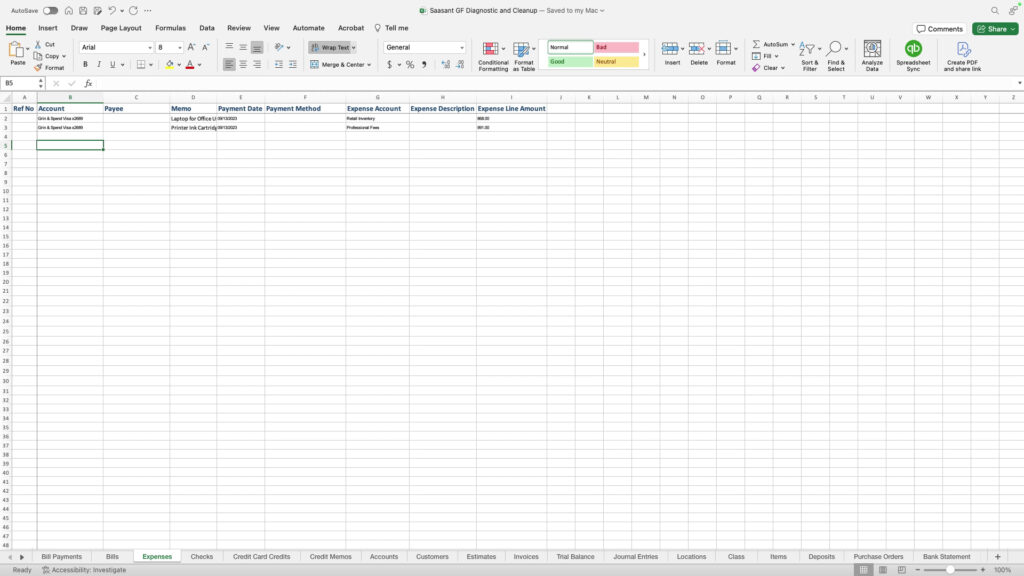
This is the Excel file I’m importing. It’s the template that I downloaded from SaasAnt.
I’m working in the Expenses tab but across the bottom, you can see there’s a tab for every type of transaction you can upload with SaasAnt.
It took a minute to understand what the different columns meant.
- Account: What account is the money coming out of (usually a bank)
- Expense Account: The Chart of Accounts expense account the money is going into
- Expense Line Amount: If you have an expense with multiple line items, this is the value of one line
Import Transactions
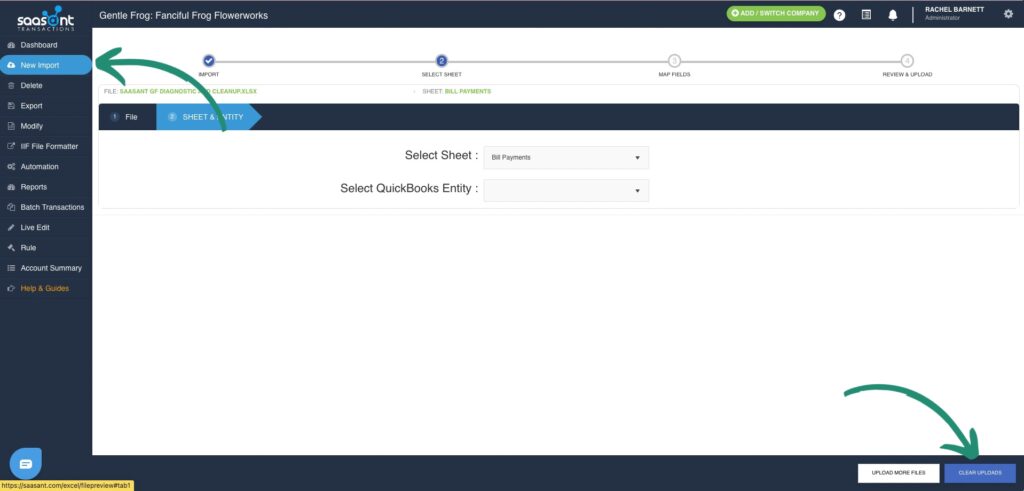
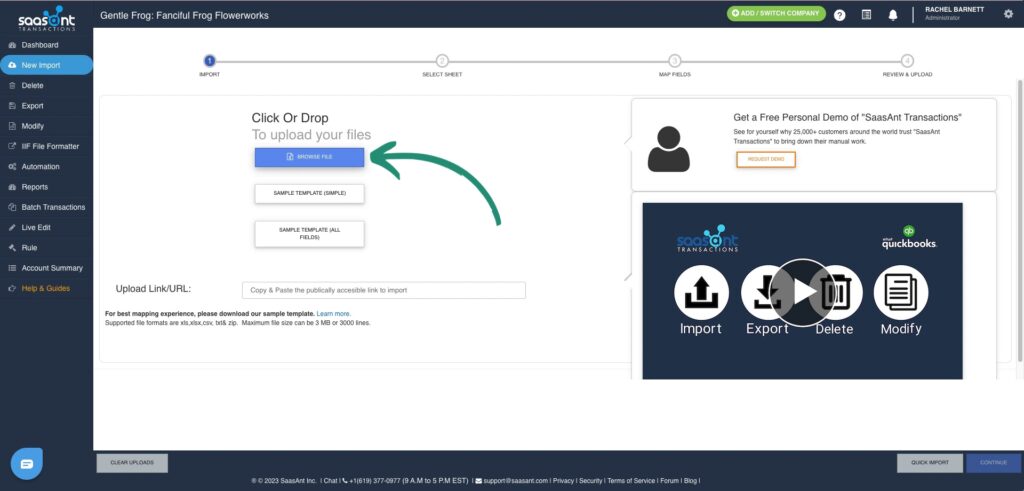
To import data using SaasAnt, click New Import at the top of the left-side menu.
Since I’ve already been uploading data from the spreadsheet I showed you I’m going to click the CLEAR UPLOADS button in the bottom right to refresh and start from scratch.
Now, click the blue BROWSE FILE button. Browse to the file on your computer and click on it to select it.
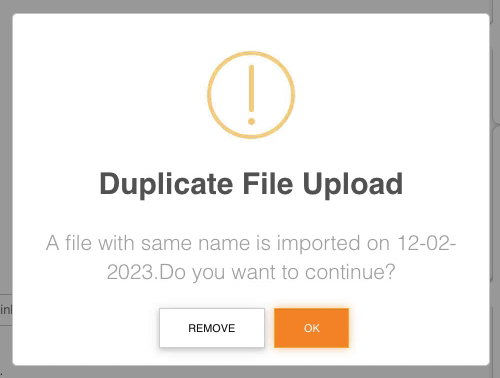
Since I’ve already been importing sheets from the file I’m using, I get a Duplicate File Upload warning. I want to upload more data from this file so I can OK.
In the lower right-hand corner, click the Continue button.
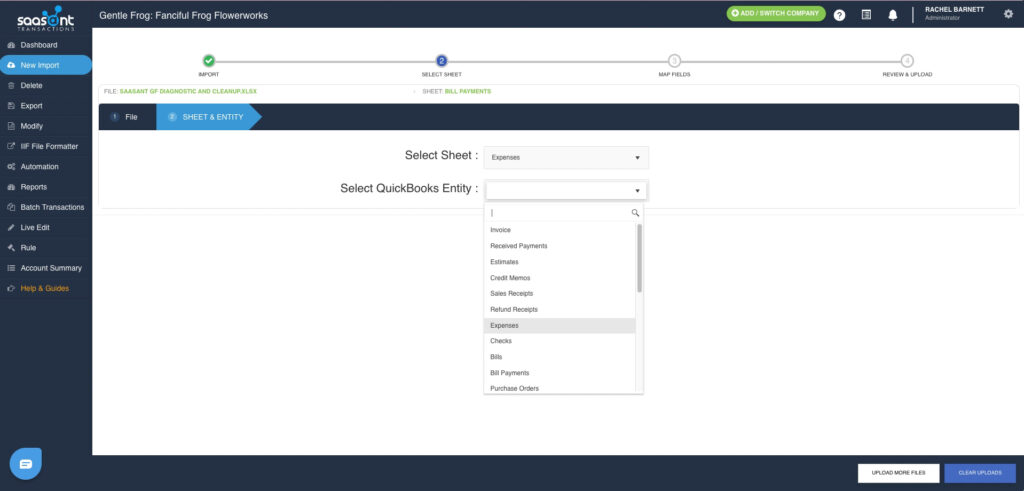
On the next screen, it wants to know which sheet on the Excel document I’m using.
The Select Sheet drop-down will show a list of all the sheets I have in that spreadsheet.
The Select QuickBooks Entity drop-down menu allows you to select where this data will go in QuickBooks. Once again, I’ll select Expenses.
Now we’re on Step #3, Map Fields. Here, we ensure that the column headers in our spreadsheet match the appropriate files within QuickBooks.
Because I’m working with SaasAnt’s template, it maps everything easily.
I can click the IMPORT TO QUICKBOOKS button in the lower right corner.
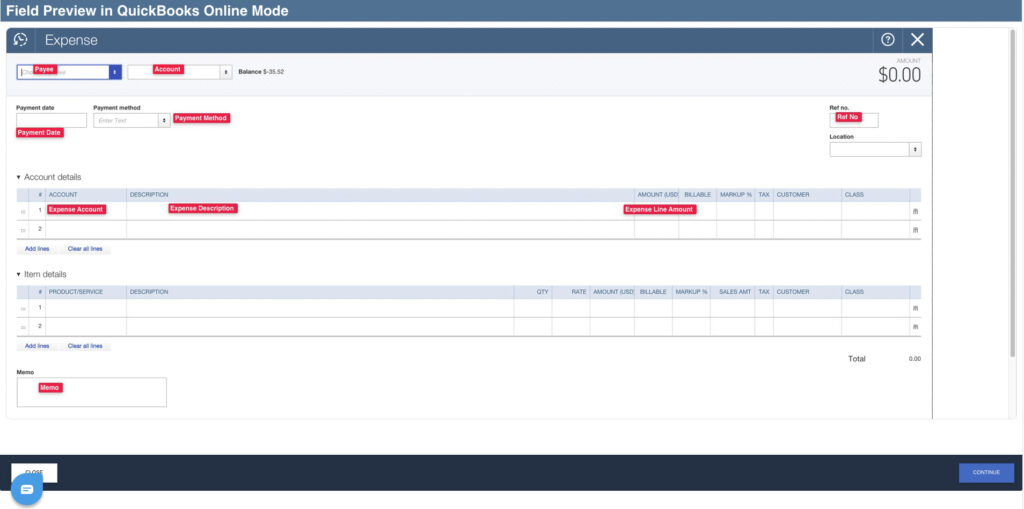
If you’re not using the SaasAnt template and need help understanding the mapping, click on the PREVIEW MAPPING button at the bottom of the screen. This will open a picture showing you the various fields in SaasAnt and what they match in QuickBooks.
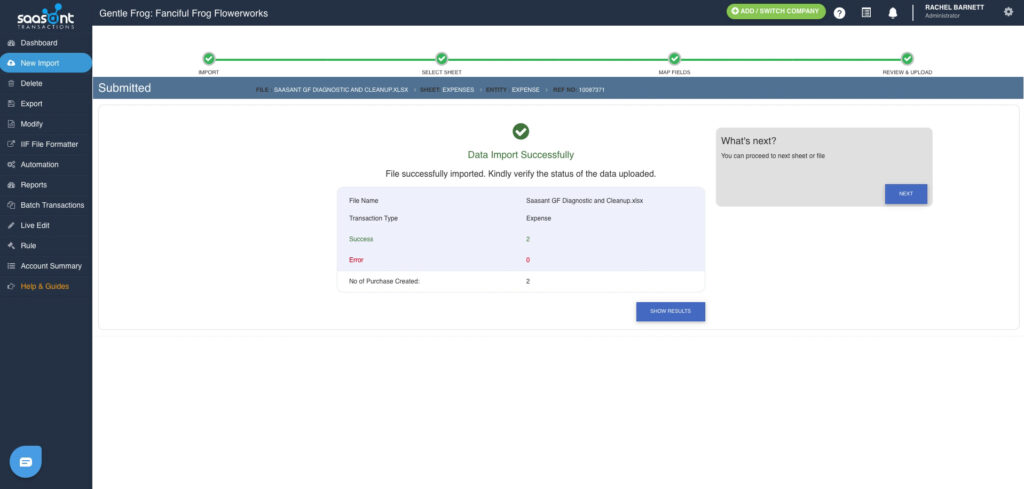
On the Review & Upload screen, I’ll click UPLOAD in the lower right corner.
SaasAnt will let us know if there are any errors. My data was imported successfully without any errors.
Viewing Data in QBO
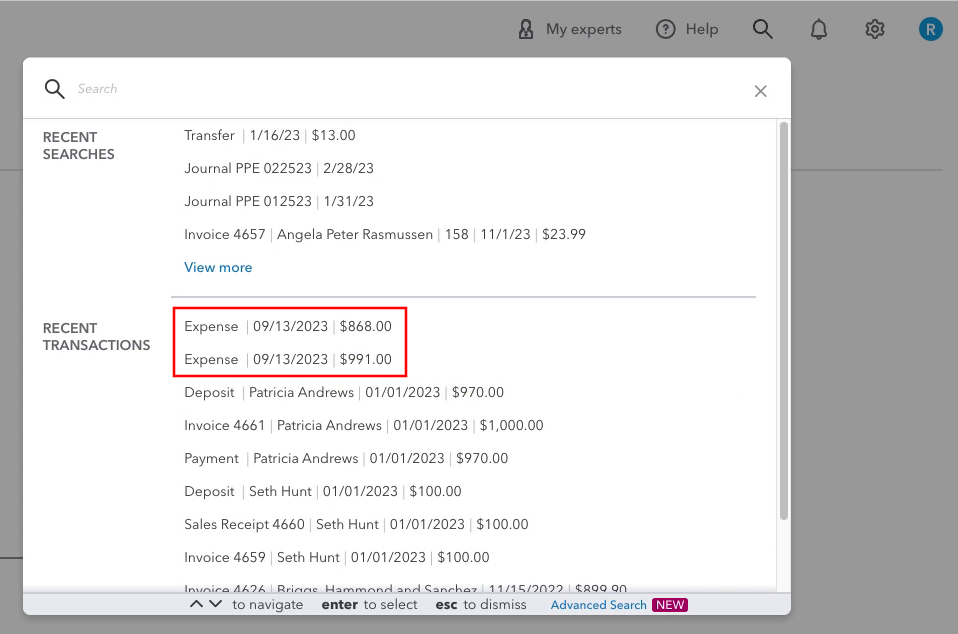
I like to double-check in QuickBooks after I upload data.
I will see my two imported expenses if I click on the Magnifying glass on the QuickBooks homepage under RECENT TRANSACTIONS.
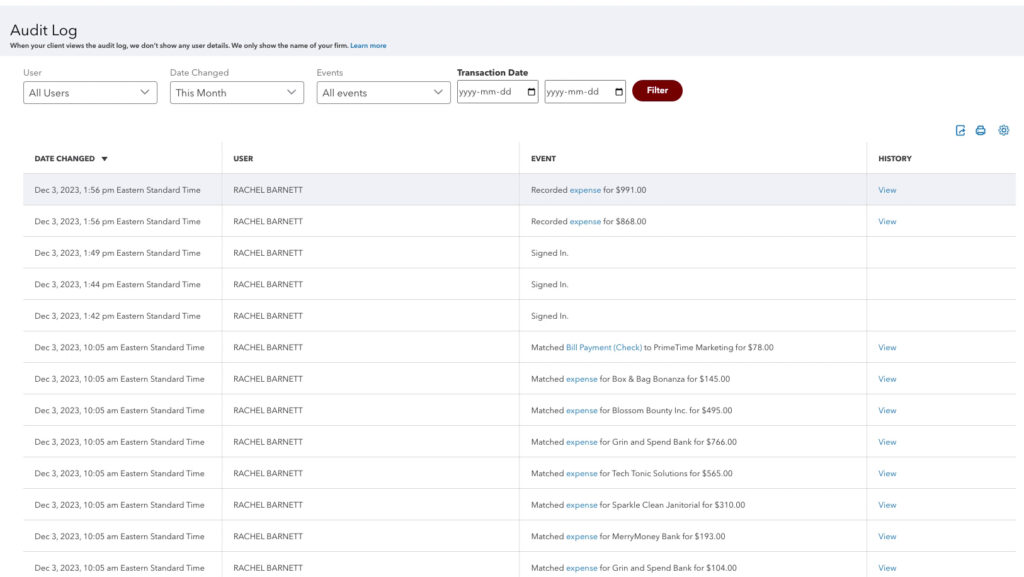
We can also go to Reports and search for the Audit Log. I can see the two transactions at the top of my Audit Log.
NOTE: SaasAnt is connected to my QBO account. If anyone on my team logs into SaasAnt and uploads transactions, the Audit Log will show me as the User.
Deleting Transactions
If you uploaded transactions by mistake, you can delete them using SaasAnt.
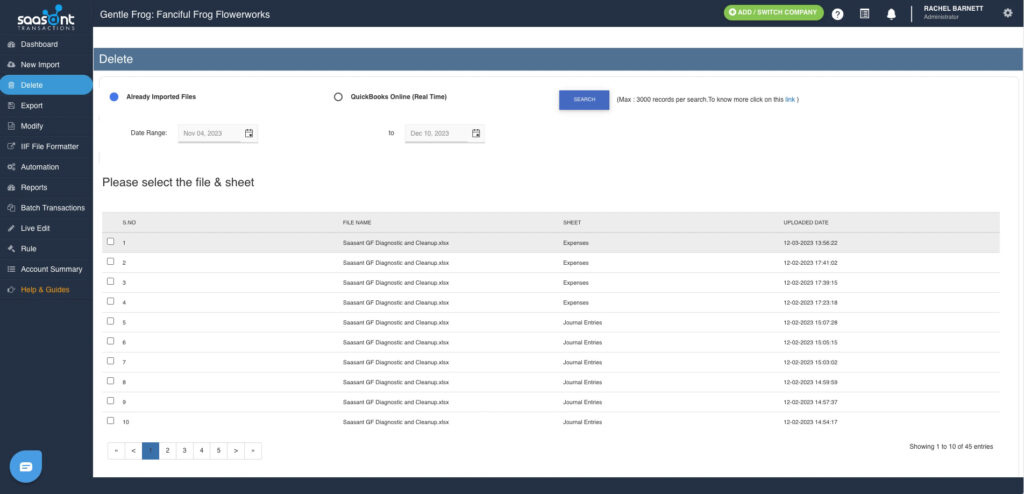
From within SaasAnt, click Delete in the left-side menu. Select Already Imported Files and click the Search button.
If I click the top line, it will show me the two expenses I just imported.
Check off the transactions you want to delete and click the Delete button in the lower right.
It will let you know that the files have been deleted. Once again, you can go into QuickBooks and verify by checking the Audit Log.
You now know how to upload and delete transactions in QuickBooks using SaasAnt.
☕ If you found this helpful, you can say “thanks” by buying me a coffee… https://www.buymeacoffee.com/gentlefrog
If you have questions about importing transactions into QuickBooks Online click the green button below to schedule a free consultation.

