QuickBooks Online doesn’t automatically know the details of deposits you make at your bank. Like which payments were included. Or if there were any fees incurred.
Accurately recording your bank deposits in QuickBooks Online ensures your financial records match your actual bank transactions.
This guide provides a step-by-step process to help you record bank deposits, including handling multiple payments and accounting for bank fees.
You only need to use this method when recording a bank deposit that covers multiple payments.
Note: Before recording your deposit, make sure ALL payments within the deposit have been added to QuickBooks and deposited into the Undeposited funds account.
Quick Instructions:
- Receive all payments included in the deposit to Undeposited Funds
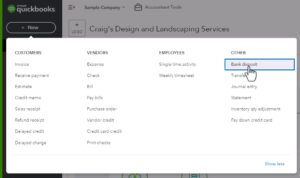
- Click the +New button
- Under OTHER click Bank deposit
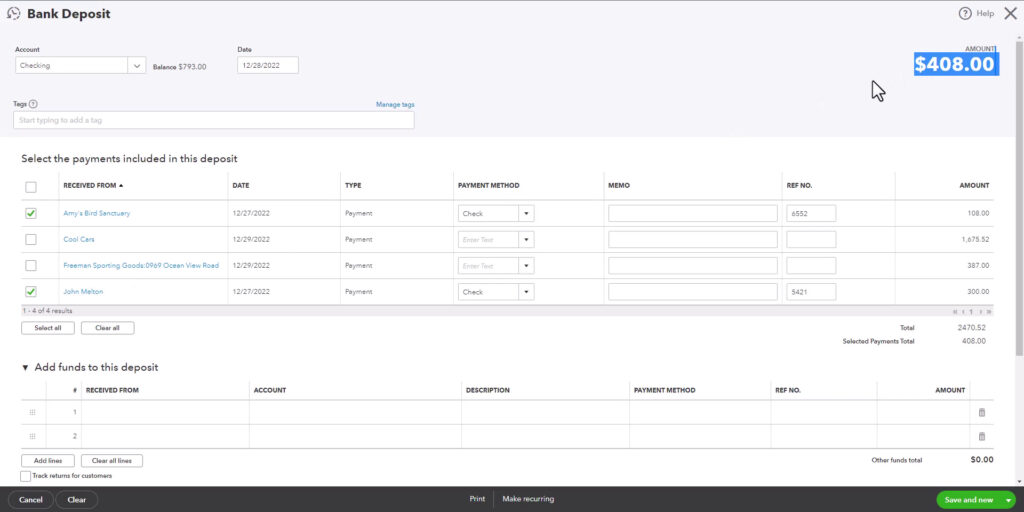
- Select the account the deposit is made to
- Enter the date of the deposit
- Under Select the payments included in this deposit check off all that apply
- If needed, add additional funds or fees to Add funds to this deposit
- If needed, enter cash back
- Double-check the Amount matches your deposit slip
- Click Save and close
Why Recording Bank Deposits is Important
When you deposit funds at your bank, especially multiple payments at once, the bank combines them into a single record.
To mirror this in QuickBooks Online, you need to group these payments into a single deposit.
This practice ensures your QuickBooks records align with your bank statements, simplifying reconciliation.
Steps to Record a Bank Deposit
To record a bank deposit in QuickBooks Online click the +New button in the upper left corner.
Under the OTHER section, select Bank deposit.
In the Account dropdown, choose the bank account where you’re depositing the funds.
Enter Deposit Details:
- Date: Input the date of the actual bank deposit.
- Payments Included in Deposit: In the Select the payments included in this deposit section, check all payments you’re including in this deposit. Only payments assigned to Undeposited Funds will appear here.
Add Additional Funds or Fees:
If you’re including funds not previously recorded or need to account for bank fees:
- Scroll down to the Add funds to this deposit section.
- Received From: Enter the source of the additional funds or the entity charging the fee.
- Account: Select the appropriate account (e.g., an income account for additional funds or an expense account like Bank Charges for fees).
- Amount: Enter the amount. For fees, input as a negative number (e.g., -10).
Attach Deposit Slip (Optional):
- Use the Attachments section to upload an image or PDF of the deposit slip for reference.
Verify and Save:
- Double-check that the Total matches the actual deposit amount on your bank slip.
- Click Save and close to record the deposit.
Here is an example of a deposit with two payments included:
Matching Deposits with Bank Transactions
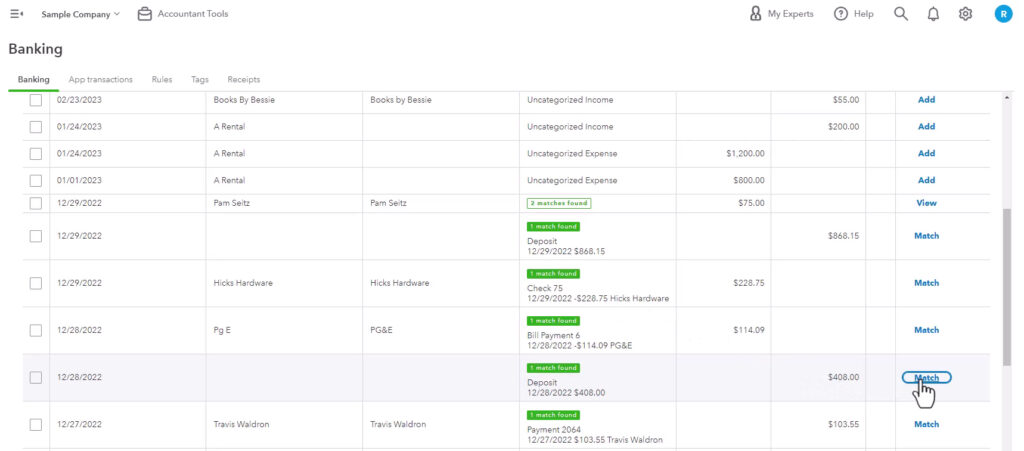
After recording the deposit, match it with the corresponding transaction in your bank feed to maintain accurate records.
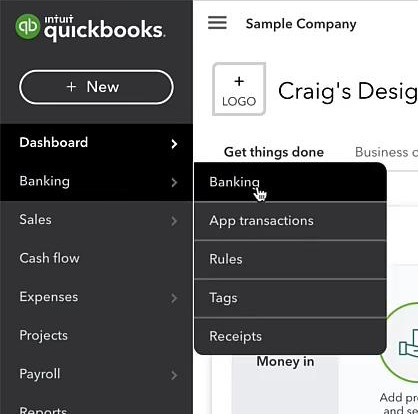
Click Banking in the left-side menu.
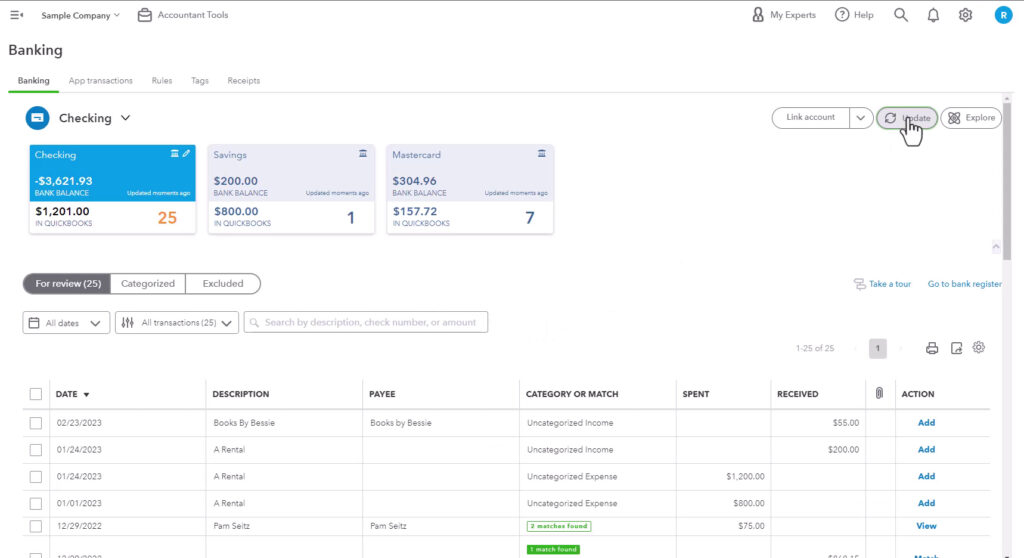
Click Update to refresh and download the latest transactions.
Select the appropriate bank account tile.
Match the Deposit:
- Locate the bank transaction that corresponds to your recorded deposit.
- If QuickBooks finds a match, it will suggest it.
- Click Match to confirm.
You now know how to record a bank deposit in Quickbooks Online.
☕ If you found this helpful you can say “thanks” by buying me a coffee… https://www.buymeacoffee.com/gentlefrog
If you have any questions about bank deposits in QuickBooks online click the green button below to schedule a free consultation.
For a visual demonstration, you may find this video tutorial helpful:

