In today’s QuickBooks online training blog post, we’re going to talk about how to export your QuickBooks Online data to Excel. If you wanted to keep a backup of your information or view it in a different format, read below to see how it’s done.
The first step we want to do is to navigate to the reports screen. You can do that from almost any part of QuickBooks online but, if you don’t see it, navigate to the Dashboard and look on the left-hand navigation menu.
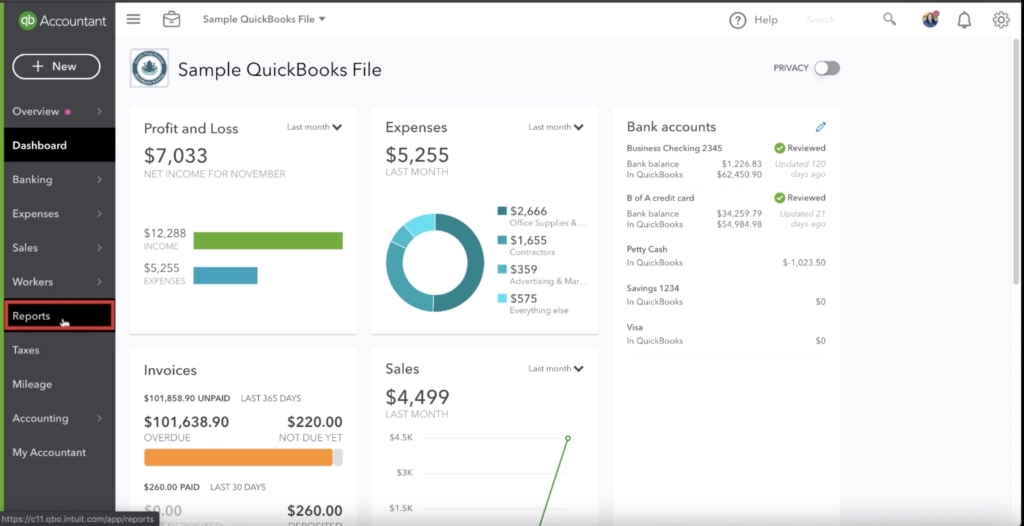
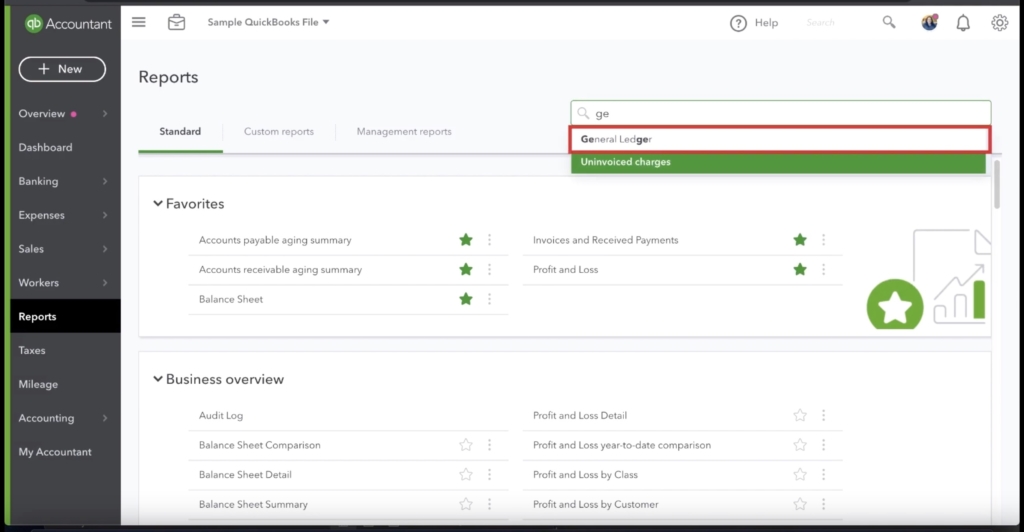
On the reports screen, you’ll have several items to scroll through. The number of reports available can be quite daunting, so what I usually do is go to the search bar, and for this example, we’re going to search for the General Ledger. We use the General Ledger in this case because it is the master log of all the transactions in your books.
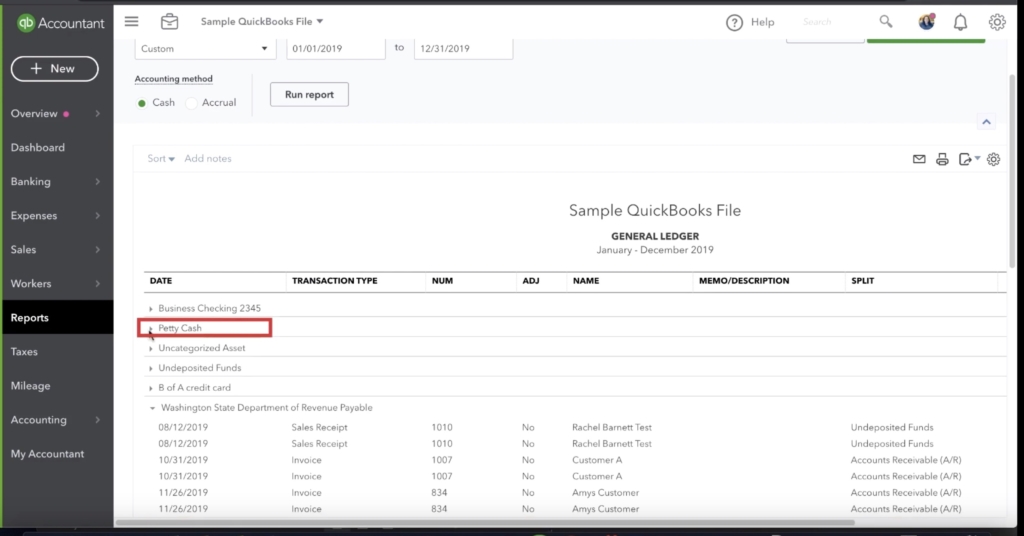
Next, we need to tell QuickBooks the dates we are interested in. For this example, we’re interested in the entire year of 2019. We select the dates and then click Run Report.
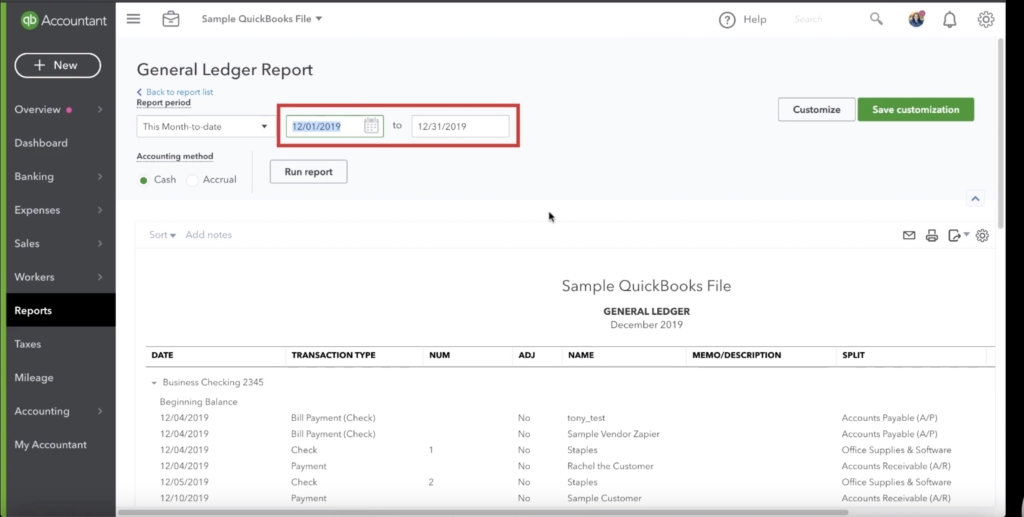
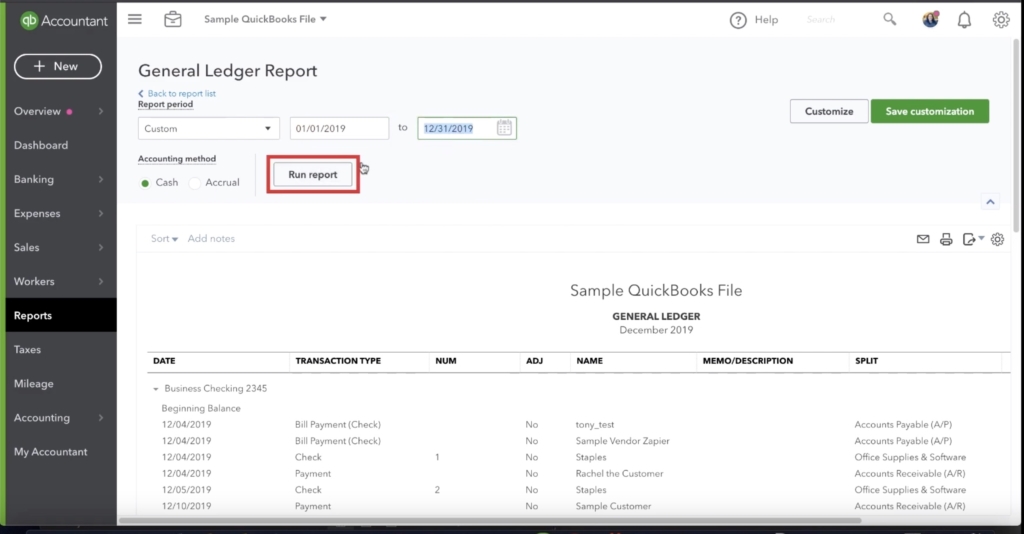
To recap, the General Ledger is everything — every transaction in your QuickBooks is here. You can see below that it has categorized the transactions into several accounts:
- Business Checking 2345
- Petty Cash
- Uncategorized Asset
- Undeposited Funds
- B of A Credit Card
- Washington State Department of Revenue Payable
- Opening Balance Equity
- Owner’s Pay and Personal Expenses
- Sales and Product Income
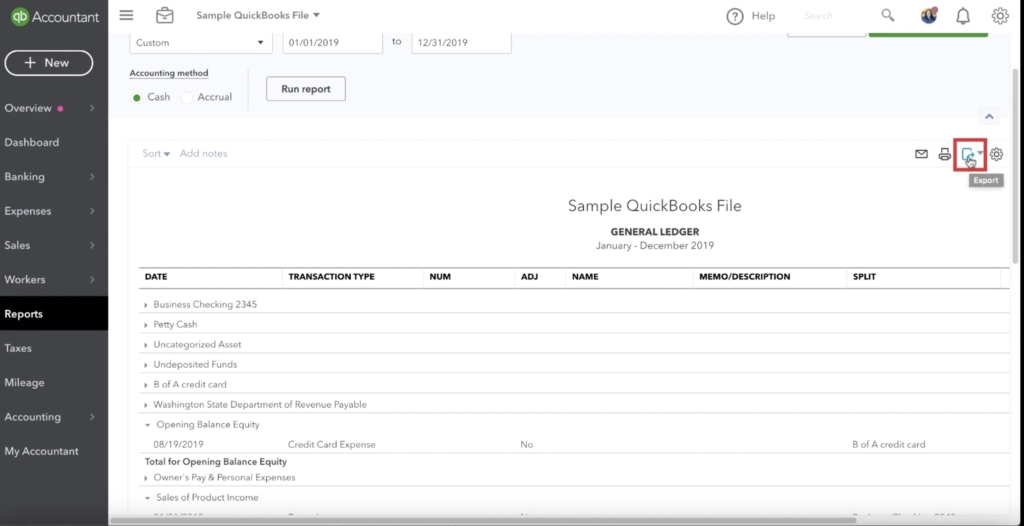
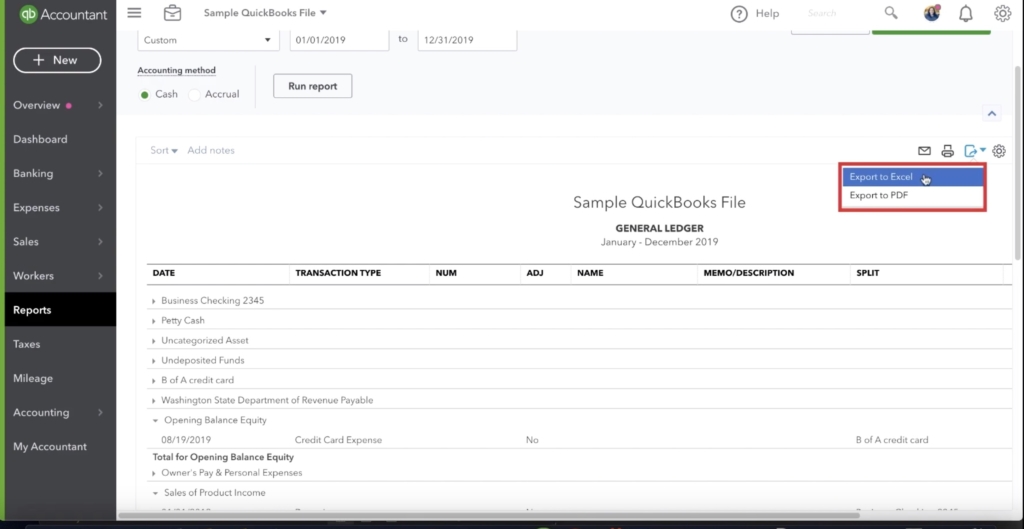
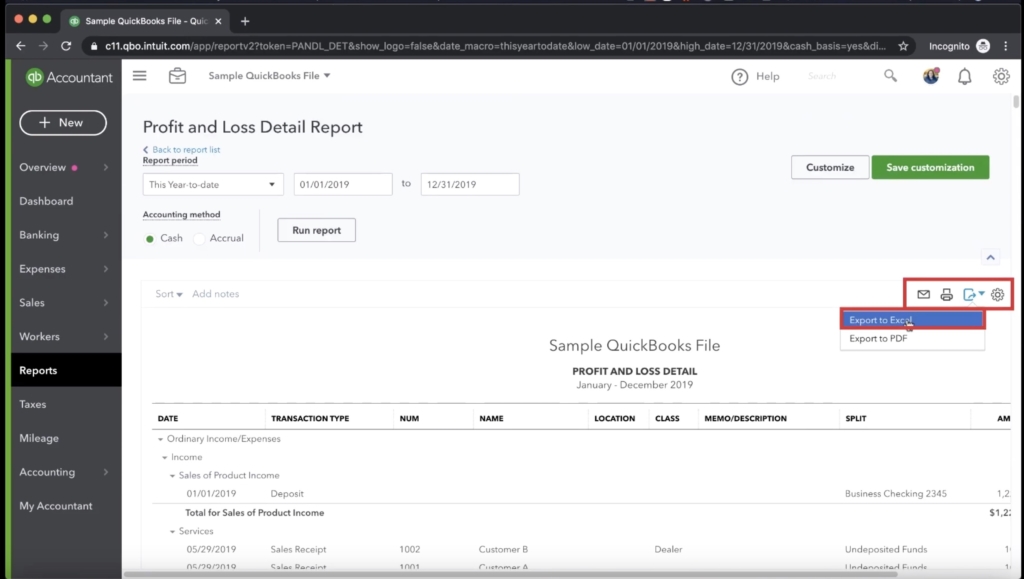
At this point, we’ve navigated to the report of interest: General Ledger, and we’ve told QuickBooks the dates we want the report to cover. Now it’s time to export the report. Find the report by clicking the little paper with an arrow on it on the right-hand side of your screen. Click it, and when a drop-down menu appears, click Export to Excel. Once you do that, within seconds, the download will begin.
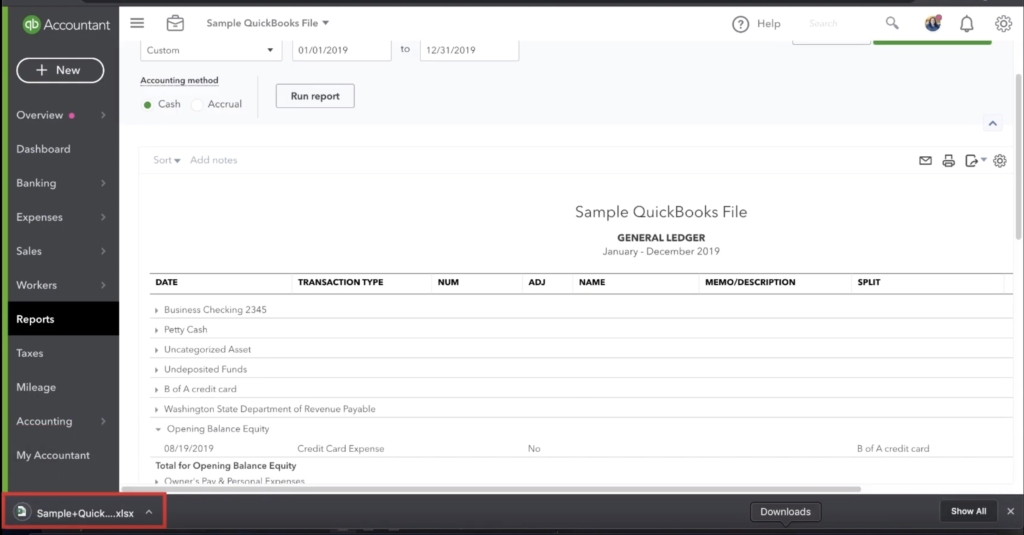
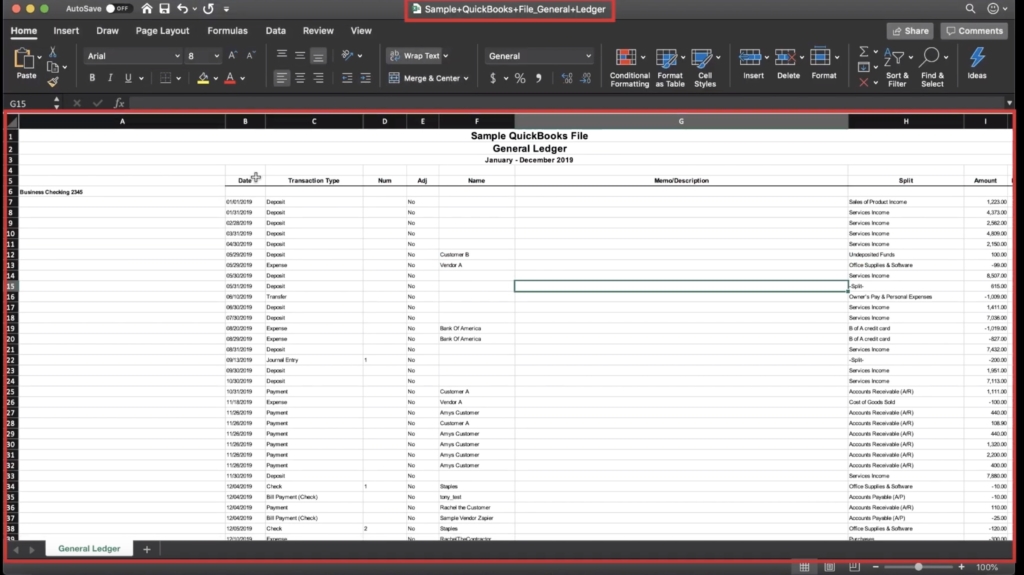
We can now open our excel file and see every transaction from our date range in the spreadsheet. Once we’re done viewing the file, click Save As and save the file as 2019 General Ledger. We will use this filename in a future step.
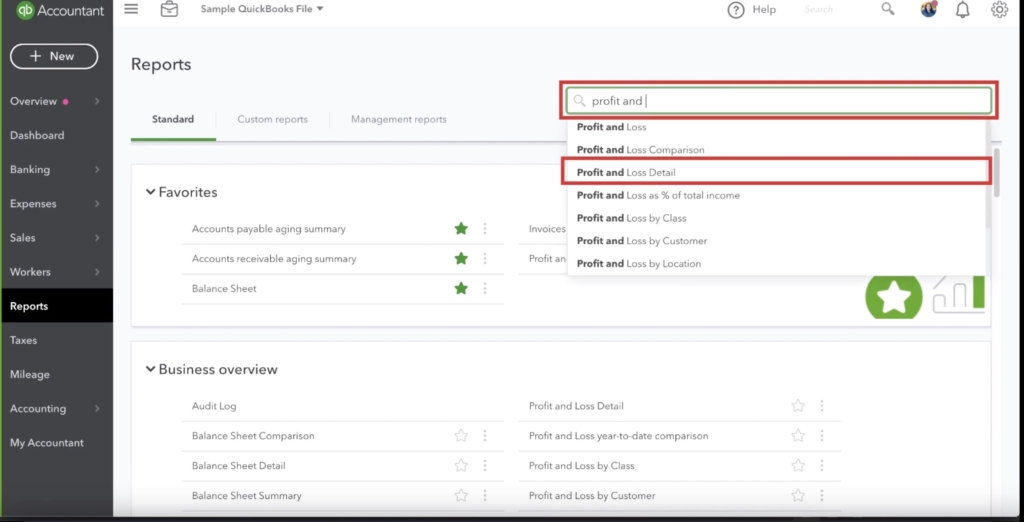
So now that we have the basics of how to export a report to Excel, I want to show you how to get a bit more detail out of your QuickBooks. Let’s say we wanted to also grab our Profit and Loss Details and combine it with our other excel archives. To do that, we start in much the same way as before, we go to the reports screen, find the profit and loss statement for the period of interest, and then export.
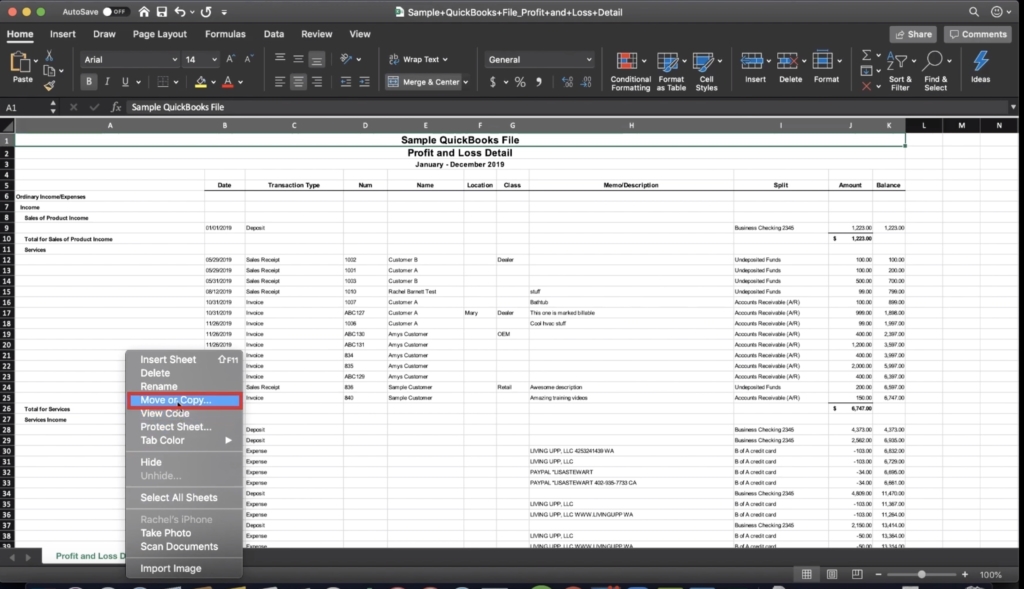
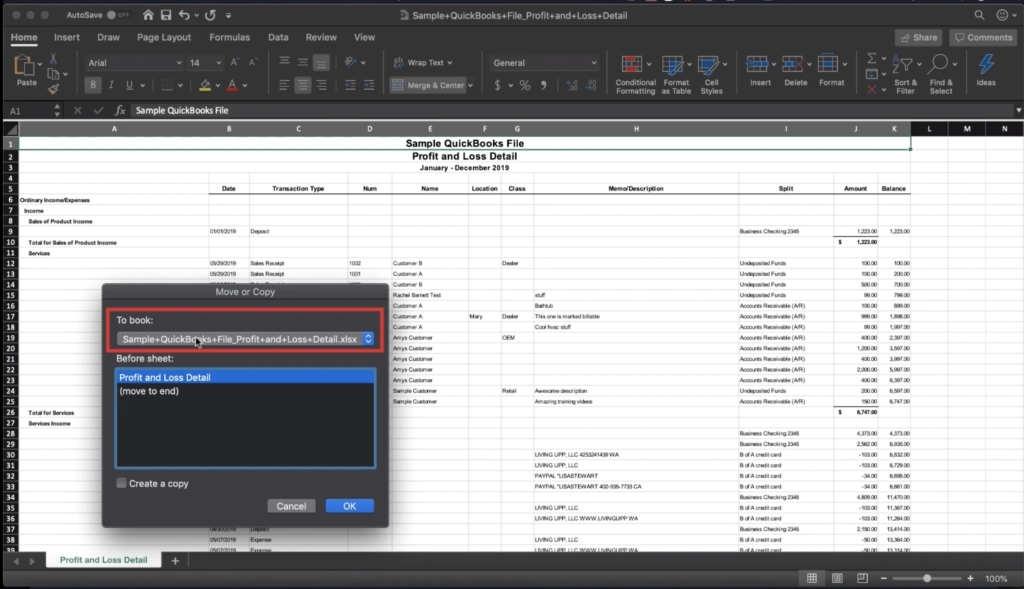
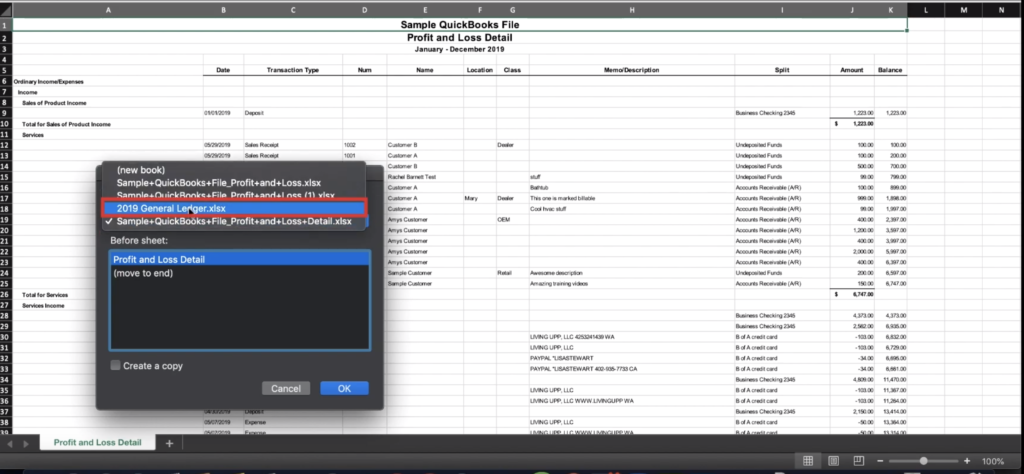
To merge this with our other archive, we need to open the item in Excel and right-click on the workbook name. Then, on the menu opened, click “move or copy.” Another dialog box will open, and we tell Excel where we want to move the workbook. In this case, it’s to the other book located in the dropdown menu titled 2019 General Ledger.
And there you have it. Now you know the fundamentals of exporting your QuickBooks information. You can do this with as many reports as you desire. And remember, it’s always better to have a backup and not need it than to need a backup and not have it.
☕ If you found this helpful you can say “thanks” by buying me a coffee…
https://www.buymeacoffee.com/gentlefrog
To see a video tutorial of this information, check out the embedded video below. Thanks for reading.




3 Responses
Hi Rachel,
Thanks for your informative article! There is also an alternative way to export your QBO data to Excel – Skyvia Excel Add-in (https://skyvia.com/excel-add-in/quickbooks). All you need is download it from Microsoft AppSource and register Skyvia account (for free). That’s it! You can run up to 5 queries per day for free even without SQL knowledge.
When I run a Statement of Activities report from QB Online it properly displays the values for each line item for the period requested.
Problem: when I try to export this report to Excel, it shows all the line items properly, but all the values for each account show as 0.00.
I have successfully run these reports in previous days, but today each line item value show as 0.00.
Hope you can help!
Hi Joseph,
At the top of the Excel document you should see a ribbon (I think it’s yellow), click the button on it that says “enable”
-Jess