Have you ever wondered how to rename an account in QuickBooks Online?
In this blogpost, I’m going to go over the required steps to rename an account in the Chart of Accounts. The scenario we will be discussing is one in which we are adding a credit card and need to add the last 4 digits of our existing credit card to account name in order to be able to identify each one individually.
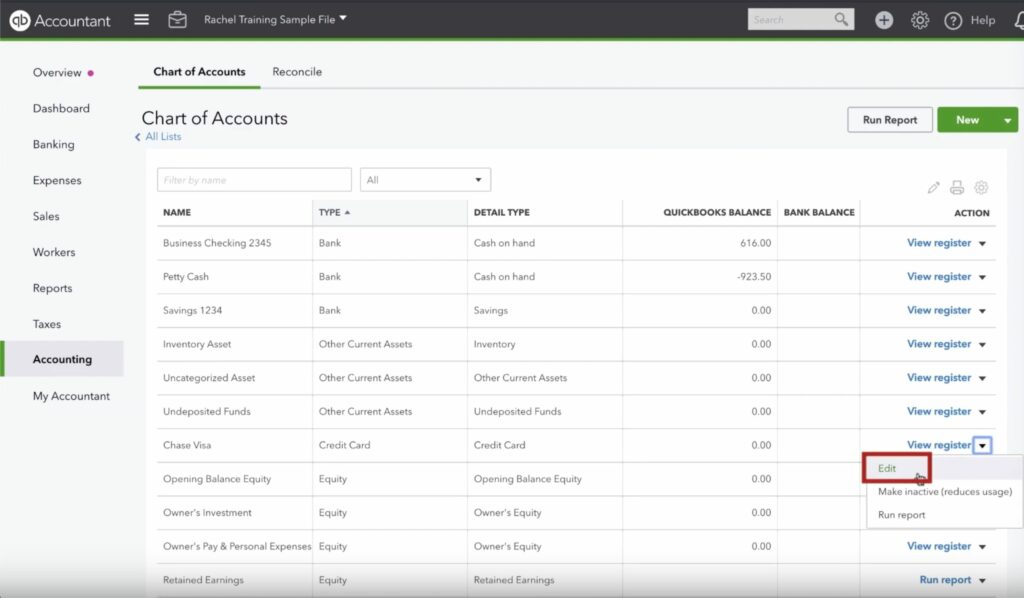
The first thing you need to do is navigate to your chart of accounts. From there, you’re going to look for the column labeled “ACTION.” And inside that column, you’ll see a link for “view register” with a downward pointing arrow for each account. Click the downward arrow and select the edit option.
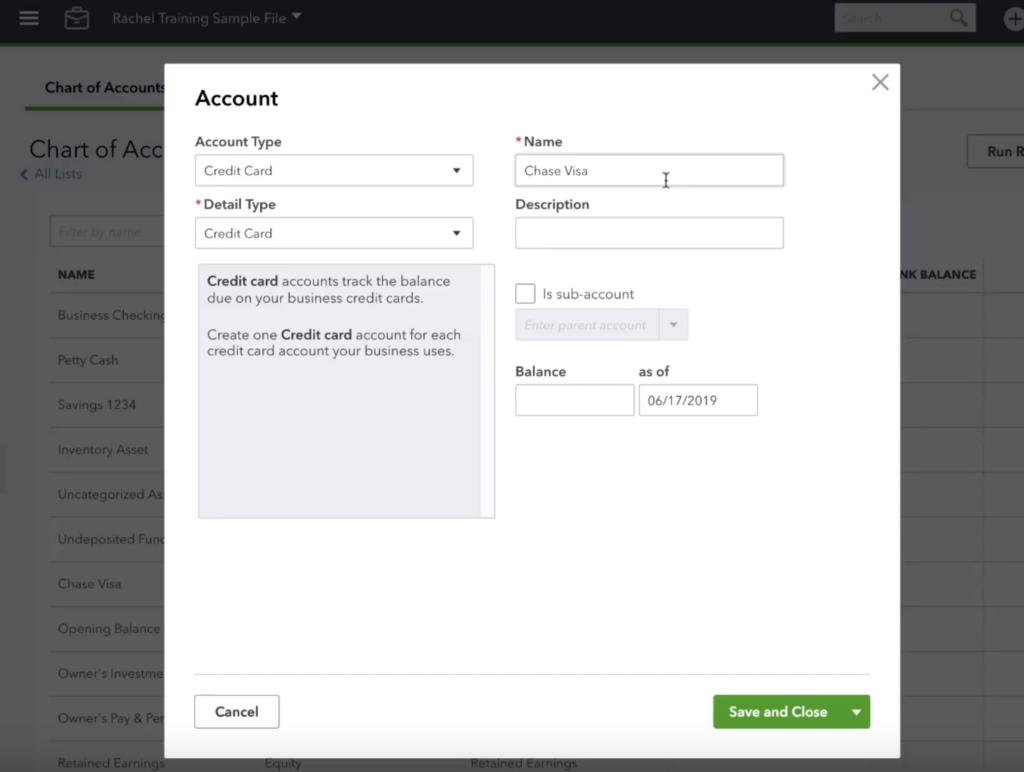
Once you click the edit option, a new screen will pop up. This new screen will have a handful of attributes we can customize. For this example, we’re concerned about the name. Don’t forget that we’re changing this name in anticipation of having another “credit card” account and in order to be able to uniquely identify each credit card, we’re adding the last 4 digits. Adding the last 4 digits of the credit card will look like the figure below.
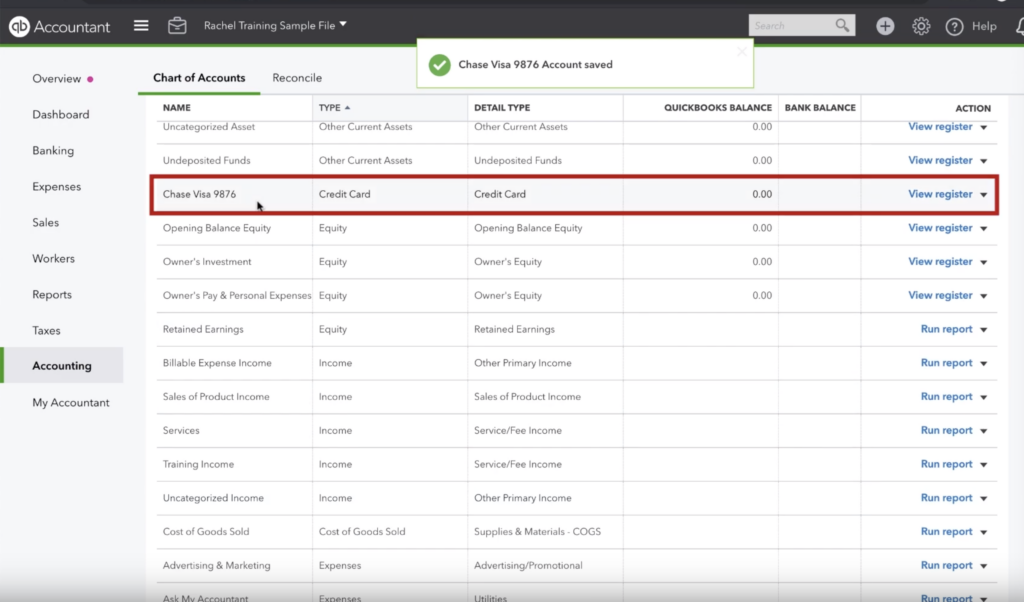
Once you’ve made your change,click “save and close” and you’ll receive confirmation that the account was changed and you’ll be able to see your changes on the following screen.

And there you have it. If you ever need to modify the name of an account in your chart of accounts in QuickBooks Online, that’s how you do it.
☕ If you found this helpful you can say “thanks” by buying me a coffee…
https://www.buymeacoffee.com/gentlefrog
You can watch a walkthrough video of how to do this below:


