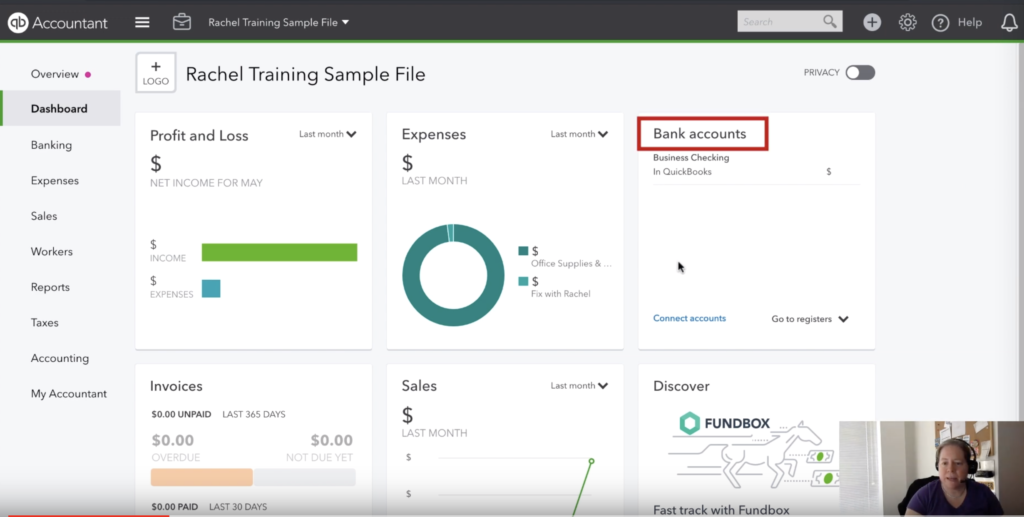
In this post, I’m going to show you how to connect your bank to QuickBooks online. We’re going to be using the Sample Company File. The first thing we need to do is get into our Dashboard and locate the area that says “Bank Accounts”.
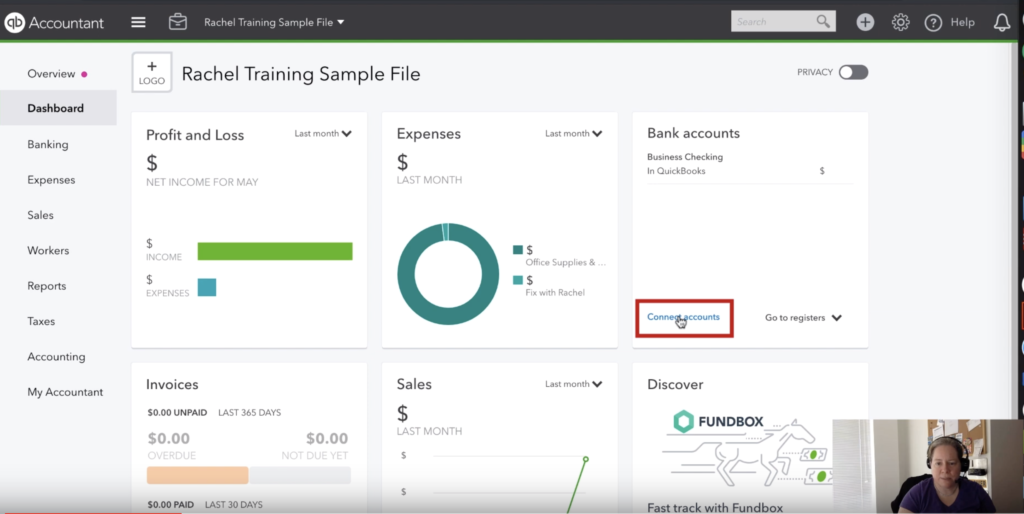
After we locate that region, scroll down a little bit and look for the link that says “Connect accounts”.
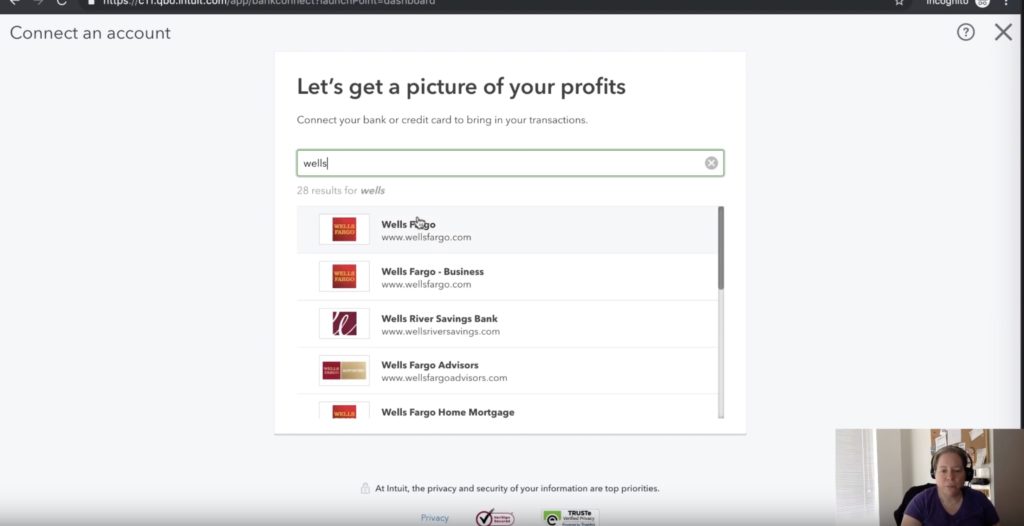
Clicking the connect accounts button is going to bring up a new screen where we can tell QuickBooks online where to look for our bank account. The screen will have some options automatically available for you to click for the more popular banks like Wells Fargo and Bank of America. If you don’t see your bank there, you can just type in the name or URL of the bank and it should populate in the results below.
Now that we have our Banking Institution selected, we need to help QuickBooks identify which of our accounts it will be linking. You may have more accounts or you may have only one. The exact display will vary depending on how your banking is set up. Select the account you want to use in this example, we’re going to uncheck the box that says “Please connect any newly opened accounts or newly eligible information automatically with Intuit.” We do this because we don’t necessarily want it to automatically connect to QuickBooks.
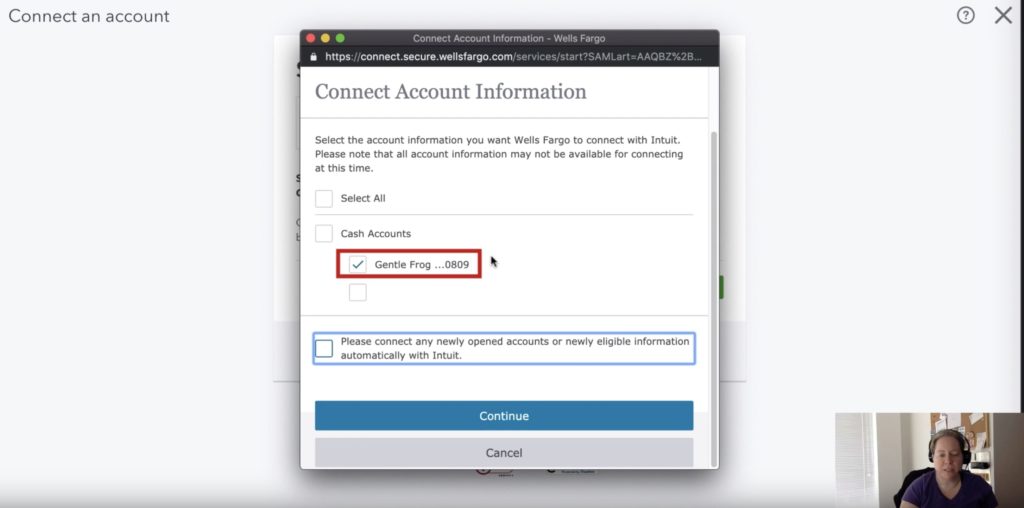
the next steps are simple. Click continue and then read and accept the terms and conditions on the next screen. And once you’ve done that, click Confirm Account Information. This will prompt another screen to let you know QuickBooks is talking to your bank. It will look like this:
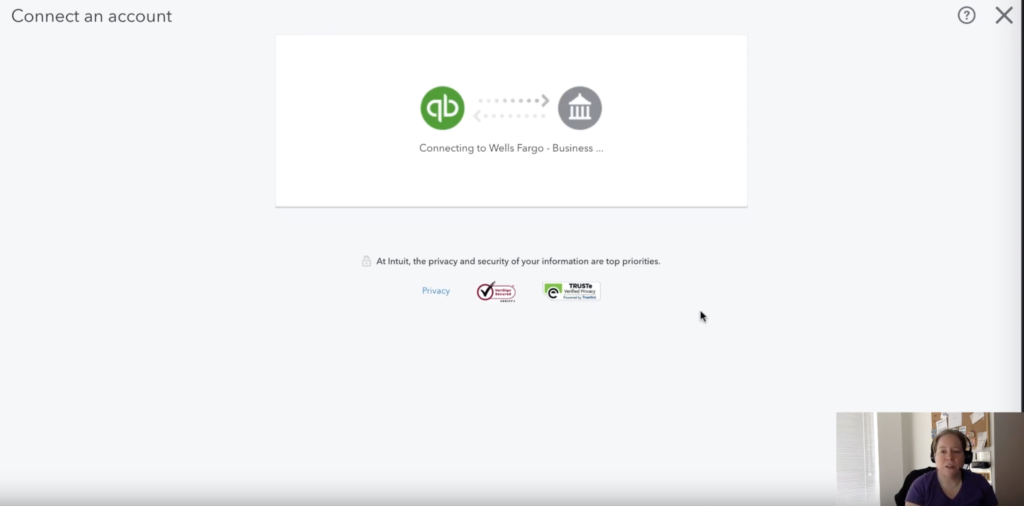
What this does it it creates a link between your bank account and Quickbooks. Quickbooks will now be able to receive information from your bank account. This is a one-way communication line. Quickbooks will not be able to make any changes on your behalf to your bank account information. So now that quickbooks has our accounts linked, it will be able to see which account you have available and prompt you to select the correct one and link it to a register in QuickBooks.
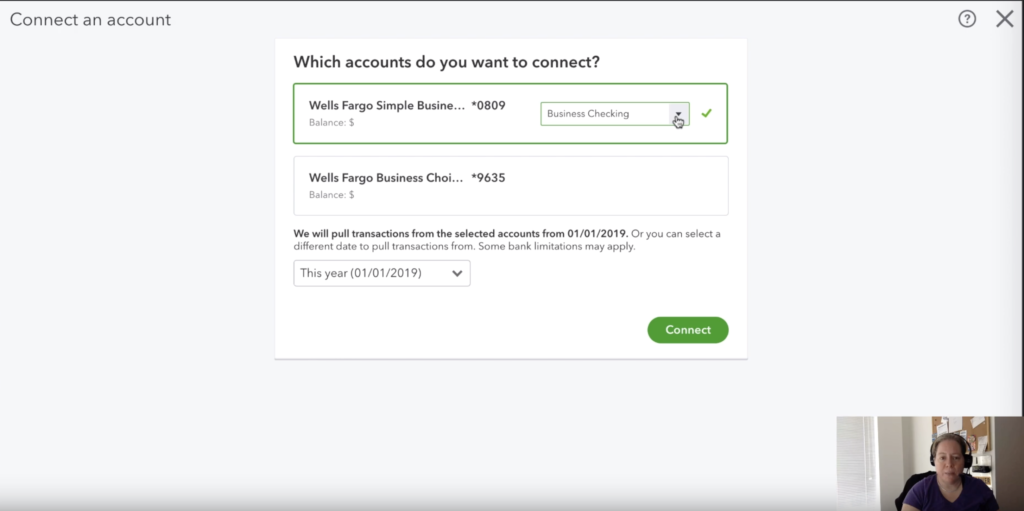
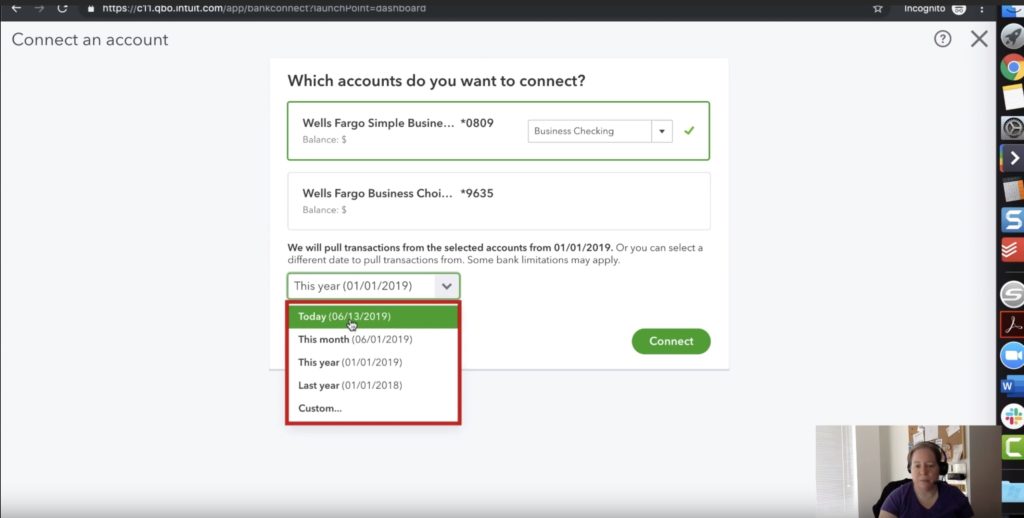
With the appropriate account now linked, we can tell QuickBooks which date range to use. There are some pre-filled date ranges you can use in the drop-down menu or you can create your own custom range. In our example, we’ll use 01/01/2019 and click connect.
QuickBooks will begin working it’s magic and begin importing your transactions into the coding queue for the selected register. You’ll see that we have 81 items to reivew. Click on the business checking tile and we’ll be taken to the next step.
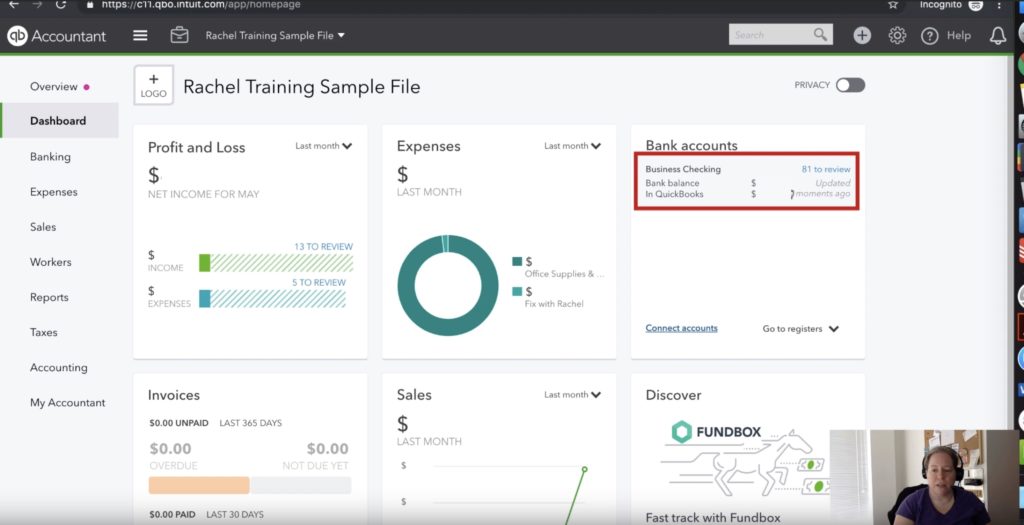
Once we click on that tile, we’ll be able to see the balance we have in our bank and the balance that we have in QuickBooks. There are also 81 things for us to process. For more information on how to process these transactions, check out my blog on How to Code Banking in QuickBooks Online.
☕ If you found this helpful you can say “thanks” by buying me a coffee…
https://www.buymeacoffee.com/gentlefrog
For a video tutorial on how to connect banks to your QuickBooks account, please see the video below.

