The Chart of Accounts in QuickBooks Online serves as a comprehensive list of all the accounts used to record your income, expenses, assets, liabilities, equity, and other financial activities.
Each account within the Chart of Accounts represents a specific category or type of transaction. Such as cash, accounts receivable, sales revenue, rent expense, etc.
In this blog post, we will explore how to find and navigate the Chart of Accounts in QuickBooks Online. Understand the different columns and information it provides. And learn about various actions you can perform to optimize your accounting processes.
Let’s dive in and uncover the power of the Chart of Accounts in QuickBooks Online.
How to Find the Chart of Accounts
There are two ways to navigate to the Chart of Accounts in QuickBooks Online.
The first is to use the settings menu.
Click the gear icon in the upper right corner of the screen to open the settings menu.
You’ll find Chart of accounts in the first column under YOUR COMPANY.
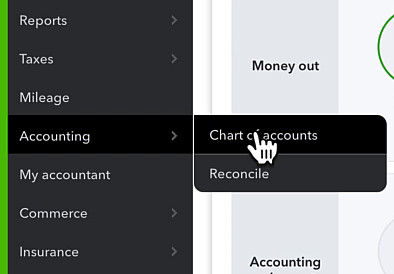
The other way is to click Accounting in the left-side menu then select Chart of accounts.
What You’ll Find In the Chart of Accounts
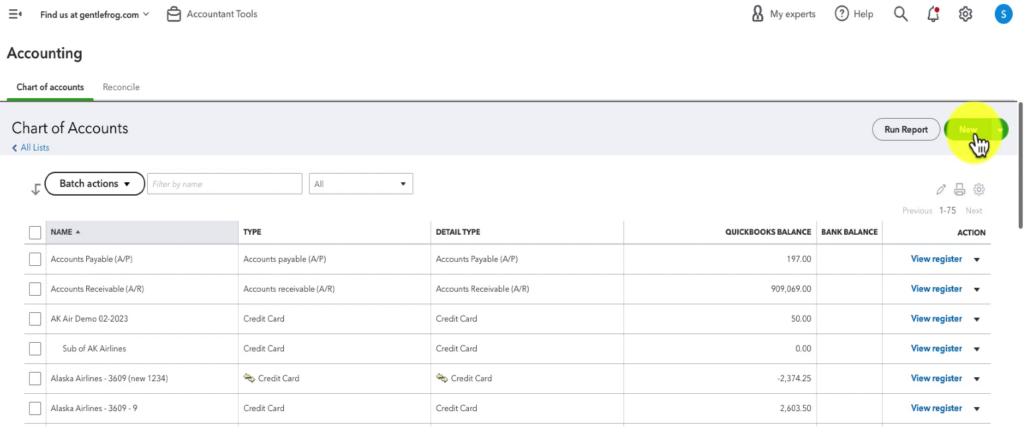
When you open the Chart of Accounts, you’ll see several columns across the top.
1 – NAME
This column shows the names of your various accounts within QuickBooks. These names are used to identify accounts throughout QBO.
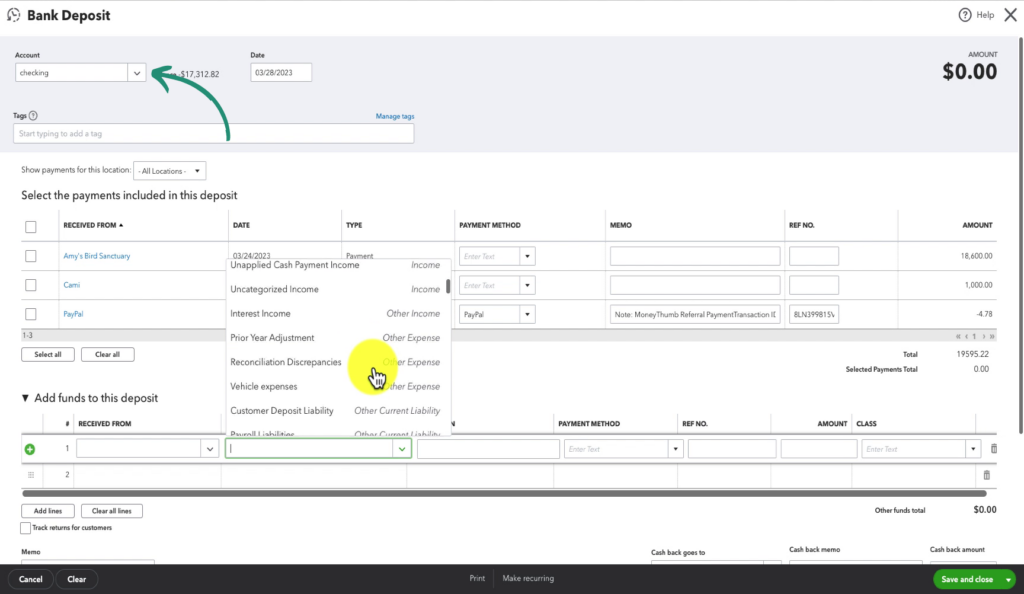
For example, in the Bank Deposit screenshot below, the account names are used in the Account drop-down and in the ACCOUNT section when adding funds to the deposit.
You’ll also see the account names on the Banking screen when you categorize your transactions Category = Name.
2 – TYPE
This tells QuickBooks what type of account this is and where to put it on the Balance Sheet or the Profit and Loss report.
3 – DETAIL TYPE
This column is related to taxes. For most people, it doesn’t matter; you can pick whatever you prefer for the Detail Type for your accounts. You’ll often see in my blog posts or videos that when I’m creating a new account, I just pick the first selection in the list.
However, you should ask your tax preparer if they’d like you to fill this out and, if so, what to put in this field.
4 – QUICKBOOKS BALANCE
This is the balance in the QuickBooks register for that account.
Only accounts that appear on the Balance Sheet have a QuickBooks Balance.
5 – BANK BALANCE
This is the actual balance of your bank account. An amount will appear in this column only for accounts you’ve connected to QuickBooks.
Note: If this appears off, navigate to the Bank Transactions screen and click the Update button.
6 – ACTION
These are the actions you can perform on your accounts.
Any Balance Sheet accounts will show View register. Profit and Loss accounts don’t have a register, so they show Run report.
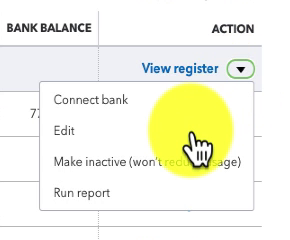
You can click the drop-down arrow on the right and see additional actions.
- Connect Bank
- Edit
- Make inactive
- Run report
Edit Your Chart of Accounts
You can take various actions within your Chart of Accounts to make it easier to work with.
Sorting
In the screenshot of the columns above, you may have noticed a little triangle next to TYPE. This tells me that my Chart of Accounts is sorted by Type.
This is standard sorting. The Balance Sheet accounts are followed by Profit and Loss accounts.
The order is:
- Assets
- Liabilities
- Equity
- Income
- Cost of Goods Sold
- Expenses
Change Sort Order
You can change the sort order of your accounts by clicking the column header.
For example, if you click NAME, it will sort by the account name alphabetically.
Filter by name
You can search for a specific account by typing in the Filter by name box above the column headings.
Batch Actions
Batch actions only has one action available: Make inactive.
This allows you to check off several accounts and make them inactive simultaneously.
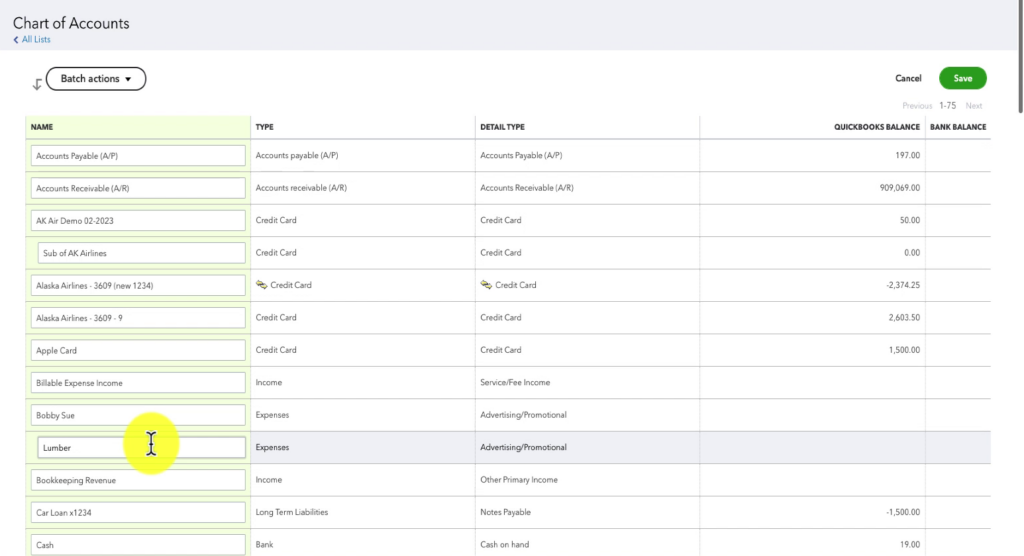
Edit Account Names
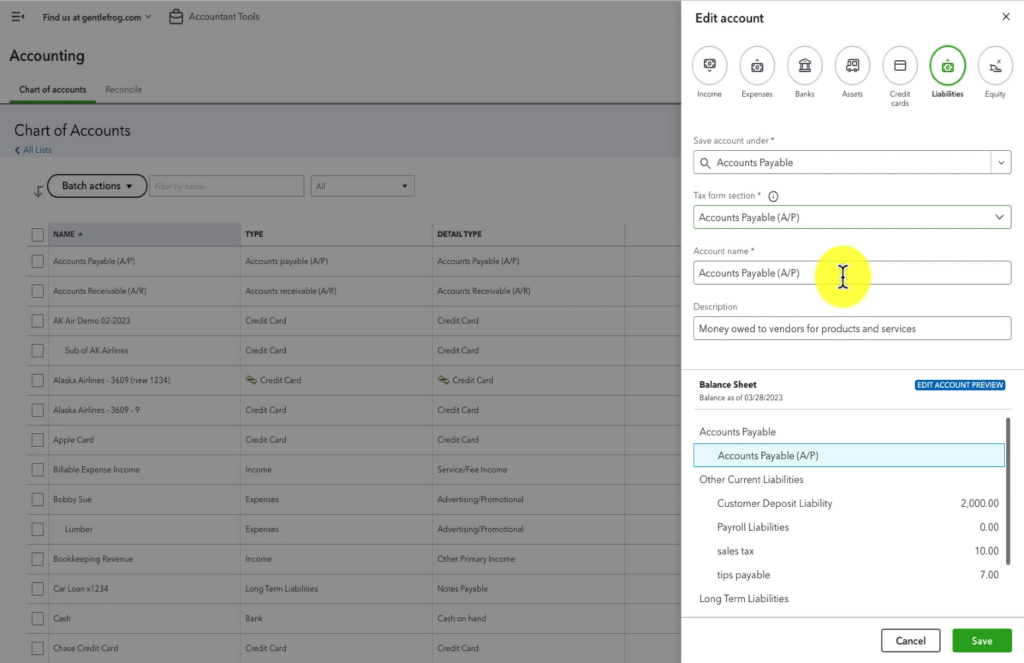
If you’d like to edit an account’s name, click the arrow under Actions for the account. Select Edit and edit the name from the Edit Account screen.
You can also click the pencil icon in the upper right. This will allow you to edit ALL your account names at one time.
Export
You can export your Chart of Accounts by clicking the Run Report button in the upper right.
Then click the export icon (paper with an arrow) and select from the various export options.
Adding an Account
You can add a new account from within the Chart of Accounts by clicking the green New button in the upper right.
This will open the New account creation screen. I have another blog post explaining this in detail: How To Add an Account to the Chart of Accounts in QuickBooks Online
Now that you’ve got a good grasp of the Chart of Accounts, you can unlock its full potential in your QuickBooks Online journey.
☕ If you found this helpful, you can say “thanks” by buying me a coffee… https://www.buymeacoffee.com/gentlefrog
Below is a video if you prefer to watch a walkthrough.
If you have questions about anything in the QuickBooks settings menu, click the green button below to schedule a free consultation.


