This is part two of a QuickBooks tutorial where I show you how to create a custom invoice template in QuickBooks Premier.
In this part I’ll show you how to use the Layout Designer to get everything to look the way you want it to.
Check out part one to see how to edit the information that appears on the invoice.
Quick Instructions:
Edit the layout
- Click the Layout Designer button
- To move boxes
- Click the box, click and drag an edge
- To remove field borders
- Double-click the field
- Select the Border tab
- Uncheck borders
- Click the blue OK button
- To edit fonts
- Double click the field
- Select the font tab
- Make your changes
- Click the blue OK button
- To edit field background color
- Double click the field
- Select the Background tab
- Select a color
- Click the blue OK button
- To move boxes
- Click the blue OK button to save your changes.
Edit the invoice template name
- Selects Lists -> Edit Templates
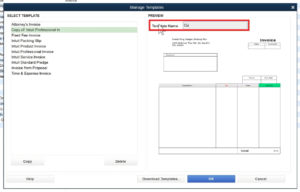
- Click the Manage Templates button
- Edit the Template Name field
- Click the blue OK button in the Manage Templates screen
- Click the blue OK button in the Basic Customization pop-up
Keep reading for full instructions with screenshots.
Edit Invoice Layout
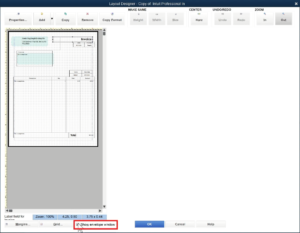
In the invoice template editor click the Layout Designer button at the bottom middle of the pop-up. This will open the invoice Layout Designer.
The first thing you might notice is the greenish areas on the invoice preview.
Those represent what would appear through an envelope window when you mail your invoice. There’s a check box at the bottom of the screen. “Show envelope window” that you check uncheck to remove that preview.
In the Layout Designer you can get all the various boxes lined up so your invoice has a more professional look.
To do this click on one of the boxes and you’ll be able to move select and move the sides of the box.
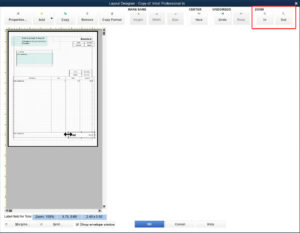
In the upper right-hand corner there’s a zoom in/out option. Zooming in will help you better line things up.
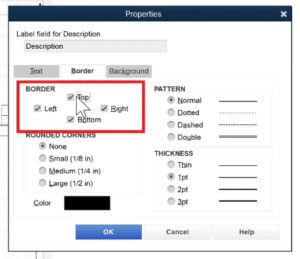
If you like the layout but you don’t wan to see the box borders you can remove those borders. Double-click on a field to open its properties. Select the Border tab and you’ll see checkboxes for adding/removing the border on any side of the field.
You can do a lot more styling to make the invoice fit your brand like editing fonts and colors.
To edit a field’s text font select the Text tab in fields Properties. From there you can edit the font’s alignment, style, and color. You can also edit the text itself in the “Label field for” box at the top of the pop-up.
The last Properties tab is background which lets you change the background color of a field.
When you finish editing the properties of a field click the blue OK button to save your changes.
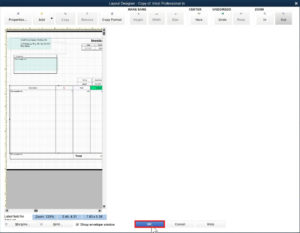
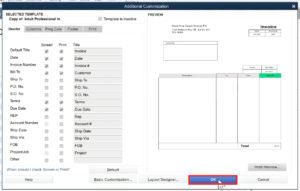
When you’ve finished making any changes to your Invoice template layout click the blue OK button at the bottom of the screen.
This will take you back to your template preview in the template editor.
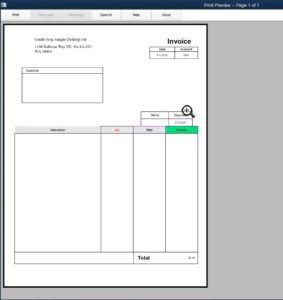
Click the Print Preview button in the lower right-hand corner to see what your invoice will look like when printed.
In my print preview you can see I made some silly changes just to show you what options you have.
I encourage you to play around in the invoice template editor. There are lots of fun ways you can edit your invoice to make it fit your brand.
When you’re finished editing click on the blue OK button at the bottom of the pop-up.
Edit Invoice Name
Your new template will have the name “Copy of: Intuit Professional Invoice Template.”
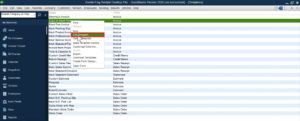
To edit this title click on Lists in the main menu then select Templates.
This will bring you to a list of your templates. Right click on the template you want to edit and select Edit Template.
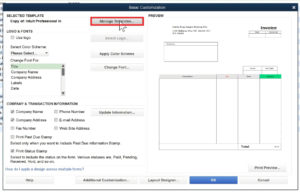
In the customization pop-up that appears click button at the top labeled Mange Templates.
You’ll now be in the Manage Templates pop-up with an editable Template Name field on the right. Change the name of your template and click the blue OK button.
Click OK again in the basic customization pop-up to save your change.
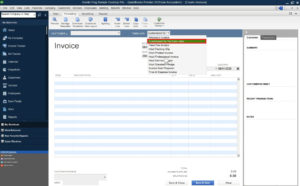
Click the ESC key and you’ll be back at the Invoice creation screen. You’ll now be able to choose the template you created from the TEMPLATE drop down list
There you have it, you now know how to edit the invoice template in QuickBooks Premier so you can make it better fit your brand. If you have any questions about editing the invoice template please ask in the comments.
☕ If you found this helpful you can say “thanks” by buying me a coffee…
https://www.buymeacoffee.com/gentlefrog
If you’d like to watch me walk through this process check out the video below:


