In this QuickBooks tutorial, you’ll learn how to create a credit memo and apply it to an invoice.
Quick Instructions:
Create credit memo
- Click the +New button
- Under CUSTOMERS, click Credit memo
- Fill in the credit memo screen
- Click Save and Close
Apply credit memo
- Find the invoice the credit memo will be applied to
- Click the Receive Payment link to the right
- Check off the invoice and the credit memo
- Click Save and Close
Keep reading for a complete walkthrough with screenshots:
What is a Credit Memo?
A credit memo is a “credit” that can be applied to an open or future invoice.
It’s like returning an item to a store and getting in-store credit. You don’t get your cash back but you can use the credit towards the purchase of something from that store.
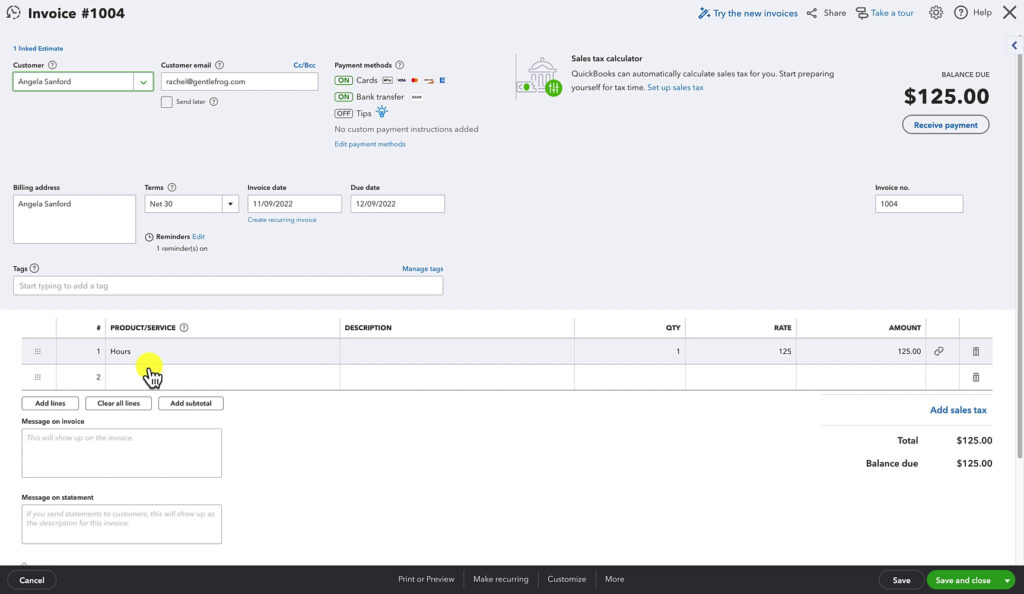
In this example, I have a customer with an open invoice.
Although the customer has not yet paid for this invoice, I want to keep a record of it. To do that, I’m going to create a credit memo to “pay” the invoice.
Let’s take a look at the invoice:
The invoice shows that Angela Sanford purchased 1 unit of “Hours” for $125.
The credit memo will reverse this.
The invoice increases the accounts receivable/income, and the credit memo will decrease both.
Create a Credit Memo
To create a credit memo, click the + New button in the upper left corner.
Under CUSTOMERS, click Credit memo.
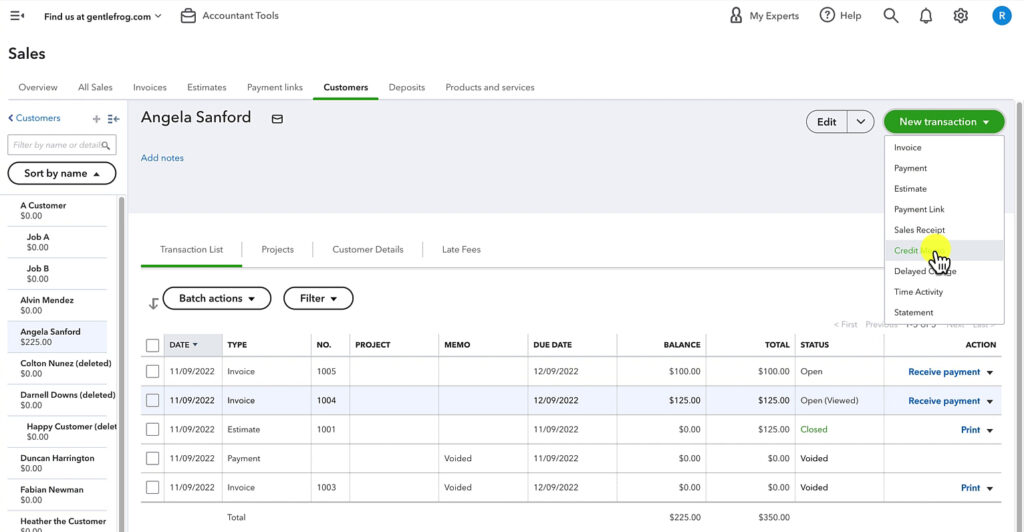
You can also access the credit memo creation screen within a customer profile. Click the New transaction button on the right and select Credit memo from the drop-down menu.
I will now fill in the credit memo with the same information as the invoice above. Then click the Save and Close button.
You can use a different PRODUCT/SERVICE in your credit memo. For example, you could create and use a “credit” product when crediting customers. I prefer to use the same PRODUCT/SERVICE as the invoice.
Apply a Credit Memo
Once a credit memo has been created, there’s one more step: applying it to the invoice.
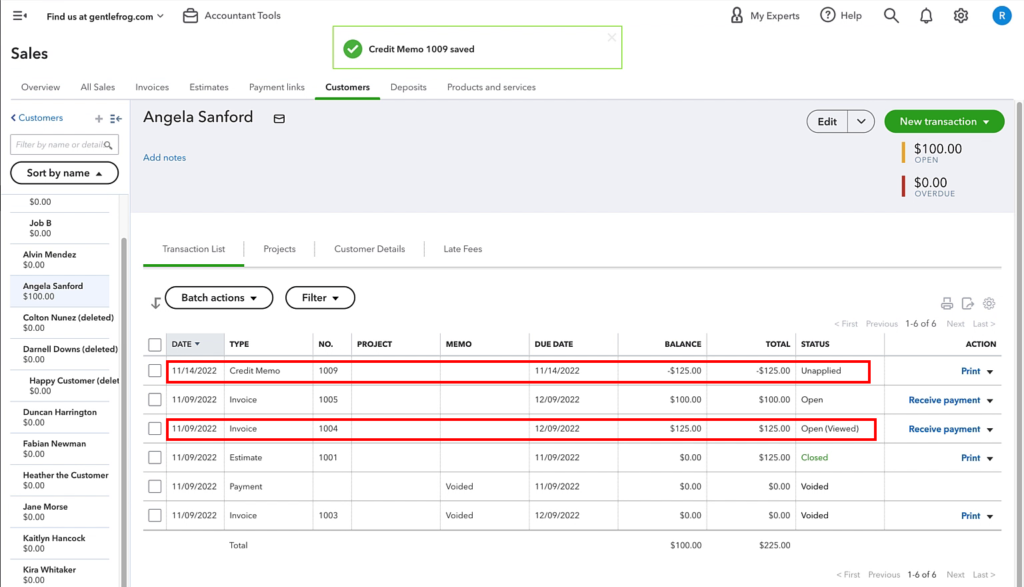
Below is my Open example invoice and the credit memo is Unapplied.
To apply the credit memo to the invoice, click the Receive Payment link to the right of the invoice.
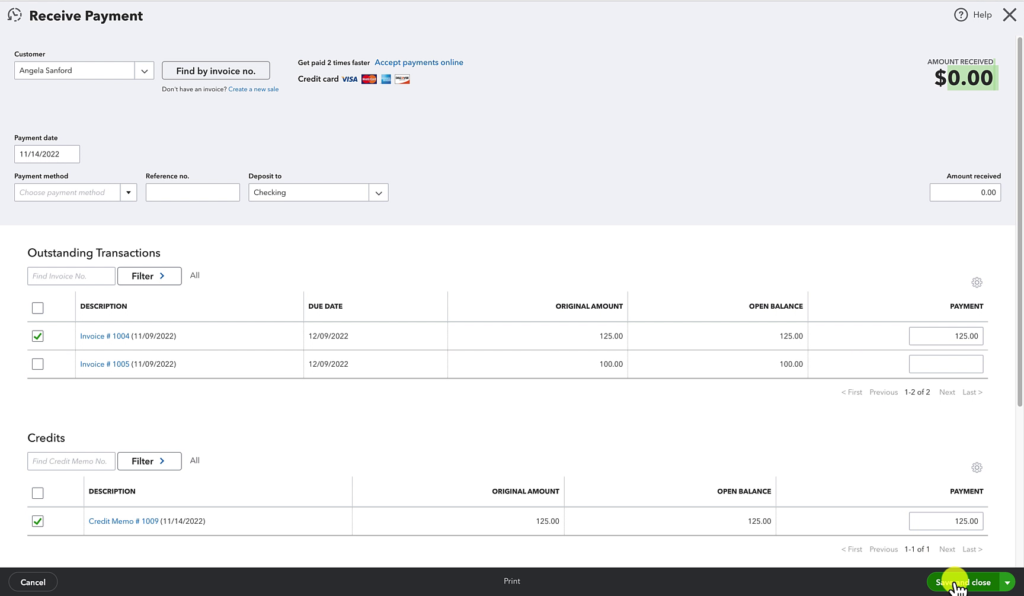
The Receive Payment screen shows Outstanding Transactions (open invoices) and Credits.
I check off the invoice and the credit memo, then click Save and Close.
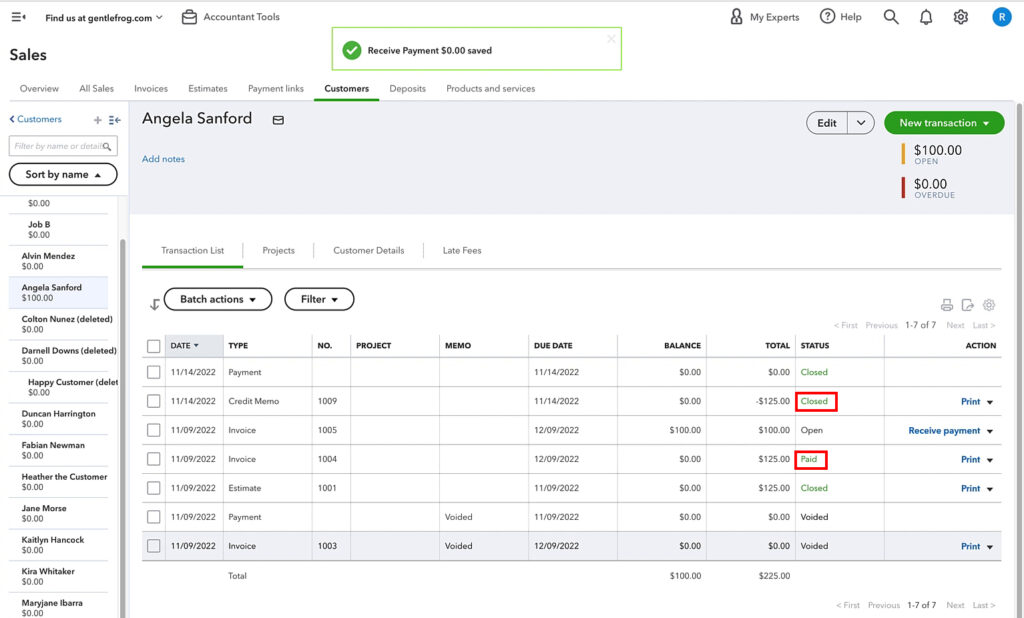
Back on the Sales page, the invoice status is now Paid, and the credit memo is Closed.
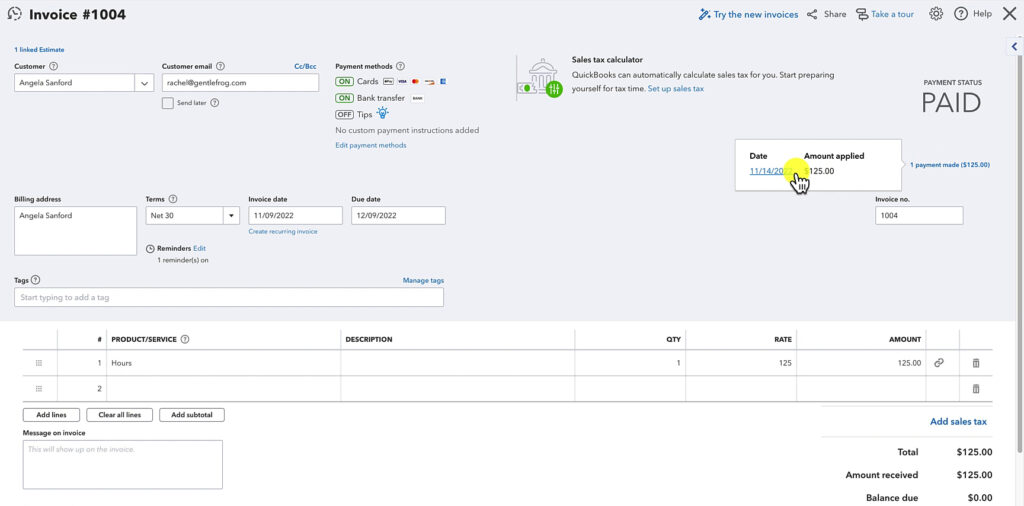
If, in the future, you forget your invoice was “paid” with a credit memo, it’s easy to figure that out. Open the invoice, then click the little blue payment made link under the Payment Status. A pop-up will open showing the payment.
Click on the Date, and the Receive Payment screen will open, showing the Credit Memo used to “pay” this invoice.
You now know how to create a credit memo and apply it to an invoice in QuickBooks Online.
☕ If you found this helpful, you can say “thanks” by buying me a coffee… https://www.buymeacoffee.com/gentlefrog
Below is a video if you prefer to watch a walkthrough.
If you have questions about creating or applying credit memos in QuickBooks Online, click the green button below to schedule a free consultation.


