Managing a corporate credit card in QuickBooks Online can be confusing—especially if your company has only one physical card associated with the account.
Many business owners and bookkeepers mistakenly connect both the corporate account and the individual card account, leading to duplicate records and reconciliation headaches.
In this guide, we’ll walk through best practices for handling a corporate credit card with a single cardholder in QuickBooks Online.
You’ll learn how to connect the right account, why you should avoid linking the corporate account, and how to fix your records if you’ve already connected both.
Understanding Corporate Credit Cards
Many corporate credit cards have multiple cardholders, each with their own individual card.
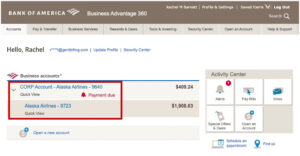
However, some businesses have a corporate credit card with only one cardholder—meaning there’s one corporate account and one physical card used for all transactions.
Example Corporate Credit Card with One Cardholder
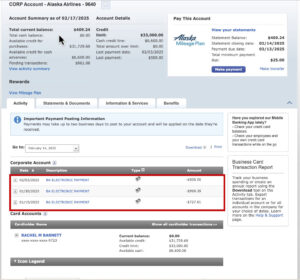
- Corporate Account Transactions (Example: 9640) → Includes on the payments made.

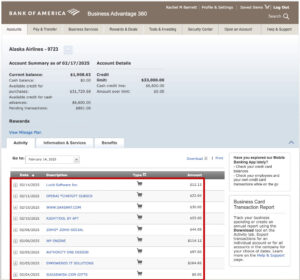
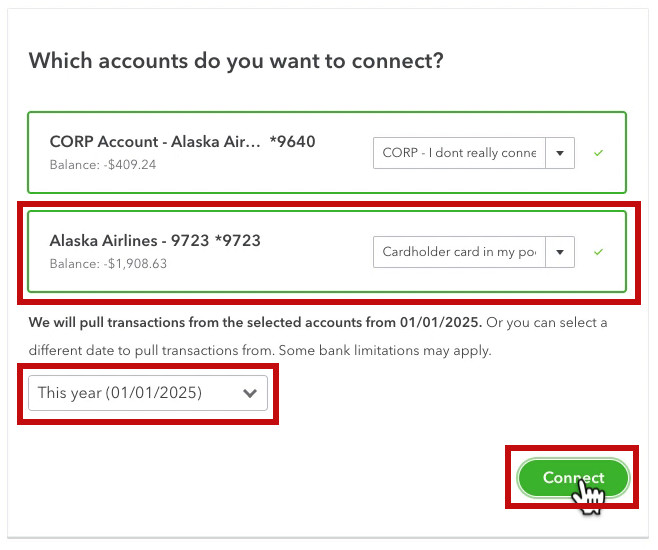
- Cardholder Account (Example: 9723) → Includes the transactions from the single physical card used for purchases.

How These Accounts Download into QuickBooks
- If you connect only the corporate account, QuickBooks downloads only payments—not individual transactions.
- If you connect only the cardholder account, QuickBooks downloads all individual transactions, making reconciliation much easier.
What happens to the payments if you only connect the cardholder? They’ll download in the transactions from the checking account used to make the payments.
NOTE: If your corporate credit card has multiple cardholders check out: How to Enter a Corporate Credit Card With Cardholder Accounts Into QuickBooks Online
How to Properly Connect a Corporate Credit Card with One Cardholder in QuickBooks Online
If you’re setting up a corporate credit card with one cardholder in QuickBooks Online, follow these steps.
Step 1: Identify the Correct Account to Connect
Before linking QuickBooks to your credit card, check your statement:
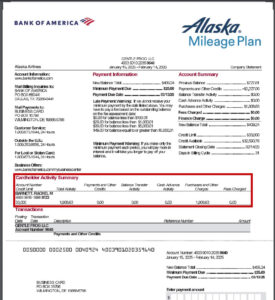
- Look at your corporate credit card statement and locate the section showing individual cardholder accounts.
- Find the card number associated with your purchases (e.g., 9723 in our example).
Step 2: Connect the Correct Account in QuickBooks Online
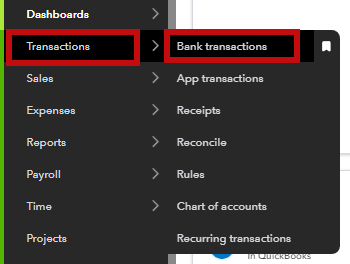
- Click Transactions -> Bank transaction in the left side menu.

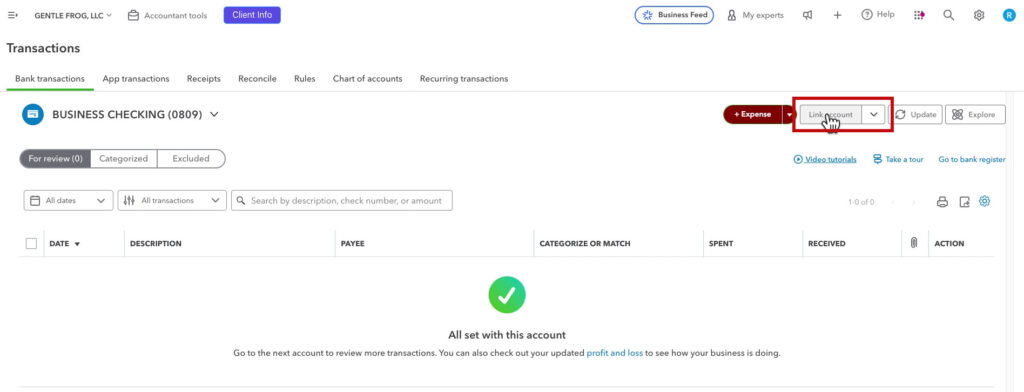
- Click Link Account.

- Click your bank or use the Search box.

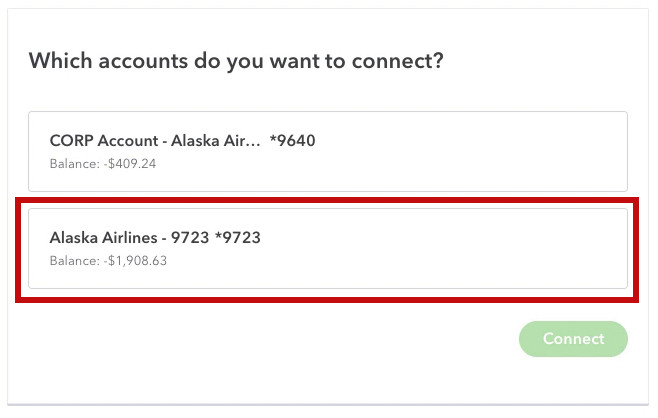
- Select the cardholder account (e.g., 9723) and NOT the corporate account.

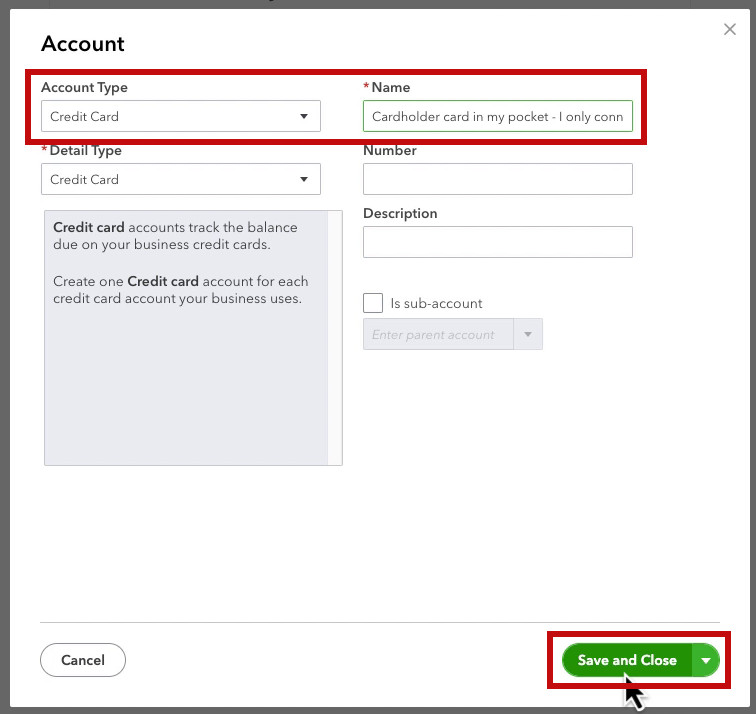
- Create an account for the credit card with a recognizable name, click Save and Close.

- Select a date to pull transactions, click Connect.

What Happens Next?
- All individual transactions from the cardholder account will now flow into QuickBooks.
- Payments to the credit card will appear in your business checking account, so you don’t need the corporate account connected.
Why You Shouldn’t Connect the Corporate Credit Card Account
Many business owners connect both the corporate credit card and the individual cardholder account, thinking it will provide a complete picture of their finances.
However, this actually causes problems:
Issue #1: Payments and Transactions Are in Separate Registers
- The corporate account only shows payments (e.g., a $5,000 payment from your checking account).
- The cardholder account shows all transactions (e.g., individual charges for office supplies, travel, etc.).
- This creates two separate registers in QuickBooks, making reconciliation harder.
Issue #2: Duplicate Payments or Missing Transactions
- If both accounts are connected, payments show up in the corporate account and the checking account they payment came from. You may forget to record this as a transfer and end up with duplicates.
How to Fix Your QuickBooks Setup If You Connected the Wrong Accounts
Here’s how to fix it and clean up your QuickBooks Online records If you’ve already connected both the corporate account and the cardholder account.
Step 1: Transfer Payments to the Correct Account
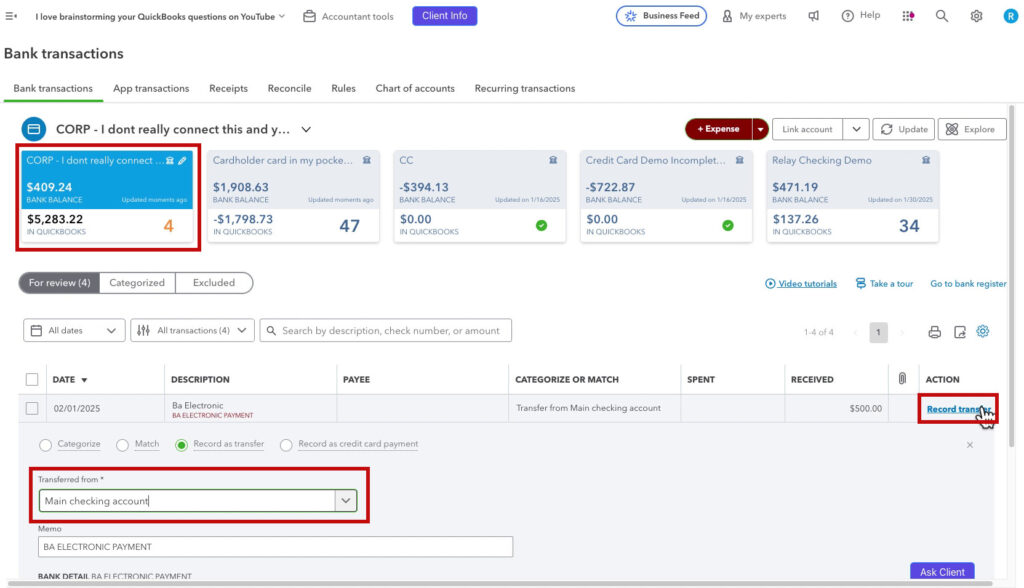
- Go to Bank Transactions in QuickBooks.
- Click the box for the corporate credit card account.
- Classify the transactions as transfers from the checking account you used to make the payments.
Step 2: Disconnect the Corporate Account in QuickBooks
Once all payments are moved to the correct account, disconnect the corporate account.
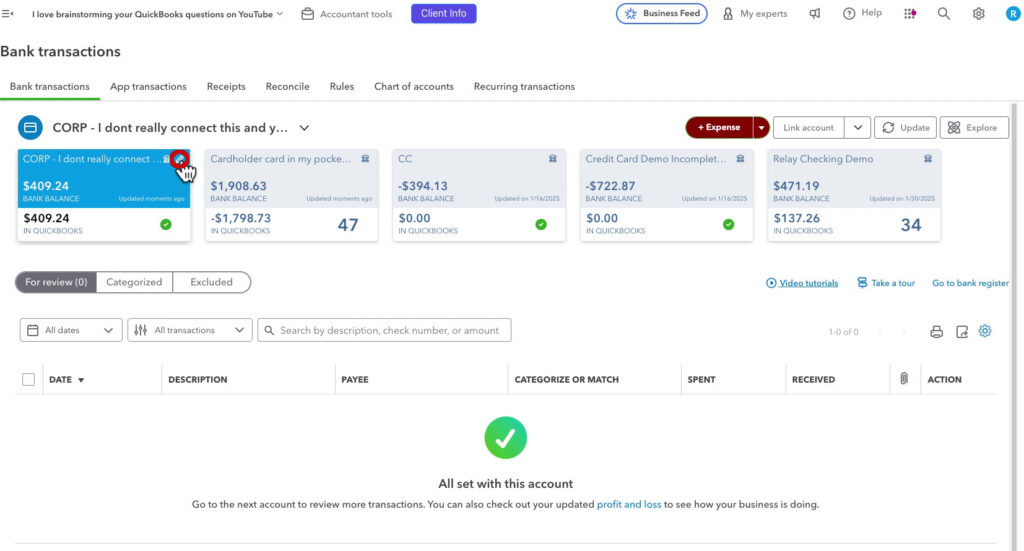
- Click the pencil in the upper right corner of the corporate account’s box.

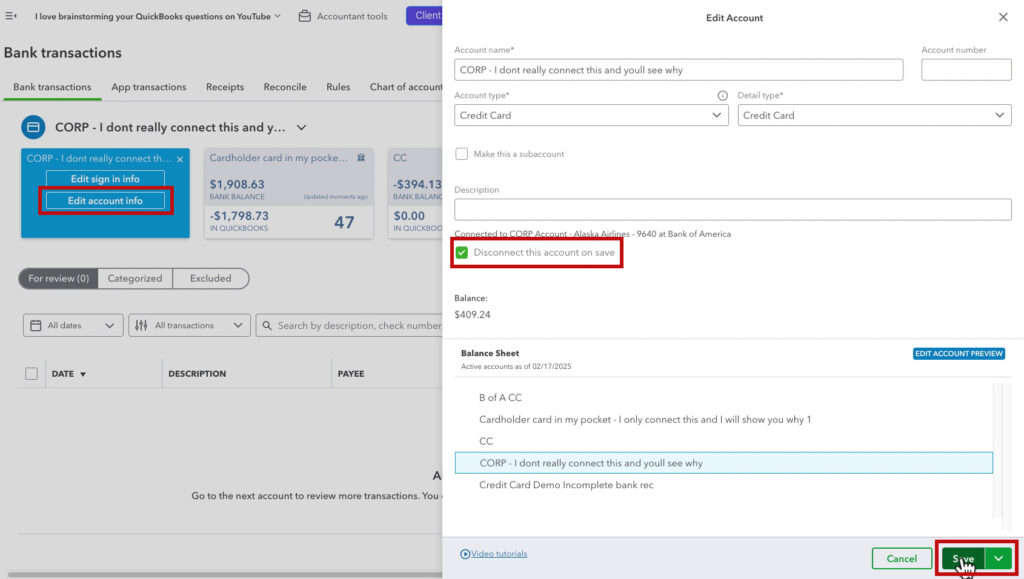
- Click Edit account info.
- Check off Disconnect this account on save.
- Click Yes on the warning pop-up.
- Click Save.
🚨 Important: Disconnecting the account does not delete past transactions.
Step 3: Merge Duplicate Credit Card Accounts
In QuickBooks you have two separate registers for your credit card (one for the corporate account and one for the cardholder account), you can merge them into a single register.
- Click Chart of Accounts in the menu on the Transactions screen.
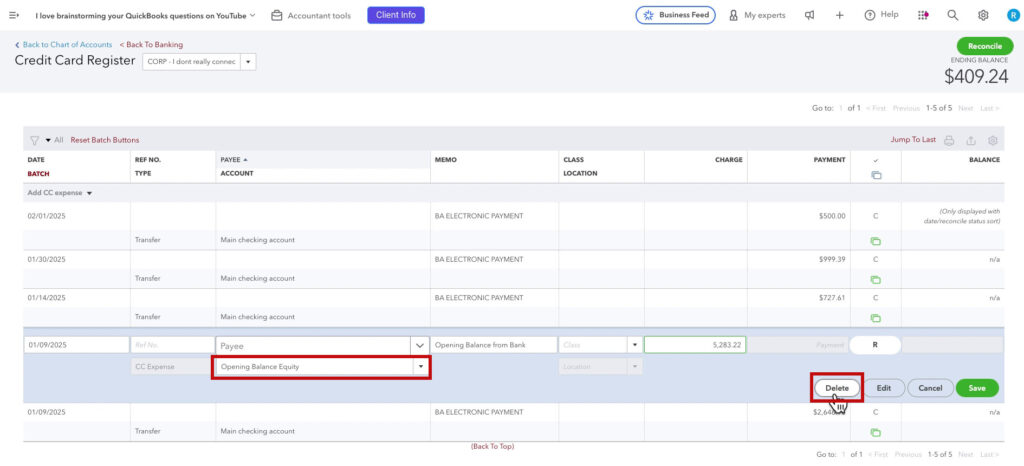
- Find the corporate credit card account you want to remove and click View register on the right.

- Click on the Opening Balance Equity transaction and then click Delete.

- Click Yes on the warning pop-up.
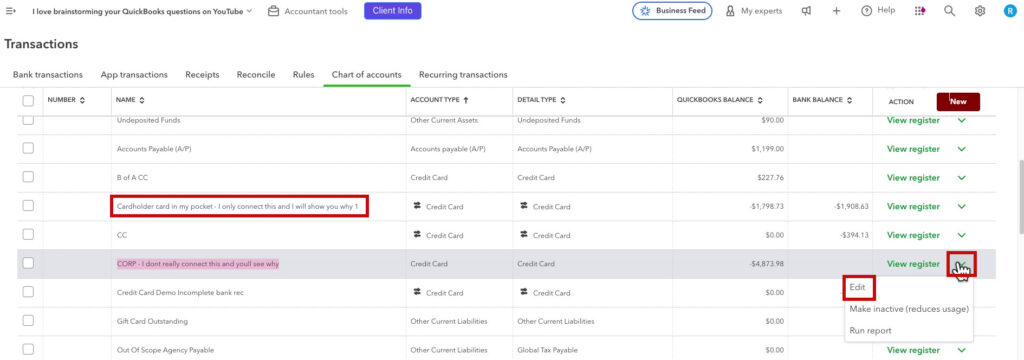
- Go back to the main Chart of Accounts.
- Find the cardholder credit card account and copy the name.
- Find the corporate card account, click the drop-down arrow on the right and click Edit.

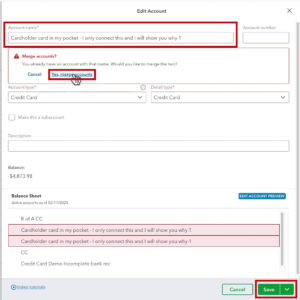
- In the Account name box paste in the name of the cardholder account.
- Click Save, and QuickBooks will ask if you want to merge the two accounts.

- Click Yes, merge accounts, then click Save again.
After merging, your credit card will now have ONE account in QuickBooks with ALL transactions and payments in one place.
Following these best practices will make reconciliation easier, prevent duplicate entries, and keep your financial records accurate.
💡 Need help fixing your QuickBooks credit card setup? Book a one-on-one training session for personalized guidance!
Want to see a walkthrough of this process? Check out the videos below:

