In this blog post, I’ll show you two different ways to add new accounts to your Chart of accounts, including sub-accounts.
Quick Instructions:
From the Chart of Accounts
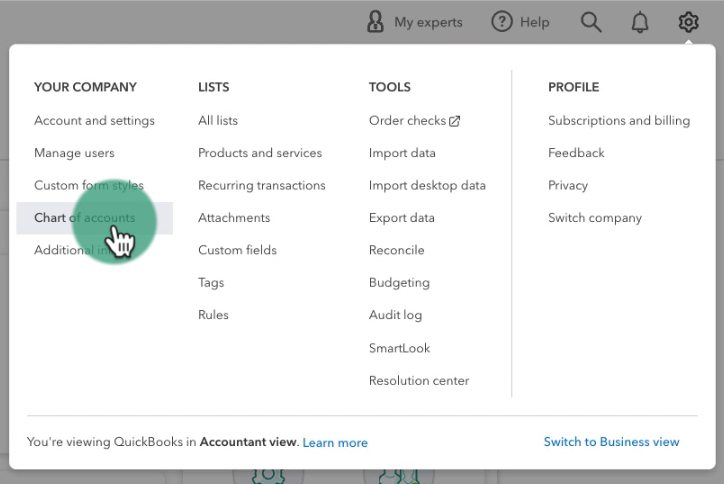
- Click the gear in the upper right corner
- Under YOUR COMPANY click Chart of accounts
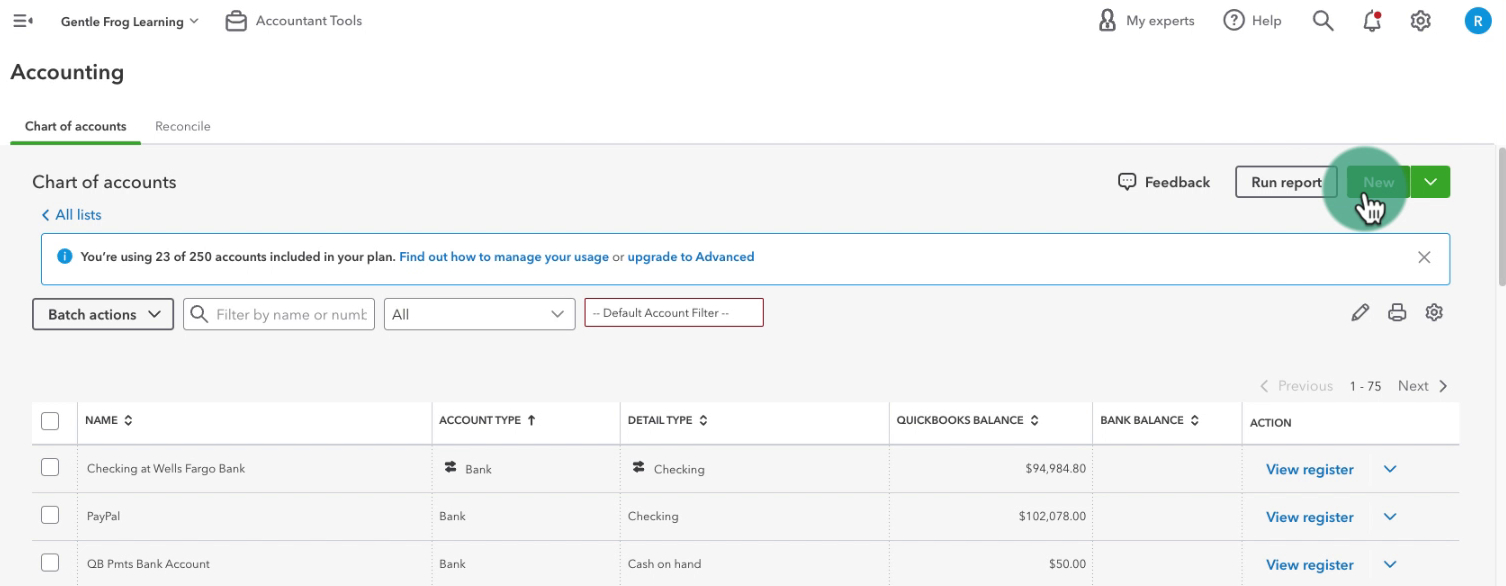
- Click the green NEW button on the right
- Select an account type
- Select an option from the Save account under drop-down
- Select an option from the Tax form section drop-down
- Enter a name in the Account name field
- Click the green Save button
From a transaction in Banking
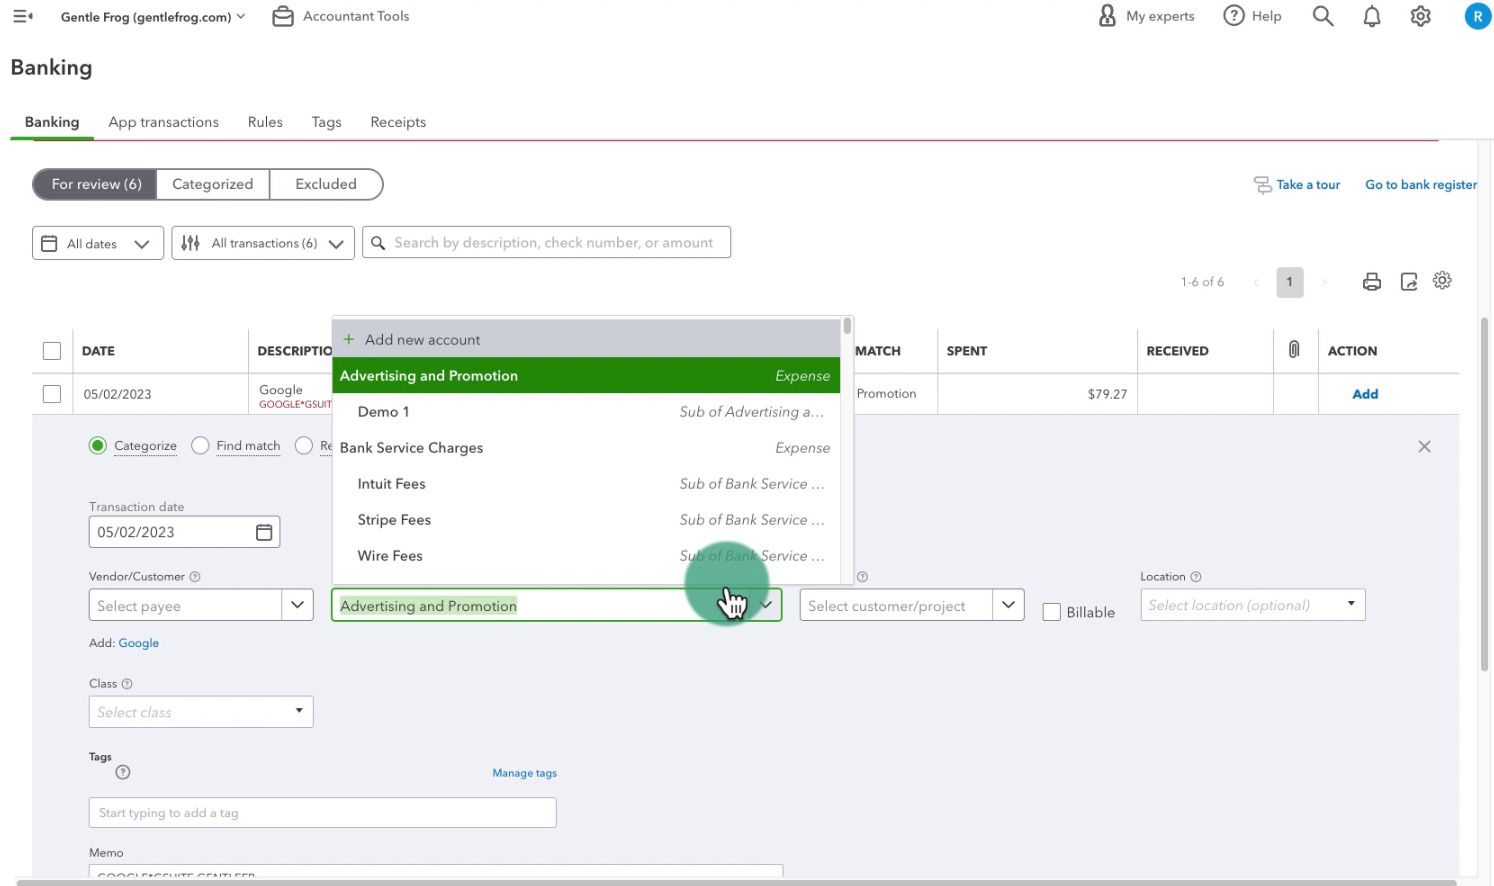
- Click the Category (may be labeled Account) drop-down
- Click + Add new account
- Select an option from the Account Type drop-down
- Select an option from the Detail Type drop-down
- Enter a name in the Name field
- If creating a sub-account check off Is sub-account
- Select an option from the Enter parent account drop-down
- Click the green Save and Close button
Keep reading for a complete walkthrough with screenshots:
Adding New Accounts From the Chart of Accounts
One way to add new accounts is from within the Chart of accounts.
To get there click the gear in the upper right corner of the screen.
In the YOUR COMPANY column click Chart of accounts.
In the upper right click the green New button.
This will open the New account screen.
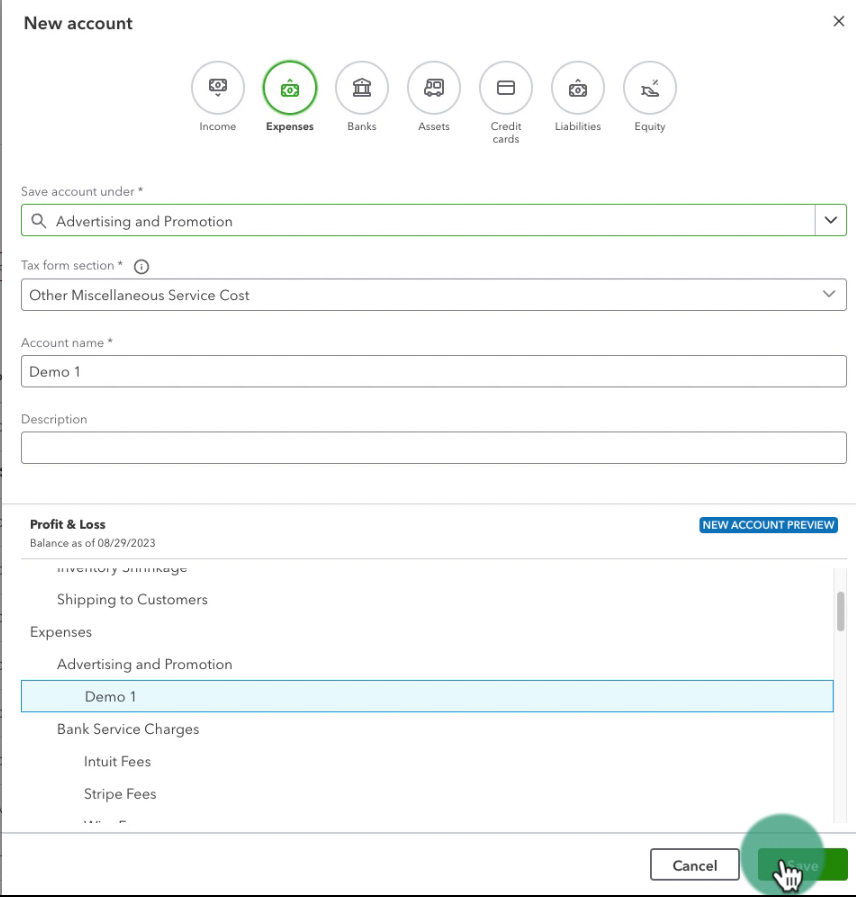
Across the top there are circles with icons showing the types of accounts you can create, including:
- Income
- Expenses
- Banks
- Assets
- Credit cards
- Liabilities
- Equity
For this example, I’m going to create an Expense account.
In the Save account under drop-down, if you choose Expense you will create a parent account. If you select any of the other accounts you will be creating a sub-account of that account.
In my example, I’m creating an account named Demo 1 that’s a sub-account of Advertising and Promotion.
Here’s what the New account screen looks like for my demo account:
Click the green Save account button to save and create your new account.
Adding New Accounts From Banking
When reviewing your downloaded banking you may come across a transaction that doesn’t fit any of your current accounts.
You can create a new account for the transaction without leaving the banking screen.
To create the new account click the Category drop-down (your QuickBooks may say Account). Then click + Add new account at the top of the list.
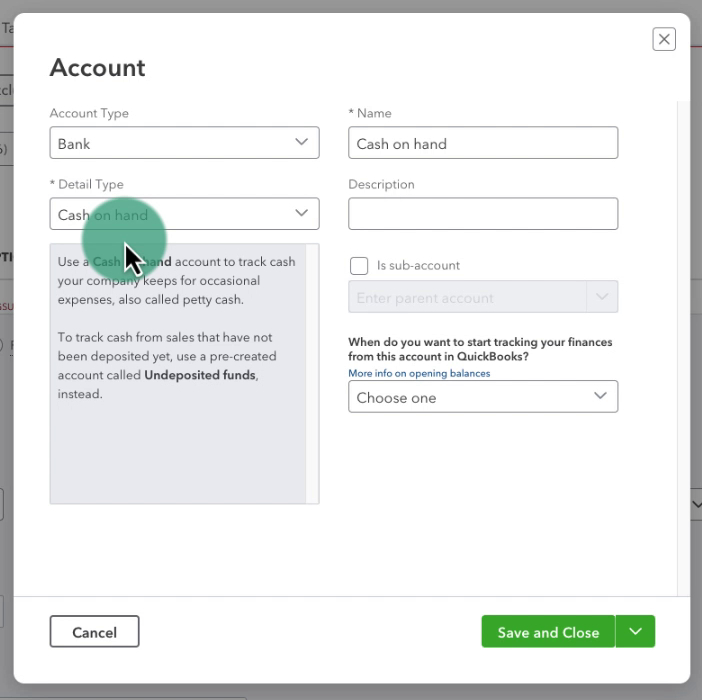
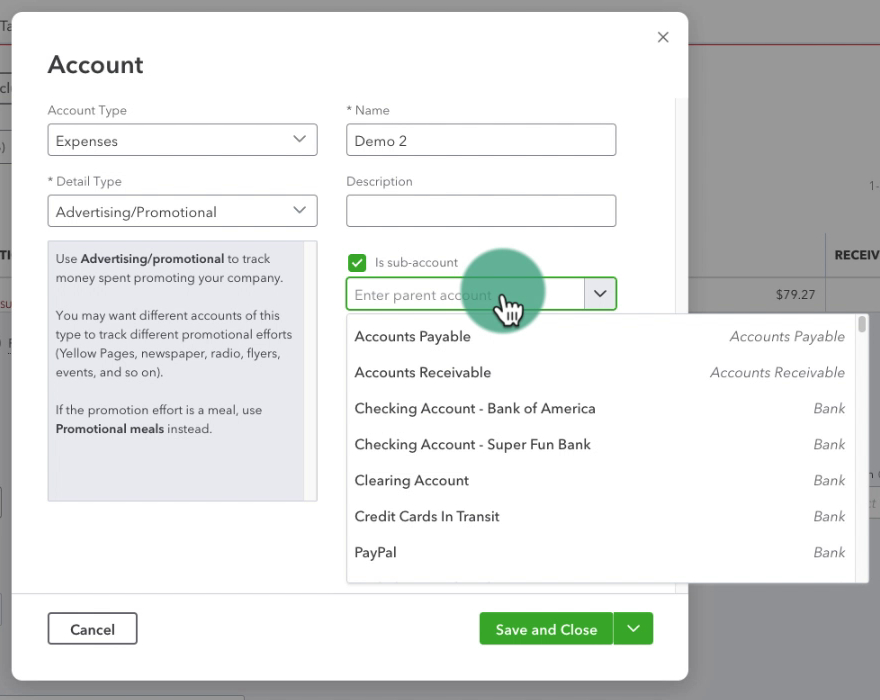
An Account creation pop-up will appear which looks very different from the account creation in the Chart of accounts.
On this screen to create a sub-account you check off the Is sub-account checkbox.
Below the checkbox there’s a drop-down where you’ll select the parent account.
When you’re ready click Save and Close to save your new sub-account.
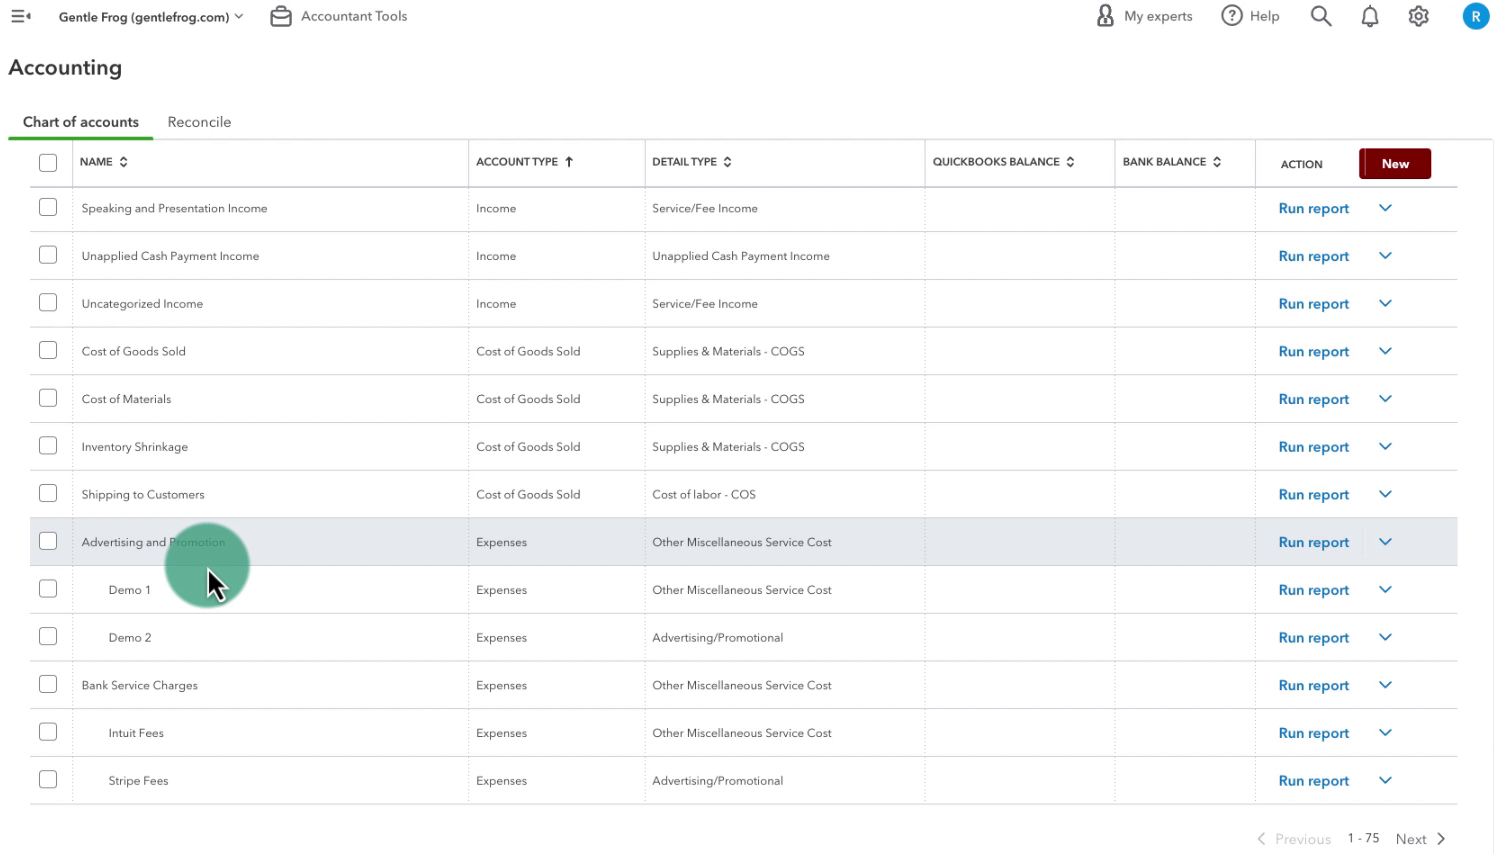
Sub-Accounts On the Chart of Accounts
On your Chart of accounts sub-accounts appear indented below the parent account. Here you can see the two demo Advertising and Promotion sub-accounts I created for this example:
Turn a Sub-Account Into a Parent Account
It’s easy to convert a sub-account into a parent account.
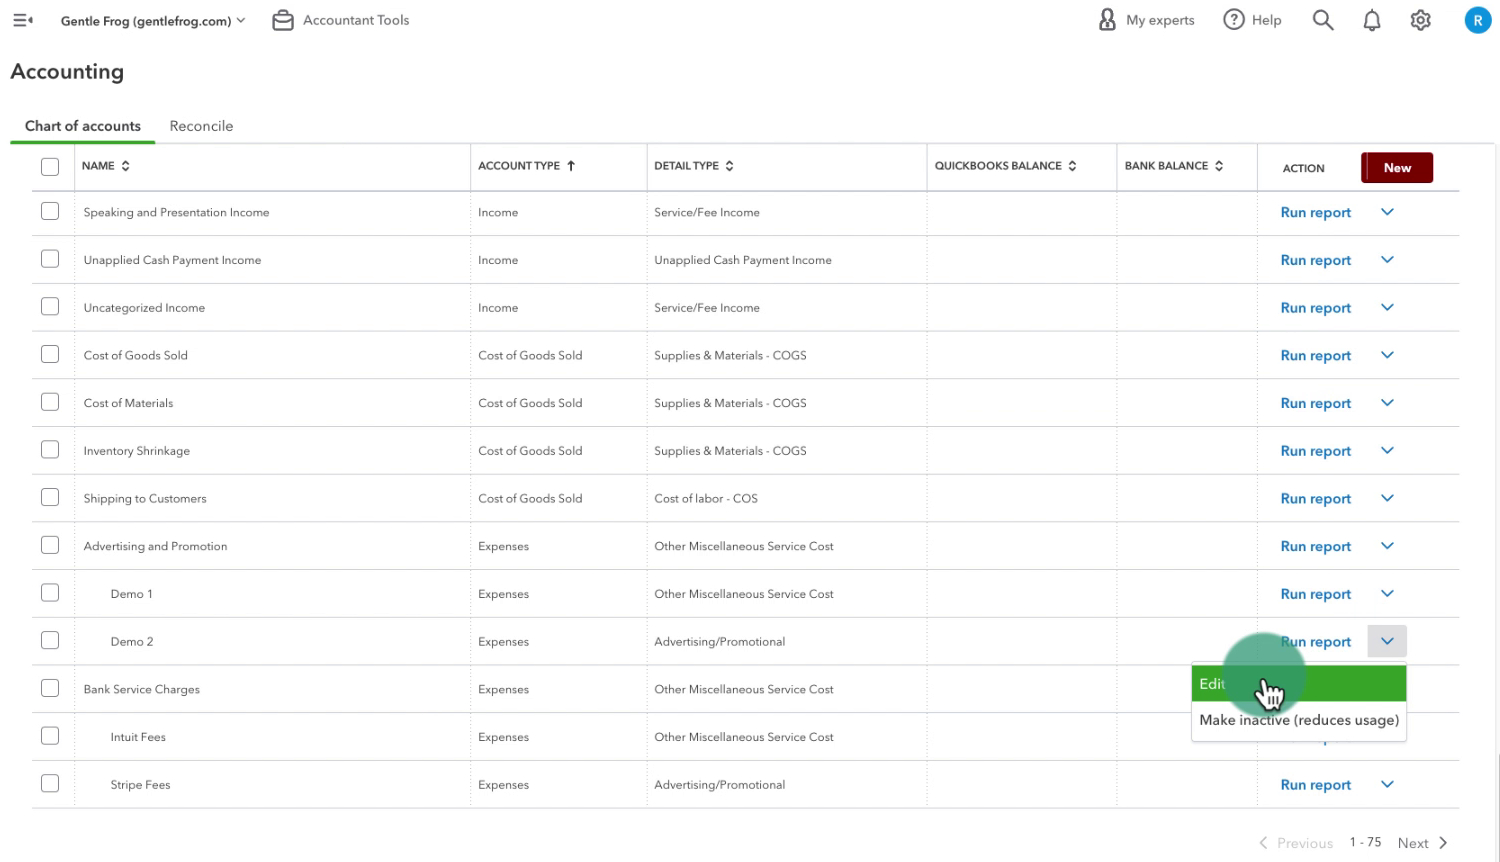
In the Chart of accounts click the drop-down to the right of the account. Select Edit.
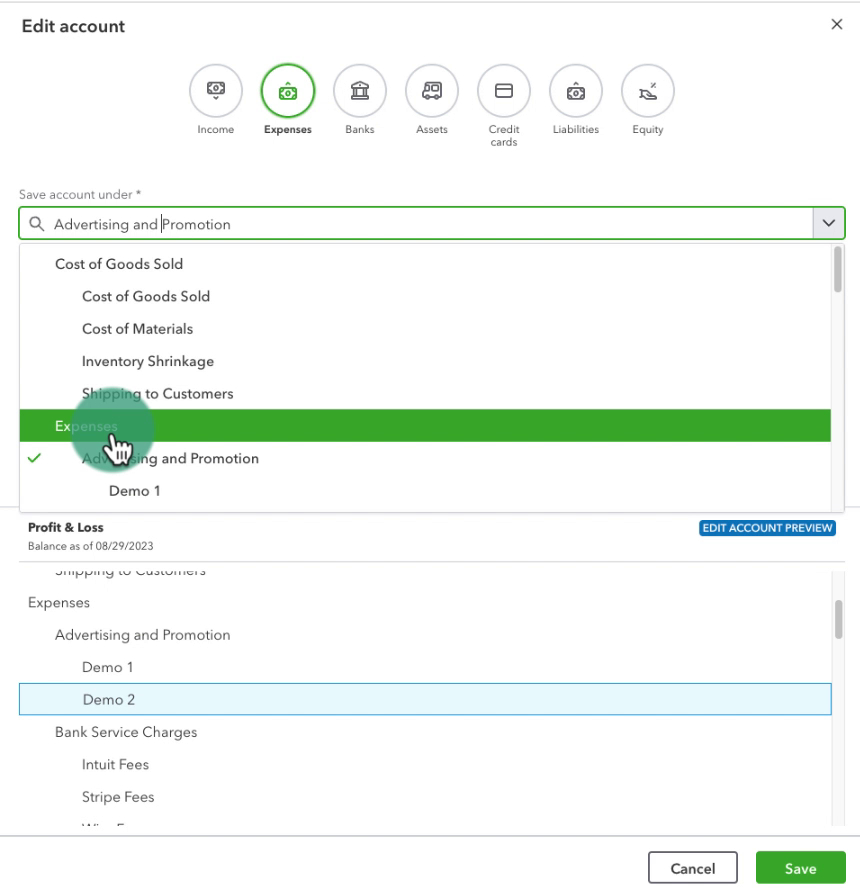
On the Edit account screen click the Save account under drop-down and select a top-level account. For this example, I’m selecting Expenses:
When you’ve finished editing your account click the green Save button.
You now know how to create accounts and sub-accounts in QuickBooks Online. Scroll down if you’d like to watch a video walkthrough.
☕ If you found this helpful you can say “thanks” by buying me a coffee… https://www.buymeacoffee.com/gentlefrog
If you have questions about accounts in QuickBooks Online click the green button below to schedule a free consultation.

