I set up a Square business account in a previous blog post and made a test sale.
Now, I’ll demonstrate how to connect my Square account to QuickBooks Online and download my transaction.
Note: When we do bookkeeping for our clients, we do not connect Square to QuickBooks. We record the information using journal entries; we find it easier and cleaner.
Quick Instructions:
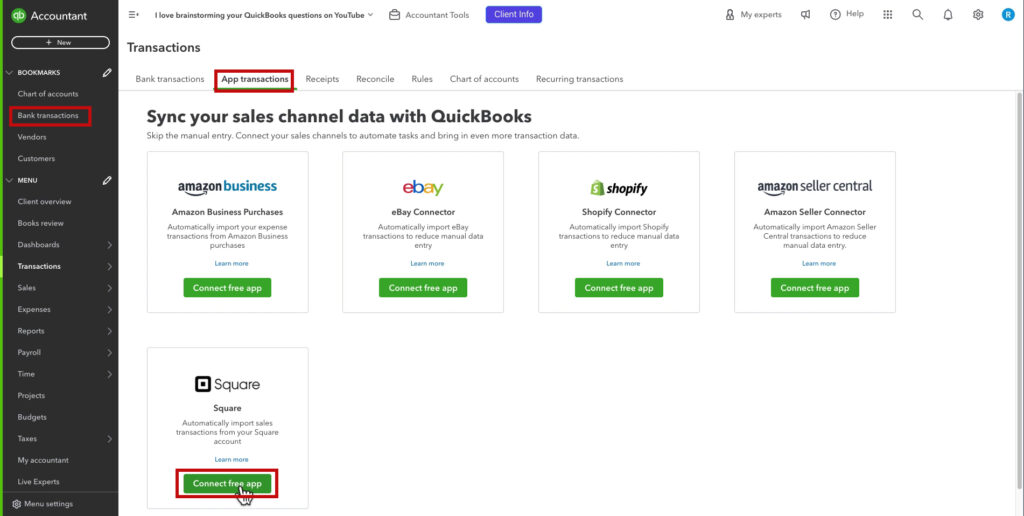
- Click Transactions -> App transactions in the left side menu
- Click the Connect free app button on the Square box
- Click Get started
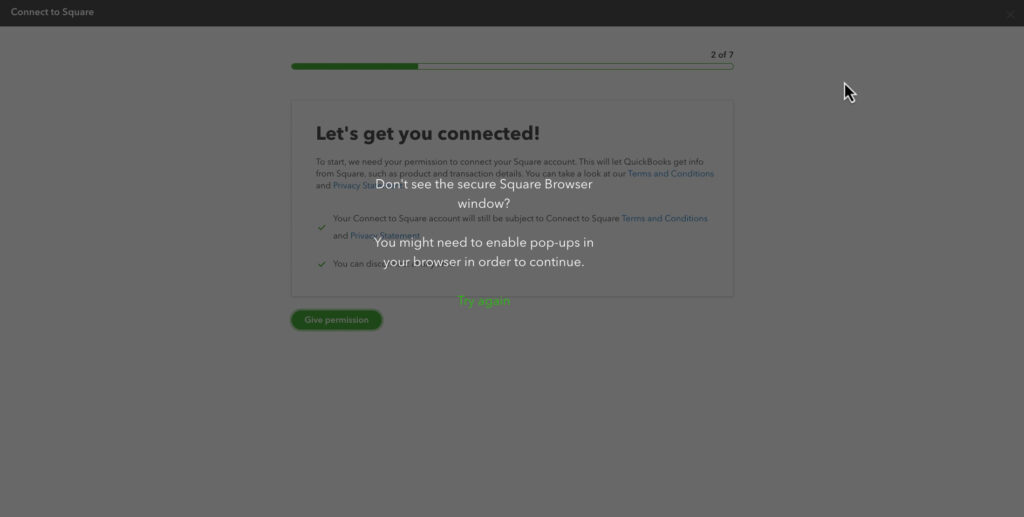
- Click Give permission
- Log into Square
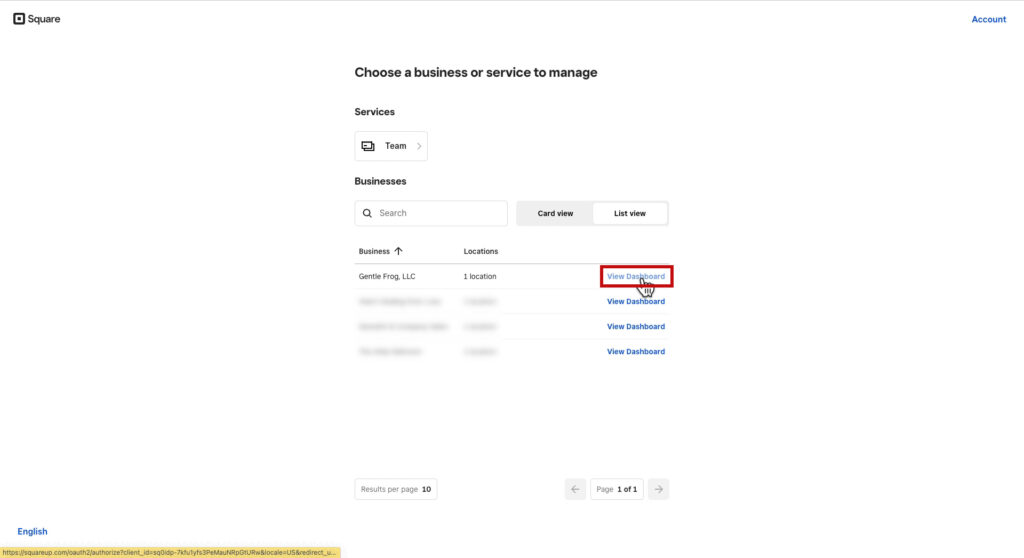
- Click View Dashboard to the right of the business you’re connecting
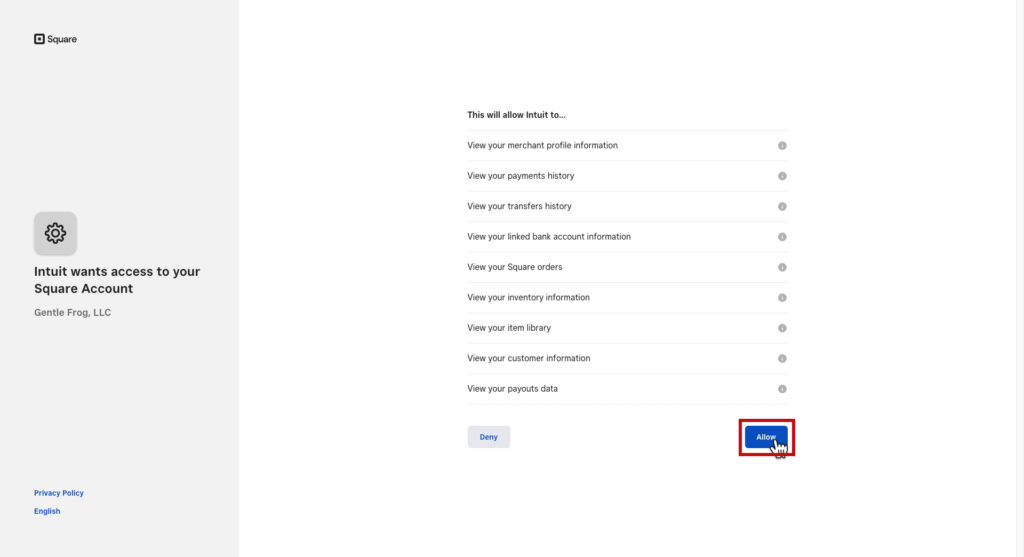
- Click Allow
- Select Accounts for your business locations. Click Next
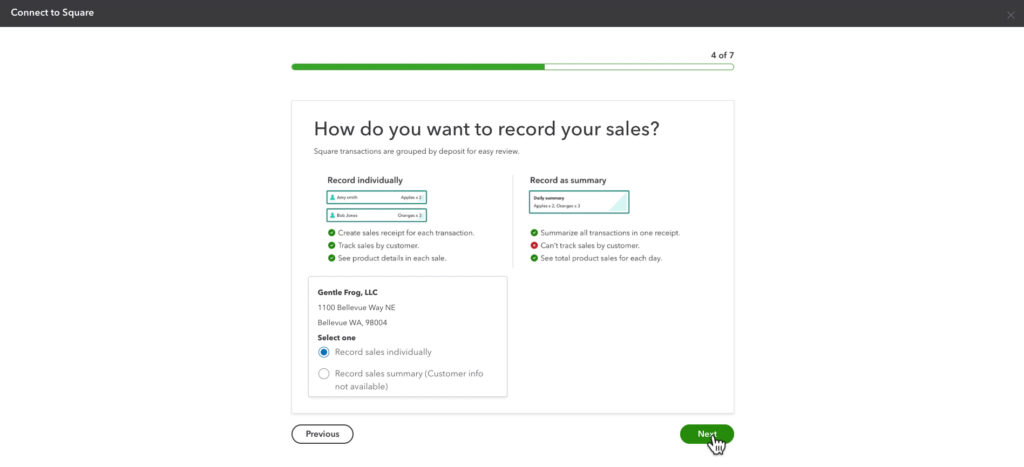
- Select how you want to record your sales. Click Next
- Select a Start date. Click Finish
- Click Check it out
Keep reading for a complete walkthrough with screenshots:
Connect Square to QuickBooks Online
You can connect Square to QuickBooks from within Square.
You can also go to apps.com, search for Square, and find lots of different options.
I’m going to show you the integration within QuickBooks.
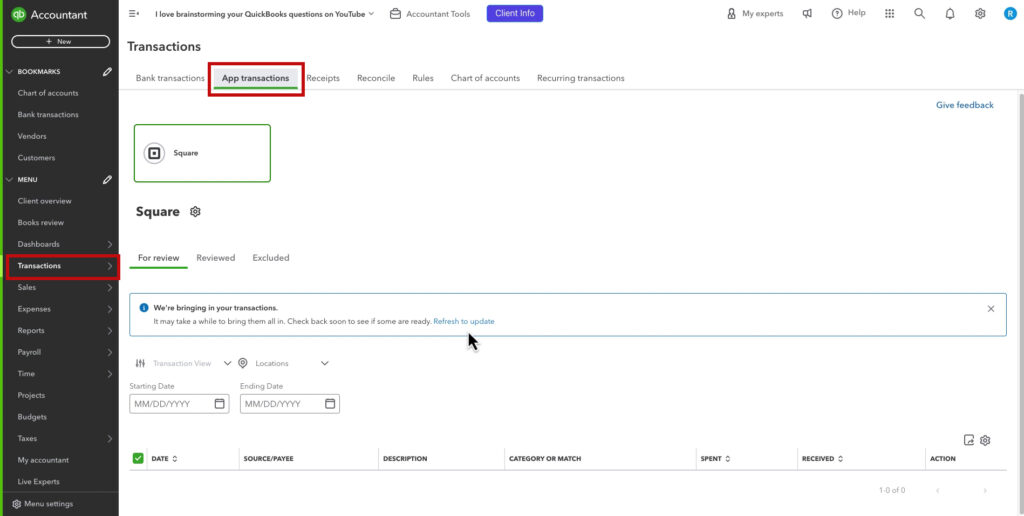
From the home screen, click Bank transactions in the left side menu. Then click App transactions in the Bank transactions menu.
Click the Connect free app button on the Square box.
On the first screen, click the Get started button.
In step 2, click the Give permission button.
Note: I got a message warning me that I needed to enable pop-ups to view the Square Browser window. If you have a pop-up blocker, you’ll need to turn it off.
It will take you to a Square Sign-in screen. Enter your email and password, then a 2-factor authentication code (if you have that turned on).
Next, it will ask you to choose a business or service to manage. To the right of the business you want to connect, click View Dashboard.
It shows you a list of the things that this will allow Intuit to do. Click Allow to continue.
In step 3, you select your business locations and which bank account (in QuickBooks) money gets deposited into for that account. If the bank account you’ve connected to Square isn’t in QuickBooks yet, you can add it.
In step 4, you let QuickBooks know how you want to record your Square sales. You have two options:
- Record sales individually
- Record sales summary (customer info not available)
This is going to be a personal preference and depends on whether you need/want customer information.
Note: You cannot update this later without disconnecting and reconnecting Square.
For this example, I’m going to select individually and click Next.
In Step 5, you select how far back you want to pull data from Square. You have several options, including a custom date.
This Year is fine for me as I recently created my Square account. I’ll select that and click Finish.
Step 6 is connecting. There’s nothing for you to do there but wait.
Step 7 displays the message that Square is connected, and transactions will start downloading. Click Check it out to return to App transactions in QuickBooks.
Square Transactions in QuickBooks Online
Once you connect Square, you can view and categorize the transactions.
You’ll find your Square transactions on the Transactions screen under App transactions.
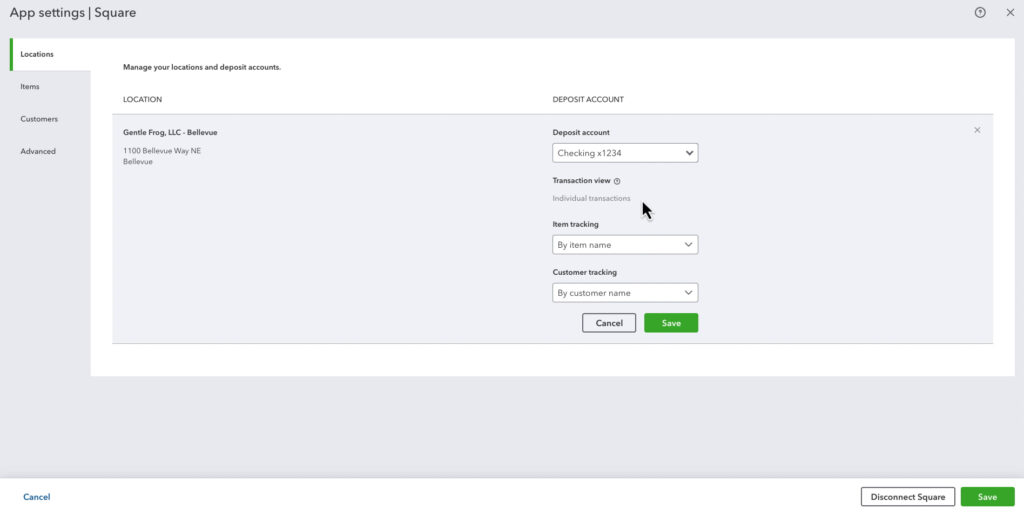
App Settings
If you click on the gear to the right of the word Square it opens the App Settings.
You cannot change how transactions are imported, whether they are individual or summary. This is something you should keep in mind when setting up your account.
Scroll down if you’d prefer to watch a video walkthrough.
☕ If you found this helpful, you can say “thanks” by buying me a coffee… https://www.buymeacoffee.com/gentlefrog
If you have questions about using Square with QuickBooks Online click the green button below to schedule a free consultation.

