In this blog post, you’ll learn how to use progress invoicing using the new invoice layout in QuickBooks Online rolled out in early 2024.
Quick Instructions:
Turn on Progress Invoicing
- Click the gear icon in the upper right corner
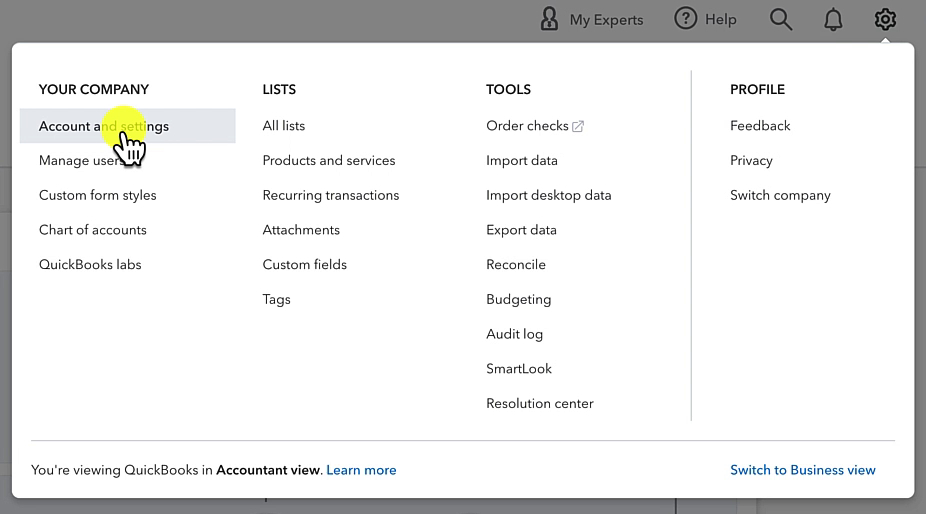
- Click Account and settings under YOUR COMPANY
- Click Sales on the left
- Find Progress Invoicing and toggle on
- Click Save in the lower right corner
Create an Estimate
- Click +New in the upper left
- Click Estimate in the CUSTOMERS column
- Select a customer
- Enter a date
- Add product/services
- Click Review and send in the lower right corner
Create Invoice
- Click +New in the upper left
- Click Invoice in the CUSTOMERS column
- In the Suggested transactions area on the right, select Add on the estimate
- Select how much you want to invoice
- Click Copy to invoice
- Click Review and send
Keep reading for a complete walkthrough with screenshots:
Turn on Progress Invoicing
Before you can use progress invoicing, you have to turn it on in the settings.
Click the gear in the upper right corner. Then click Account and settings in the YOUR COMPANY column.
Click Sales in the left side menu. You’ll find Progress Invoicing toward the bottom of the list.
Click where it says Off. Click the slider that appears so it turns green, and click Save.
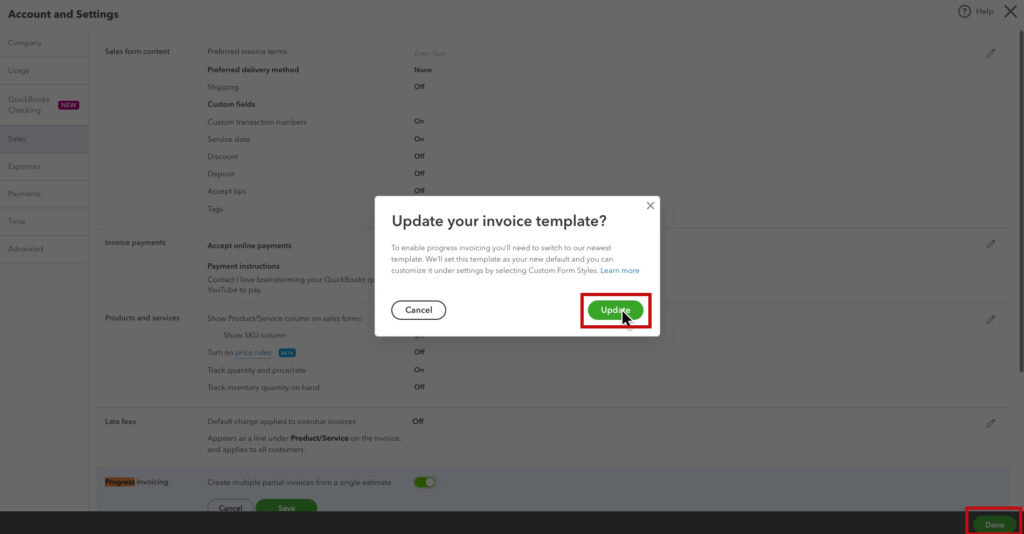
You’ll get a message letting you know that you must use the new invoice template for progress invoicing.
Click Update on the message, then click Done in the lower right corner to save the settings.
Create an Estimate
Now that you have turned on Progress Invoicing, you create an estimate.
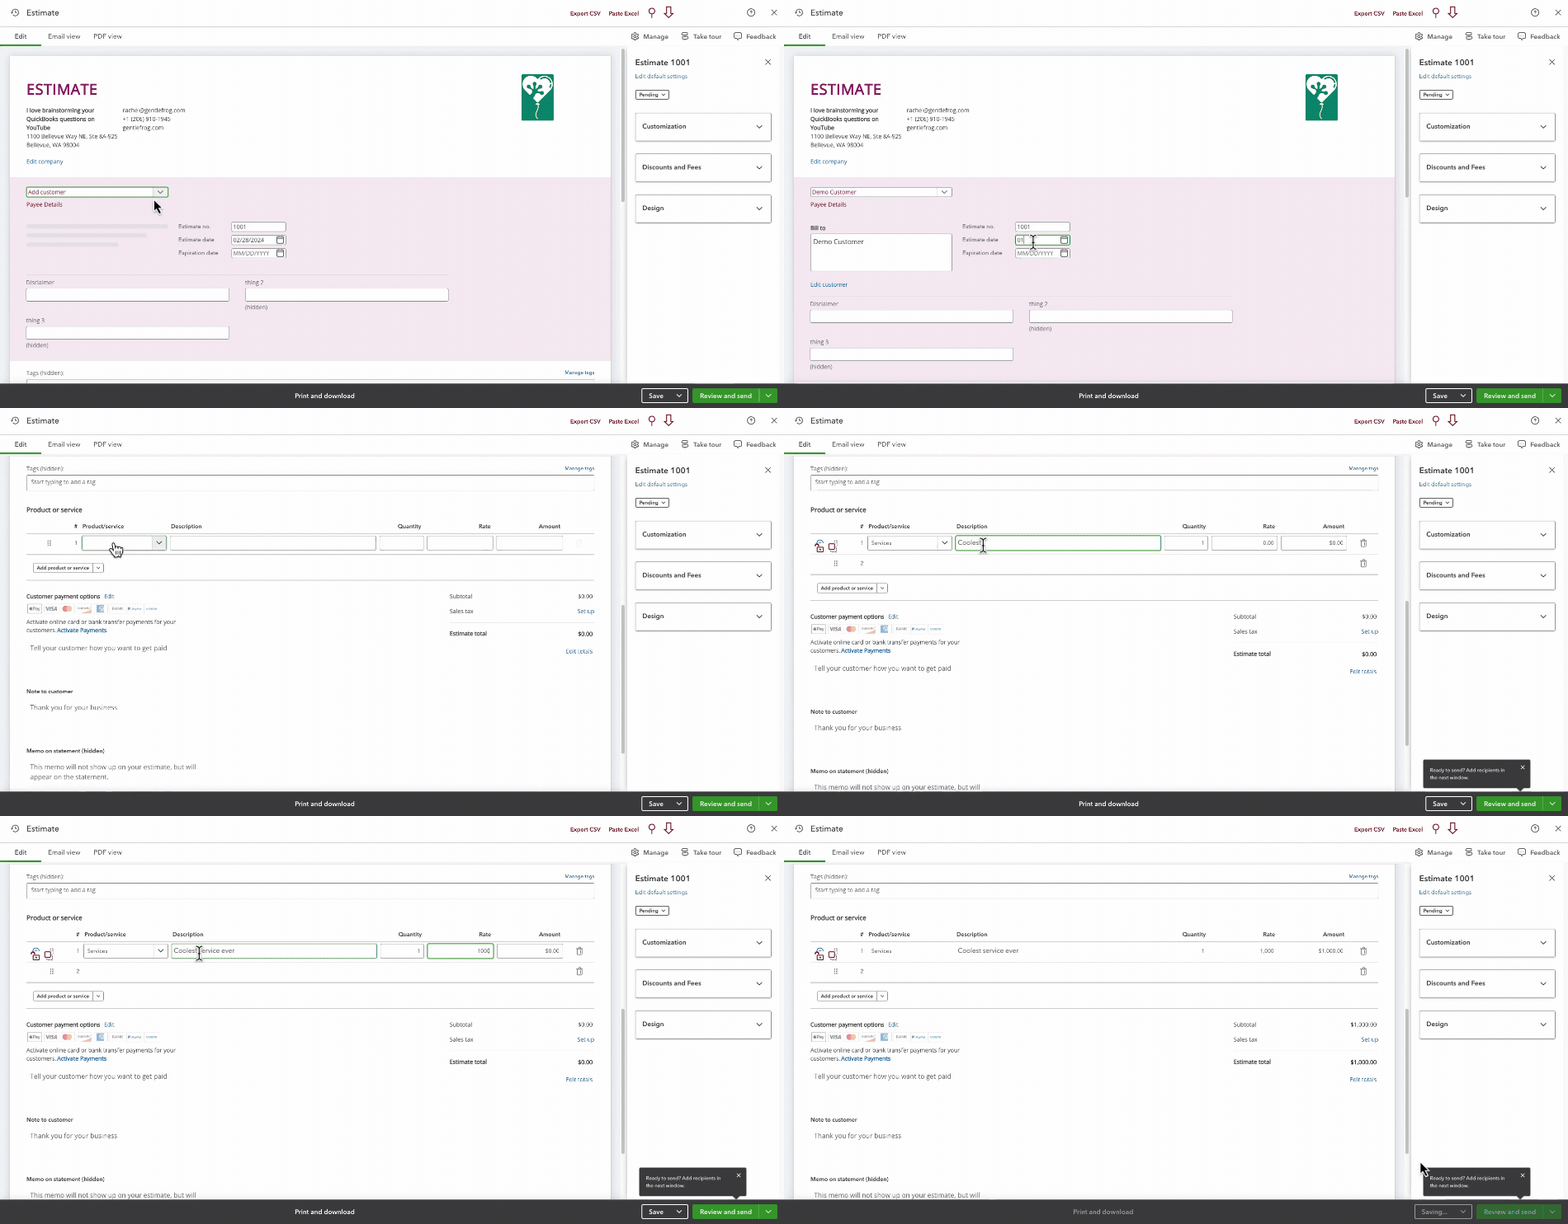
Click the +New button in the upper left. Then click Estimate in the CUSTOMERS column.
Select a customer, enter an Estimate date, add your products/services, and click Save in the lower right.
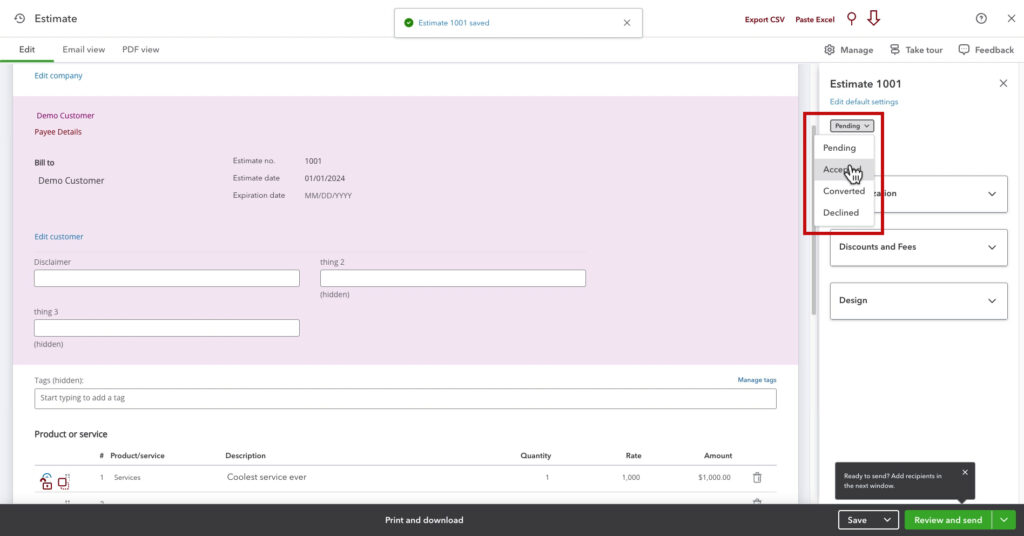
Once the customer accepts the estimate, you can change it from Pending to Accepted on the right.
Create an Invoice
Once the client accepts the estimate, you can create progress invoices.
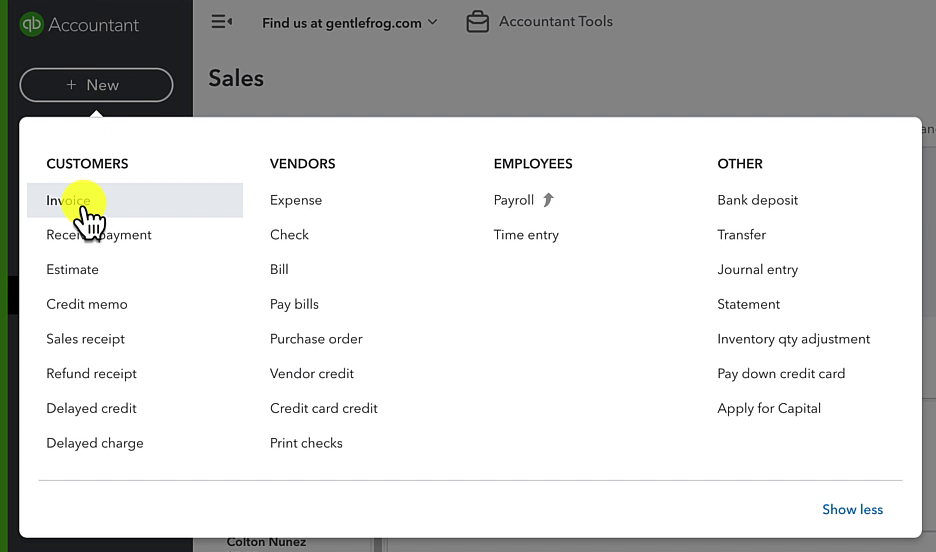
Click the +New button in the upper left. Then click Invoice in the CUSTOMERS column.
When you select the customer, Suggested transactions will appear on the right with the estimate you previously created.
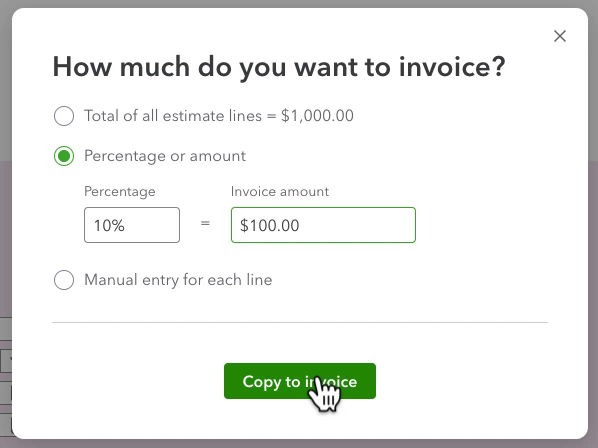
When you click Add, a box appears asking you, “How much do you want to invoice?”
Your options are:
- Total of all estimate lines = $X
- Percentage or amount
- Manual entry for each line
For this example, I’m going to select Percentage or amount.
Two boxes appear. You can fill in the Percentage or the Invoice amount, and it will calculate the other side.
When ready, click Copy to invoice.
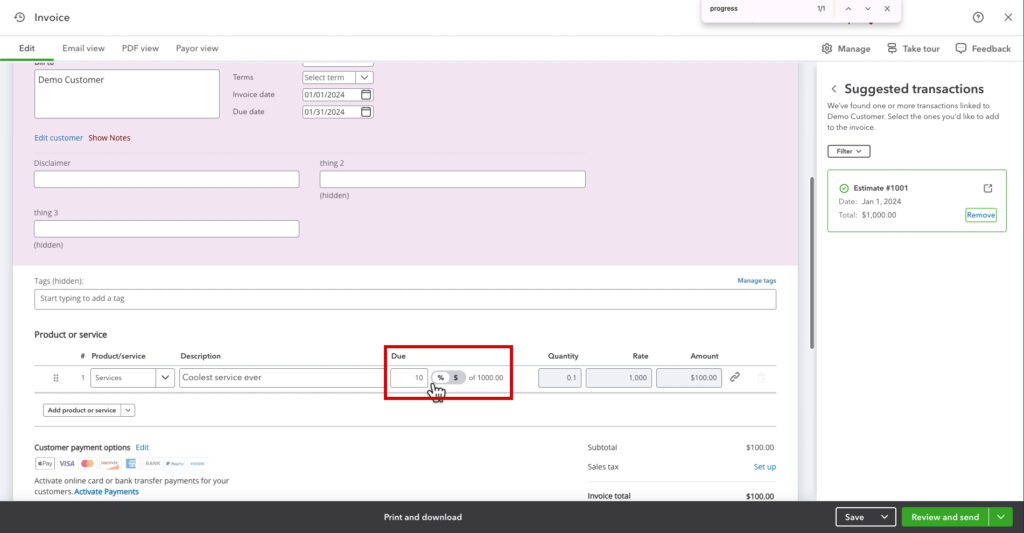
When you scroll down to the Product or Service section, a Due column shows 10% of 1000.00.
The system calculates everything else automatically, including the invoice total.
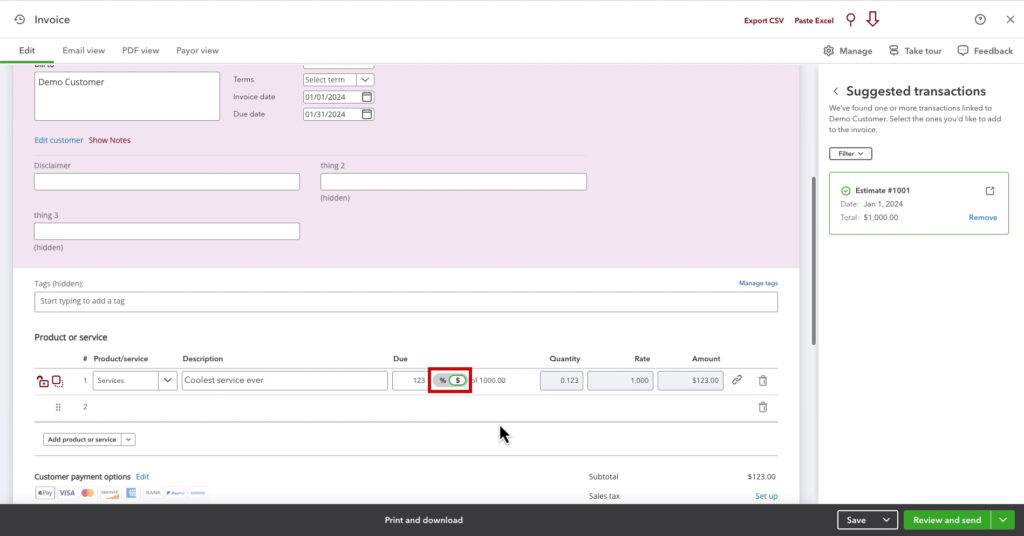
You’re not stuck with the 10%. You can adjust the percentage or click the %/$ toggle and enter a specific dollar amount.
When you’re ready, you can click Review and send or Save and close in the lower right.
Progress Invoices on the Customer Screen & Estimate
I created a second invoice from the estimate. Let’s see what this looks like in the customer’s profile and what’s going on with the estimate.
Click Sales -> Customers in the left side menu.
Find and click on the customer with the estimate from your customer’s list.
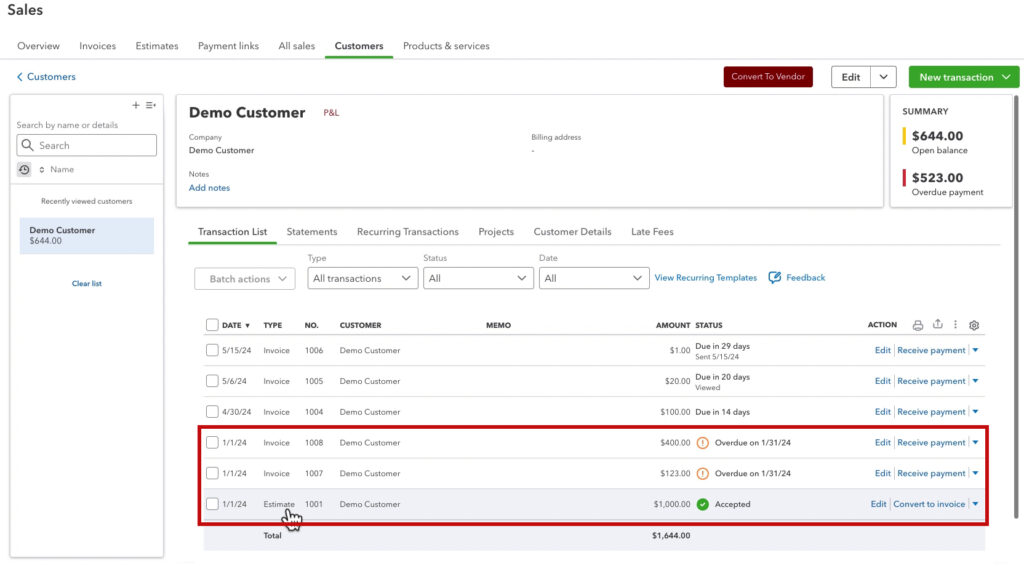
In their Transaction List, you’ll see the accepted estimate and then the invoices.
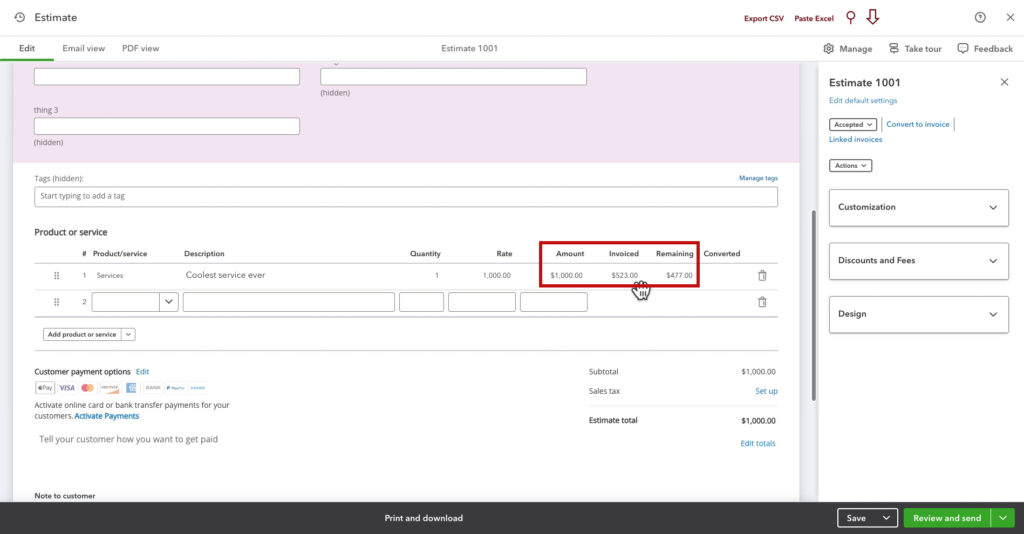
When you open the estimate, you see the total amount, how much you have invoiced, and how much remains.
Linked Transactions
You can view the invoices associated with this estimate by clicking the Linked Invoices link on the right. This will open a box that shows a list of the invoices. You can click on any of them to open that invoice.
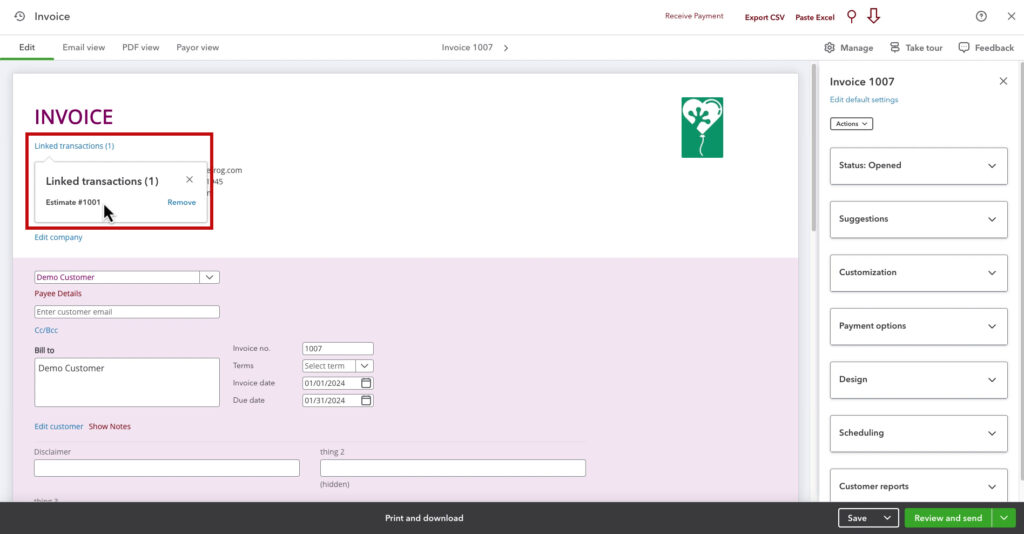
From within an invoice, you can click Linked transactions to see which invoice links to this estimate.
In the past, you could navigate to the estimate from here. Now, you can only remove the link.
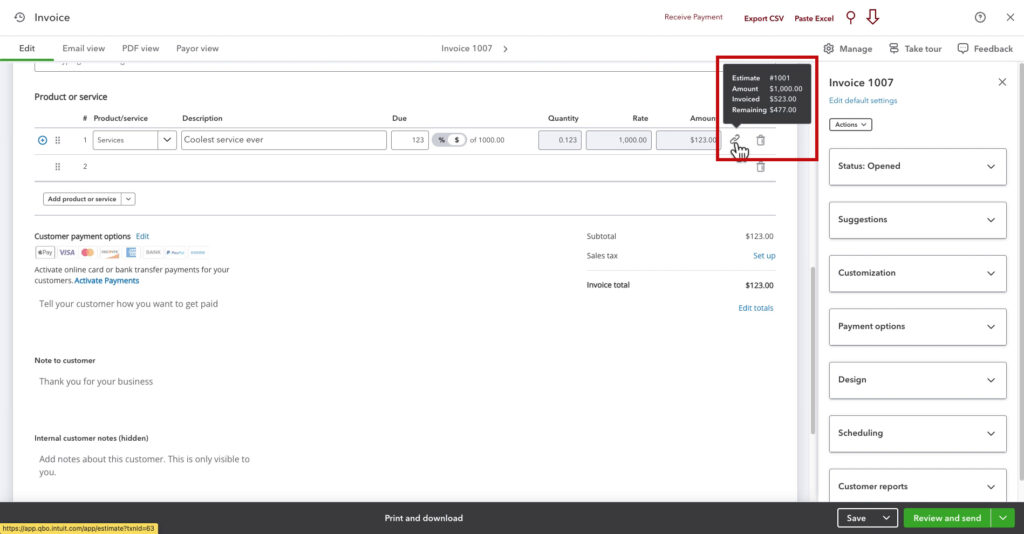
To navigate to the linked estimate from within the invoice, scroll down to the Product or service section.
You’ll see a link icon to the right.
Hovering over that will show a list of ALL the transactions linked together, including the estimate and other invoices. Clicking the link icon will take you to the estimate.
☕ If you found this helpful, you can say “thanks” by buying me a coffee… https://www.buymeacoffee.com/gentlefrog
If you have questions about progress invoicing in QuickBooks Online click the green button below to schedule a free consultation.

