Create a New Proposal
On the home screen, click the Create proposal button in the upper right corner.
This gives you a blank, easy-to-fill-out proposal.
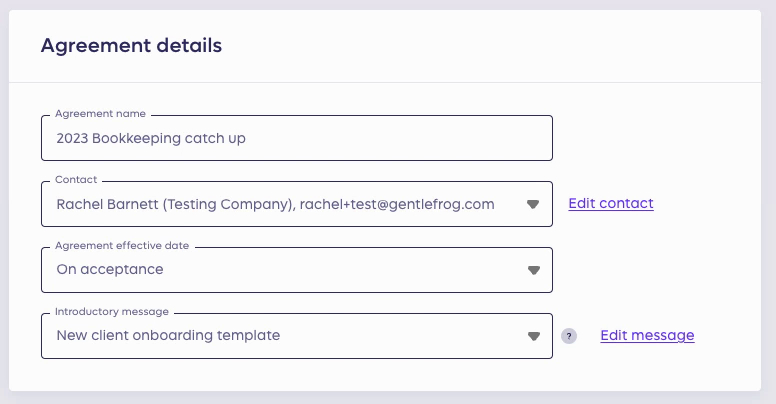
Agreement Details
First, you give your agreement a name. I like to pick something that will help me easily identify this agreement later.
The contact is the person who will receive the proposal. If their information is not already in your Anchor account, click Edit contact on the right to add it.
The Agreement effective date lets you select when the agreement goes into effect. I like to keep it on acceptance.
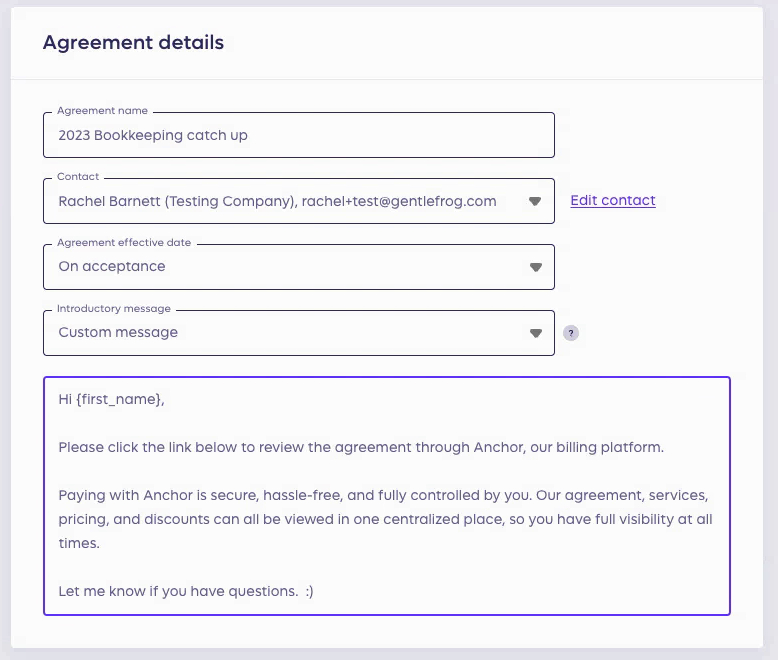
Introductory message lets you pick a template or create a custom message. If you pick a template and customize it, and it becomes a custom message.
You can edit the Introductory message templates in the settings. I covered this in the Anchor dashboard and settings blog post covered this.
Services Provided
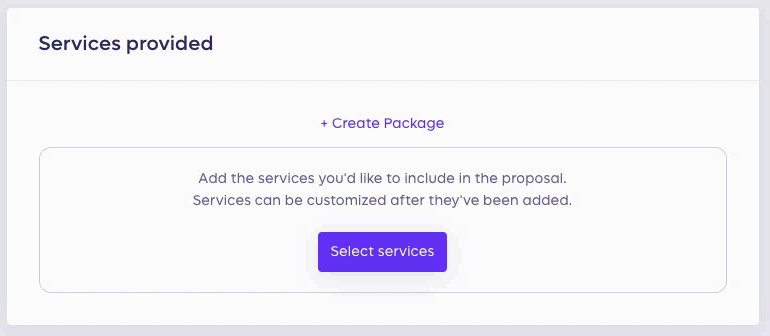
This is where you can add services or packages. Packages are bundles of services.
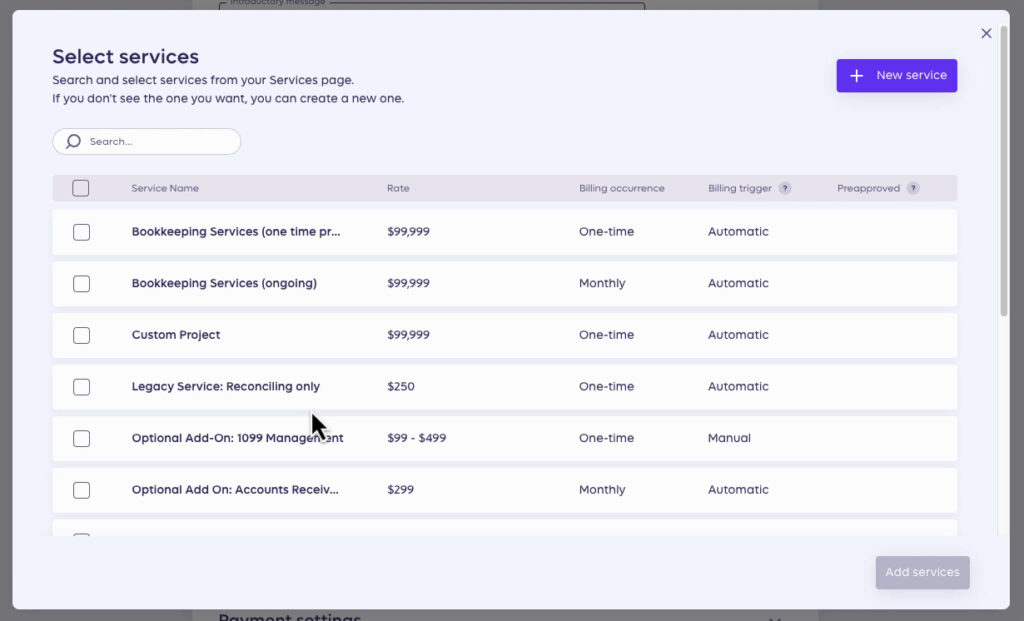
When you click Select services, a pop-up appears listing your services.
Check off the services you want to add and click the Add services button in the lower right corner.
If none of the services in the list fit your current needs, you can click + New service to create a new one.
Edit Services
The services you add are “defaults,” which are like templates. You can edit each service to fit the current client/proposal.
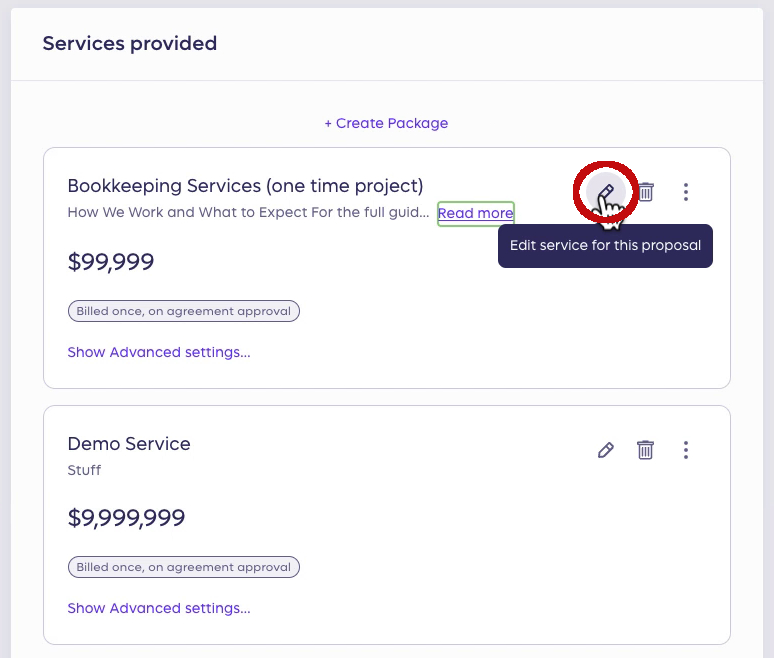
To do this, click the pencil icon to the right.
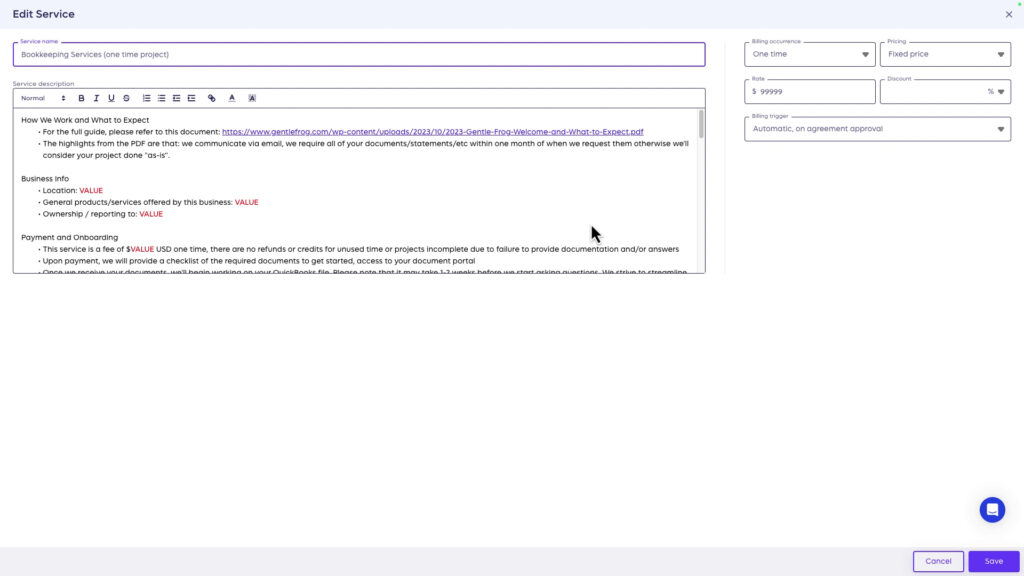
This opens the Edit Service screen. I use red placeholder text in the description to help me easily spot where I need to update things.
Delete Service
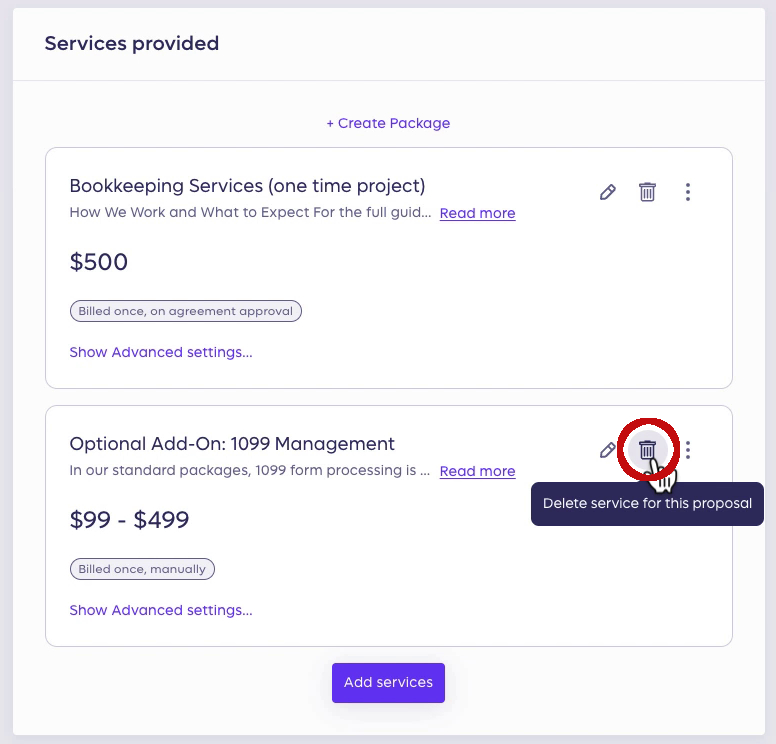
If you decide to delete a service from the proposal, click the trash can icon to the right.
Optional Add-Ons
An optional add-on is a service that the client can decide to add or not.
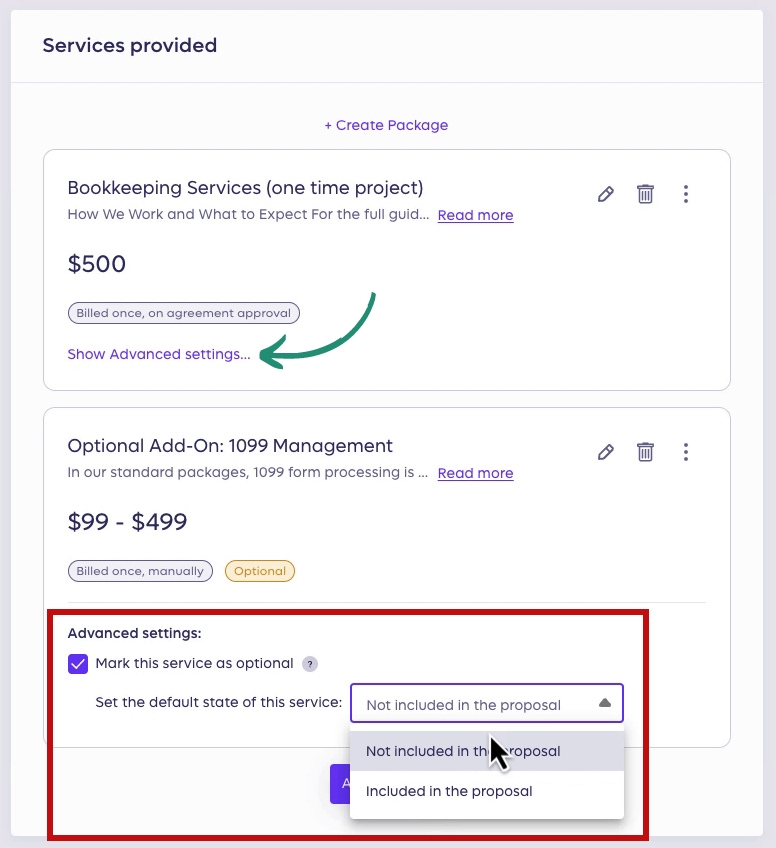
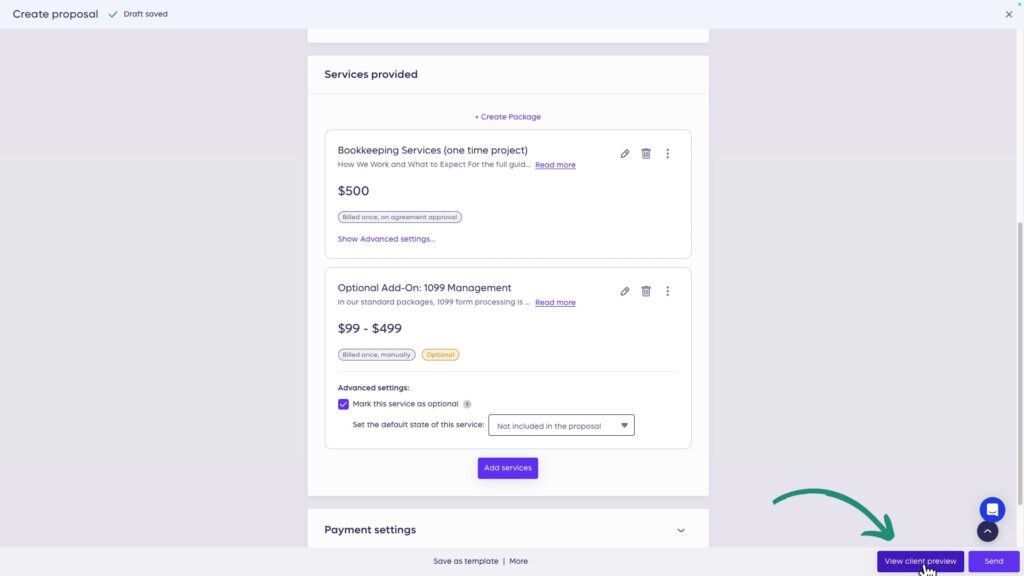
To make a service optional, click Show Advanced settings… at the bottom of the service’s box.
Check off Mark this service as optional.
You can then set the default state as either included or not included.
Optional Add-Ons On the Proposal
You can preview what the proposal will look like to the client by clicking the View client preview button in the lower right corner.
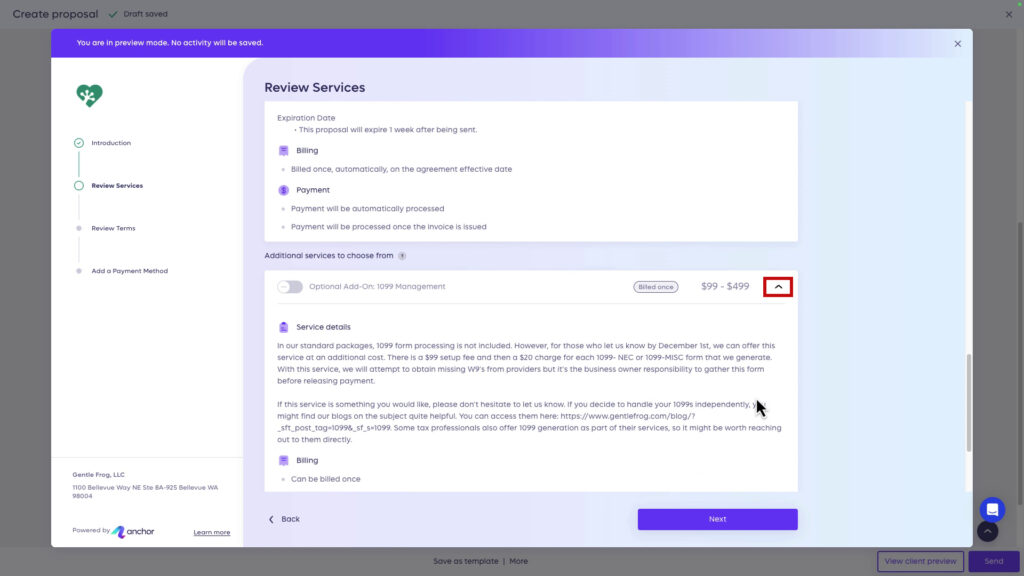
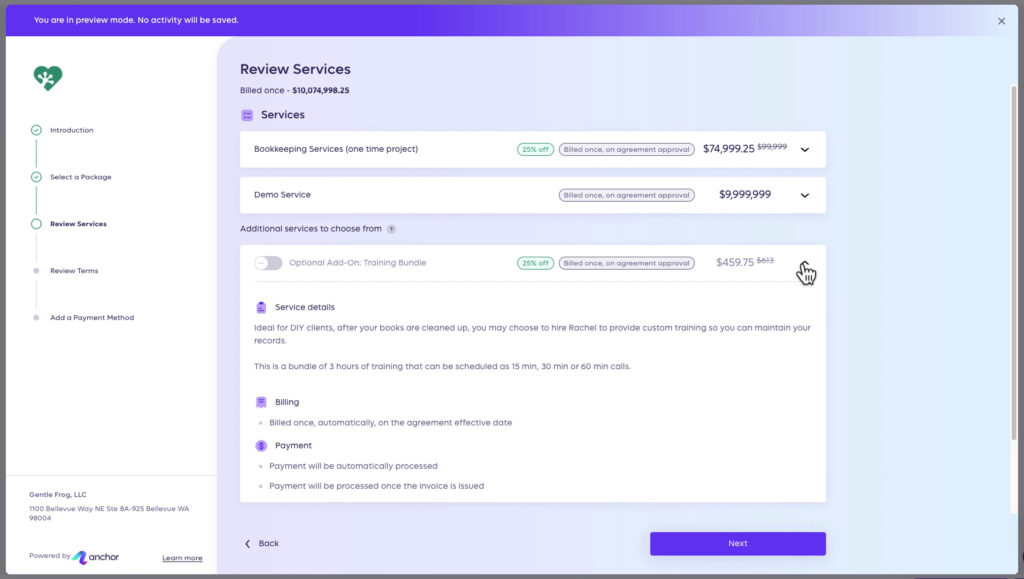
Click Review Services on the right to see how optional services appear on the proposal.
Optional add-ons appear under Additional services to choose from.
I set the default state for this add-on as “not included in the proposal,” so it’s not selected. If it was set to “Included in the proposal,” it would be selected automatically.
The client can click the down arrow on the right to view the full service/add-on description.
Payment Settings
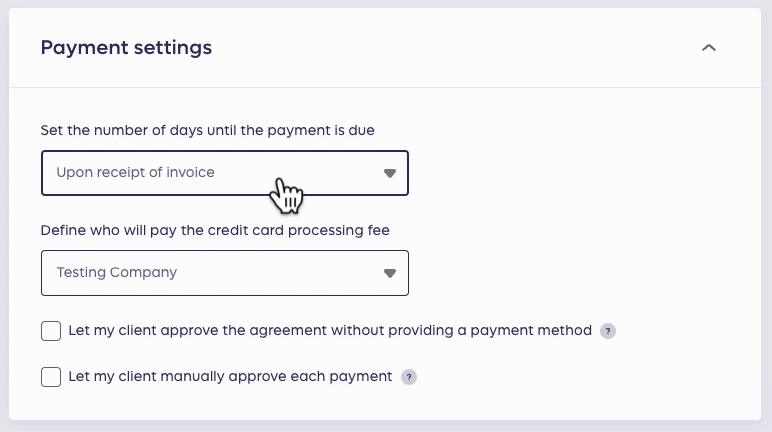
In payment settings, you have…
- Set the number of days until the payment is due: Upon receipt of invoice, or a number of days up to 90.
- Define who will pay the credit card processing fee: You can set this to you or the client.
- Let my client approve the agreement without providing a payment method: Check this box if you’re not using Anchor for your payment processing.
- Let my client manually approve each payment
Agreement Settings
This is where you select a Terms & Conditions. You can also add a note to append to the agreement.
Send Proposal
Once you review all the sections, preview your proposal. When you are satisfied with it, click the purple Send button in the lower right corner.
A Ready to Send? pop-up appears, click Send now, and then do a happy dance.
What the Client Sees
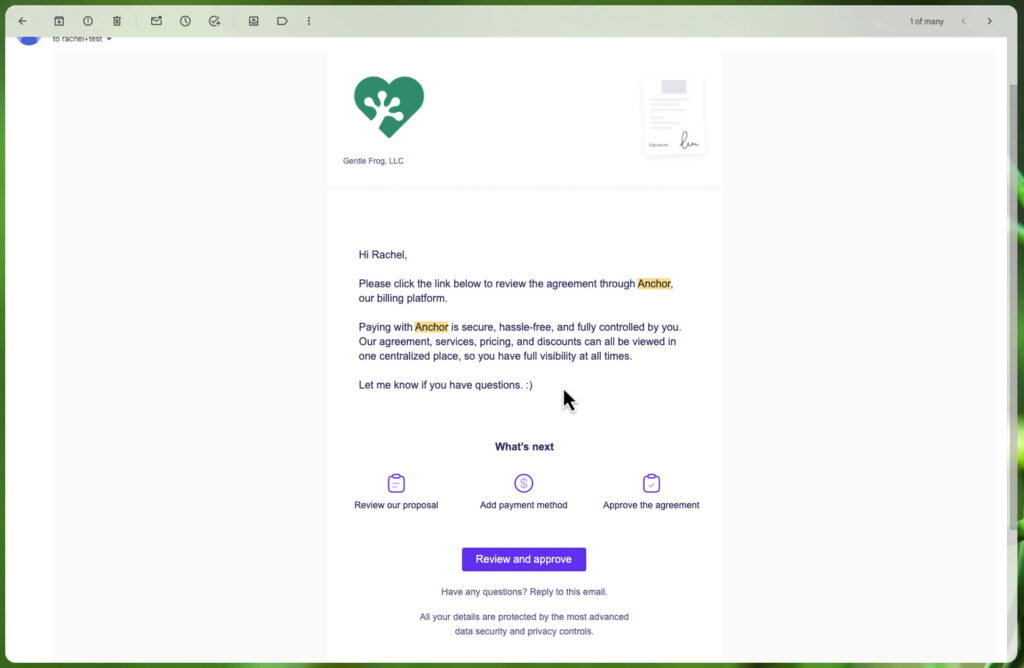
The client will receive an email with a link to the proposal. Here is what that looks like:
Packages
The example proposal above included services and add-on services. You also have the option to create packages which are bundles of services.
To create packages click + Create Package in the Services provided section when creating a new proposal.
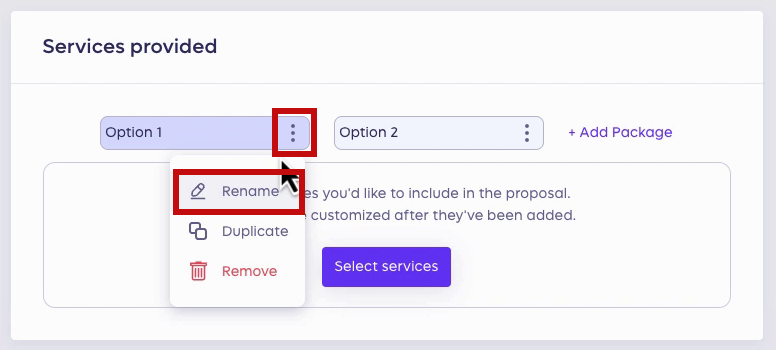
When you click + Create Package, you get two blank pages named ‘Option 1’ and ‘Option 2’. You can add an additional package by clicking + Add Package to the right.
Edit a package’s name by clicking the 3 dots to the right and selecting Rename.
To add services to a package, click the package, then click Select Services.
This is the same as adding services to the proposal, except now you’re adding them to a package.
Preview Packages
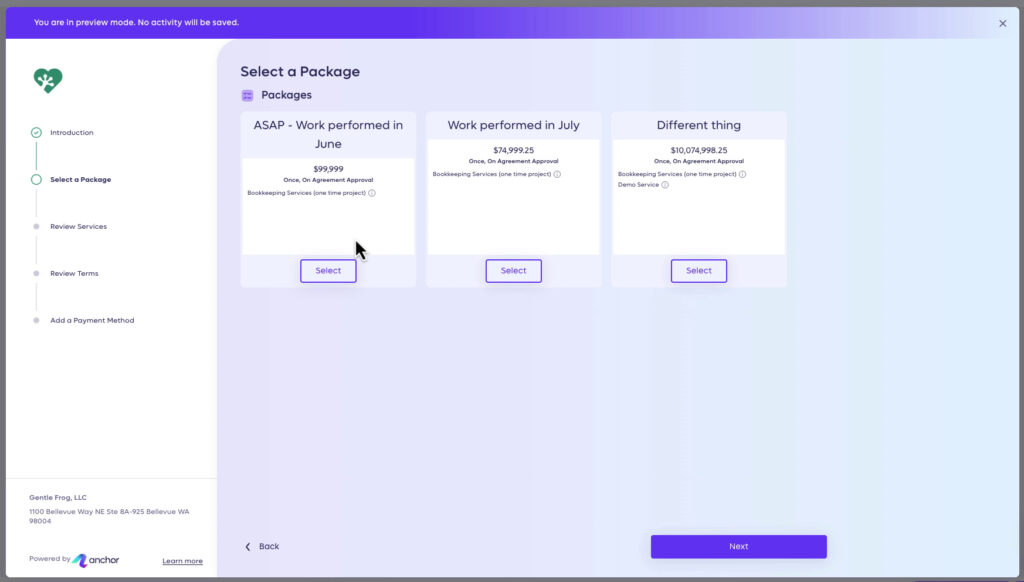
Here’s an example of what a proposal with packages looks like to the client:
Each package has a list of the services included with a little info icon to the right. The client can click the info icon to read the service’s description.
Add-Ons With Packages
You can include add-ons with packages, but there’s one thing to note.
When the client views the packages, add-ones do not show a price.
The price does not show when the client views the description.
To view the add-on pricing, they must select the package and click Next. Then, they can view all the details on the Review Services screen.
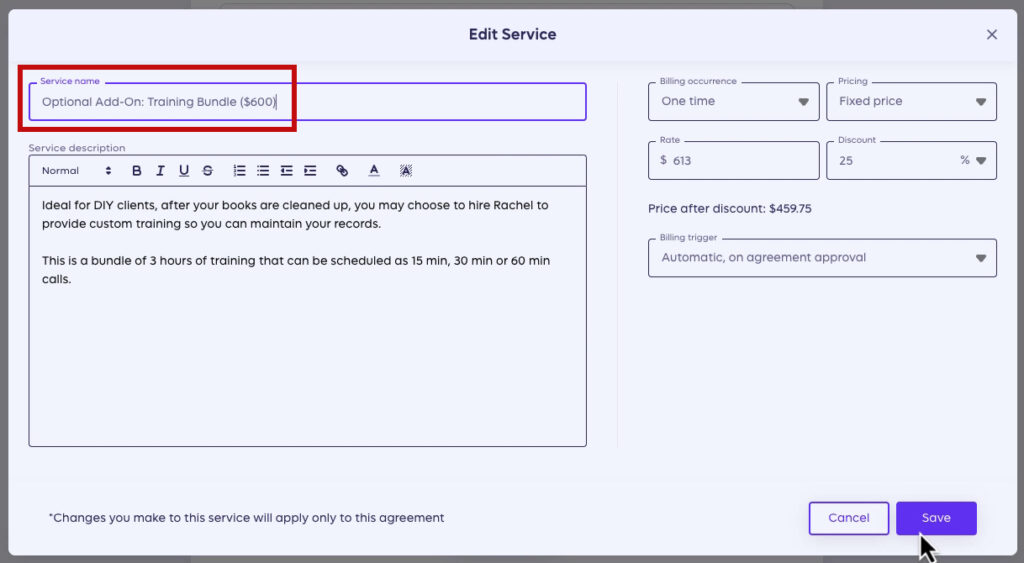
This is not ideal, but there is a workaround. I suggest adding the pricing to the name of the add-on.
Now the client can see the price on the Select Package screen.
I really like Anchor. It’s quick and easy to use.
Once I set up my default services, I can create a proposal in minutes.
There’s lots of other proposal software out there. But they’re all more money or more time than I want to spend.
If Anchor looks like software you’d like to use, you can get a $50 credit when signing up with my affiliate link: https://join.sayanchor.com/dcjMNB
Below are videos if you prefer to watch a walkthrough.
If you have questions about using Anchor for your proposals, click the green button below to schedule a free consultation.


