Classes vs. Locations
Classes and locations are similar. They help organize transactions within QuickBooks Online. The main difference is that a transaction can only have one location. In contrast, each line of a transaction can have a class.
Locations are generally used for… well, “locations.” If you have more than one office, store, or rental property, you can use locations to track them.
Classes are used more for divisions, service/product categories, etc.
Here are a few examples of how different businesses might use Classes/Locations:
- Department store chain with multiple locations: Each individual store would be its own Location. Classes could track the different departments within the stores, such as women’s clothing, shoes, furniture, appliances, etc.
- Property management company: Each property would be a Location, and rental units within those Locations could be a Class.
- Website software company: A company that sells do-it-yourself website software (like Squarespace) may also offer website design services. There’s no “physical” location but the software and services sections of the business could be set up as separate locations. Then they could use classes for different types of software/services they offer.
- Event Planner: This type of business could use Locations for events like weddings, corporate, and parties. Then, it could use a separate class for each event.
These are just a few examples to help you brainstorm how your business could use Classes and Locations.
Enable Classes and Locations
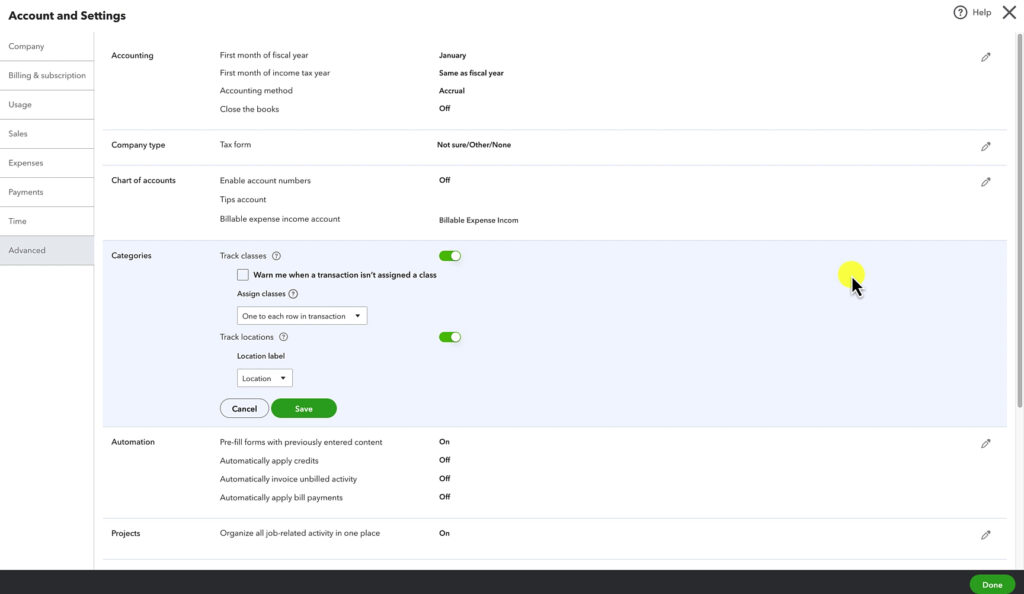
To use classes and locations in QuickBooks Online, you must first enable them in the settings.
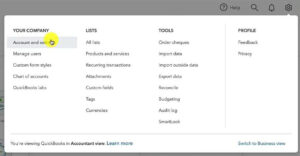
To do this, click on the gear in the upper right corner. Under YOUR COMPANY select Account and settings.
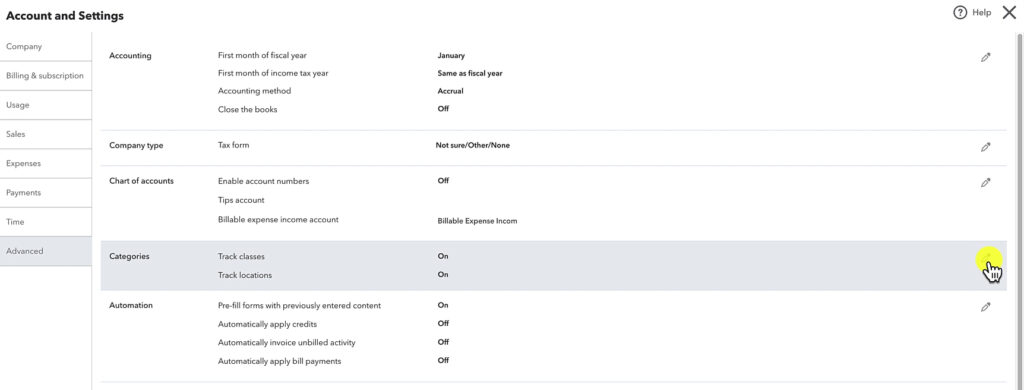
Click Advanced at the bottom of the left-side menu on the Account and Settings screen.
Check that Track classes and Track locations are turned on in the Categories section.
If they’re not turned on, click the pencil icon to the right.
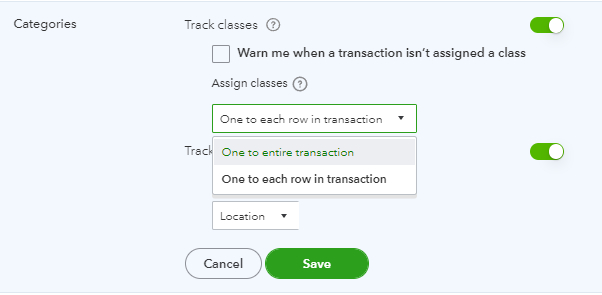
You have the option to assign classes in two ways:
- One to entire transaction
- One to each row in transaction
I suggest using one to each row in transaction.
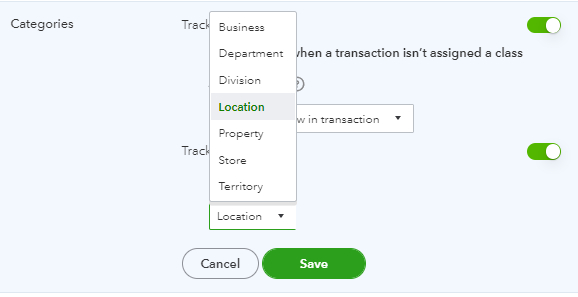
For locations, you can change the label to better match what you call a “location” in your business. You’ll notice there’s no “Assign locations” drop-down. That’s because you can ONLY have one location per transaction.
Toggle both classes and locations on and click Save. Then click Done in the lower right corner.
Classes and Locations on an Invoice and Expense
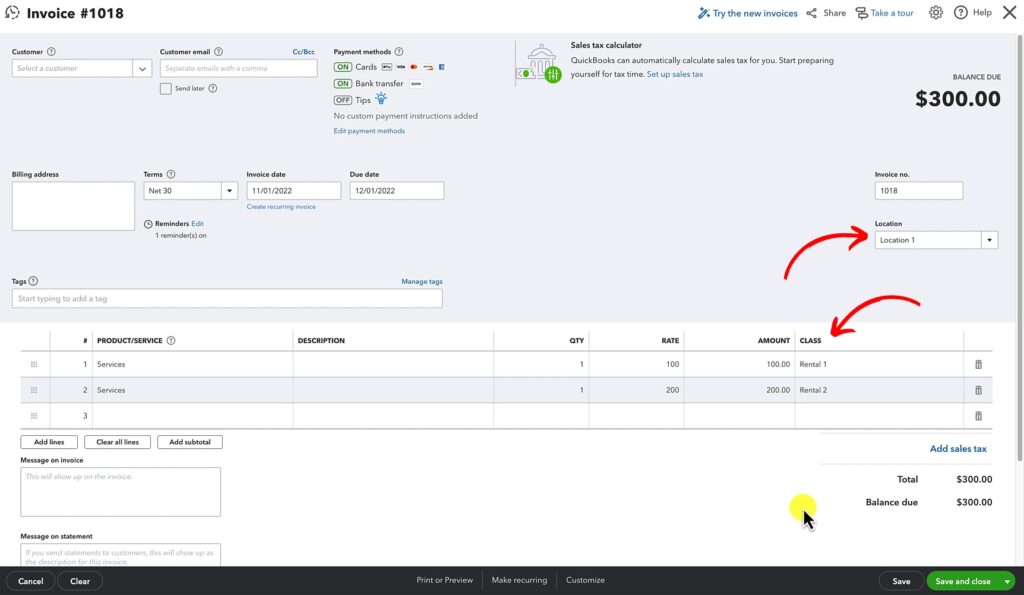
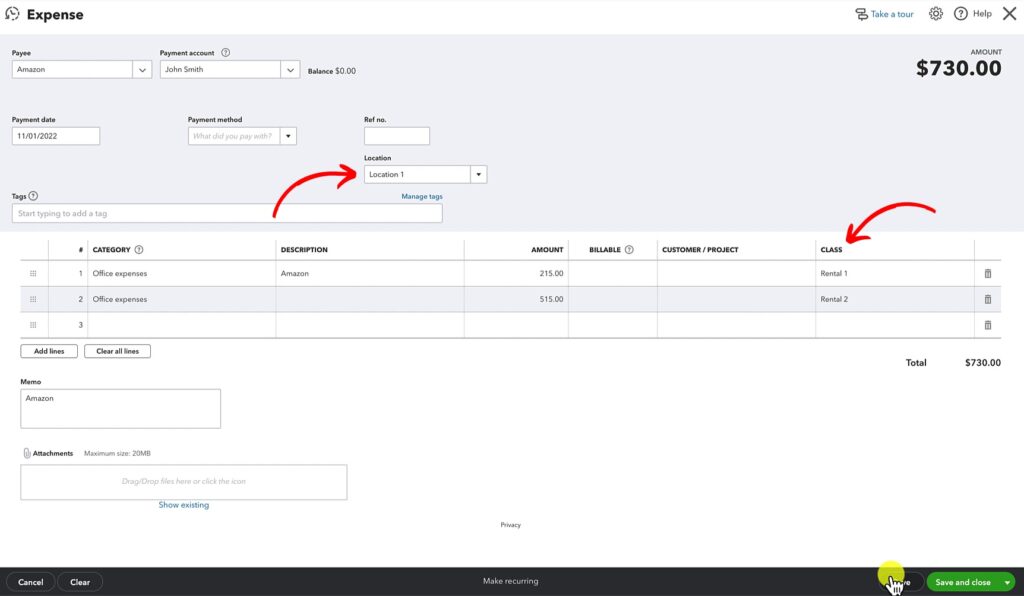
Below are examples of an invoice and an expense using Locations and Classes.
There’s one Location drop-down where you select the location for the entire transaction.
Then, each item in the transaction can be assigned a class.
Invoice:
Expense:
Classes and Locations on Reports
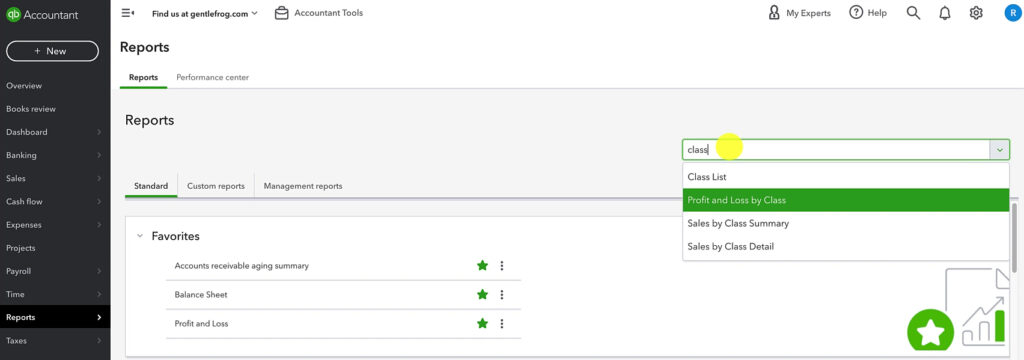
Let’s take a look at reports that can show how Locations/Classes can be useful.
Click Reports on the left-side menu, then search for Profit and Loss by Class or Profit and Loss by Location.
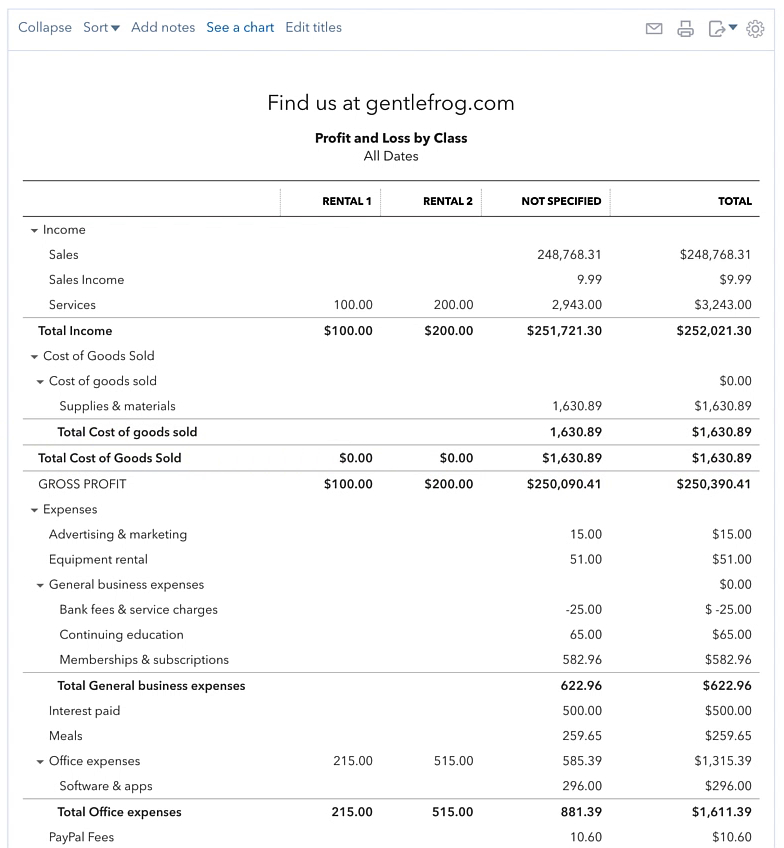
These reports look like a typical Profit Loss. But you can see the Income and Expenses for each Class/Location (“Not Specified” is anything not given a class/location).
Here’s an example of the Profit and Loss by Class report:
A similar Balance Sheet is also available.
Go back to Reports and open the Balance Sheet.
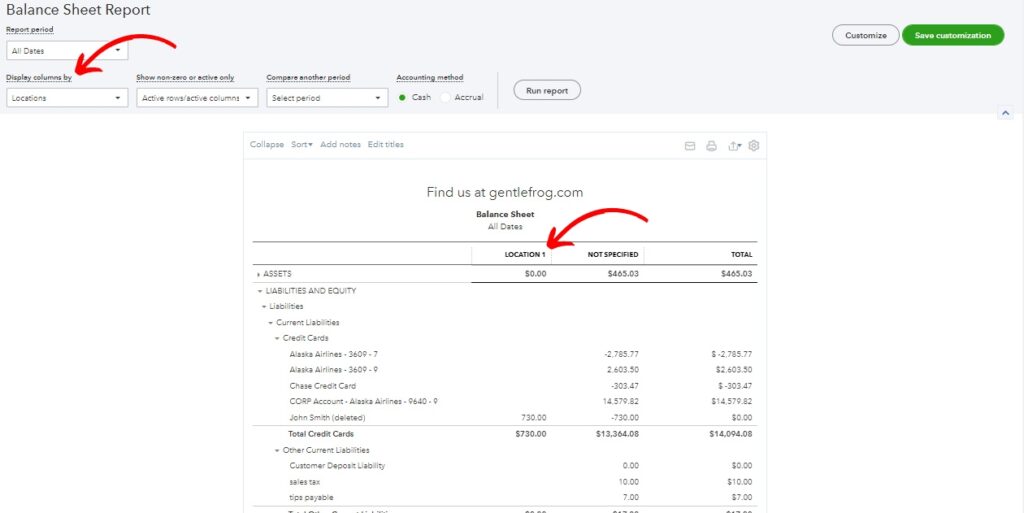
At the top of the Balance Sheet, there’s a Display columns by drop-down menu. In the menu, you can select Locations or Classes, then click Run Report.
Now your Balance Sheet is separated by Location or Class:
Depending on the type of business you run, using Locations/Classes isn’t necessary. However, it can be a great way to track the profitability of different areas of your business.
☕ If you found this helpful, you can say “thanks” by buying me a coffee… https://www.buymeacoffee.com/gentlefrog
Below is a video if you prefer to watch a walkthrough.
If you have questions or need help with locations and classes in QuickBooks Online, click the green button below to schedule a free consultation.

