Account numbers in Quickbooks are numbers that you can assign to each account to make them easier to find and better organized.
Account numbers are not turned on automatically, so if you or your accountant would like them on, I’ll show you how to do it.
Turning on Account Numbers
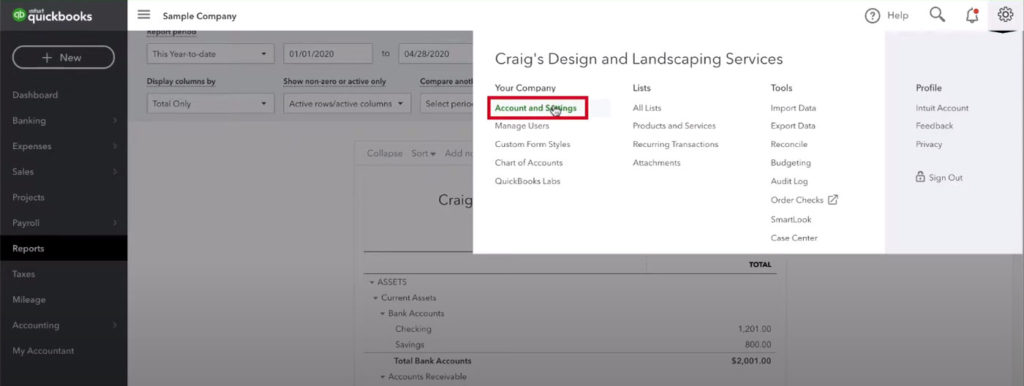
1. Click the gear ⚙ in the upper right-hand corner.
2. Click Account and Settings in the Your Company section.
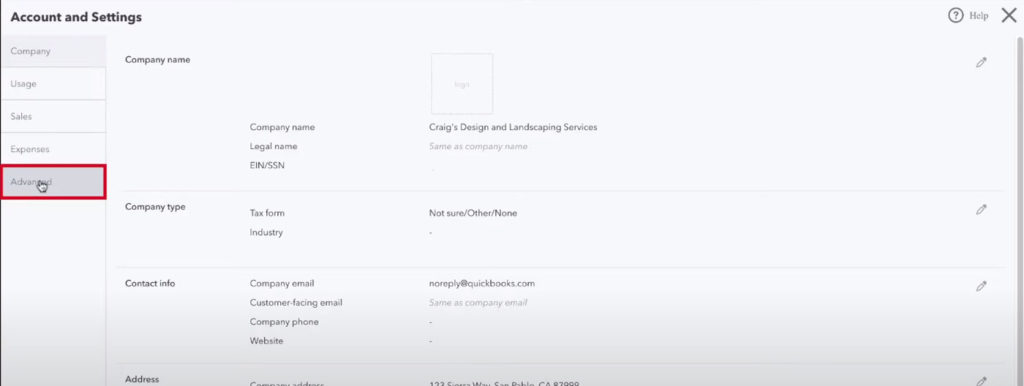
3. Click Advanced on the left-hand side.
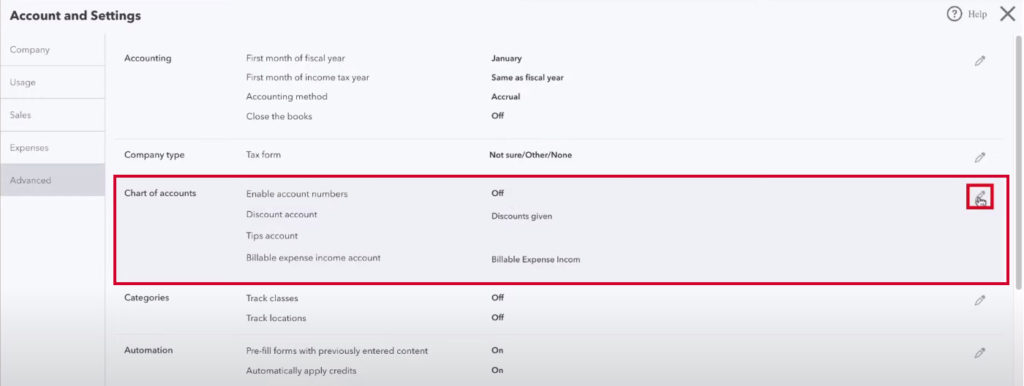
4. In the 3rd option, Chart of Accounts, you’ll see Enable account numbers is off. Click the pencil ✎ on the right-hand side of this section.
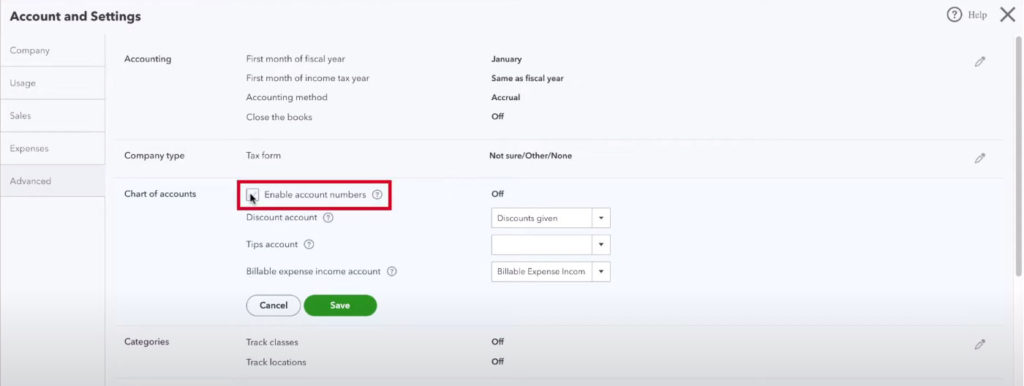
5. Check the Enable account numbers box, you’ll see “off” change to “on.”
6. A Show account numbers checkbox will appear, check this box as well.
7. Click the green Save button.
8. Click the green Done button in the lower right-hand corner of the screen.
Your Chart of Accounts will now display numbers. If you haven’t assigned any numbers yet, I’ll show you how to do that as well.
Assigning Numbers to Accounts
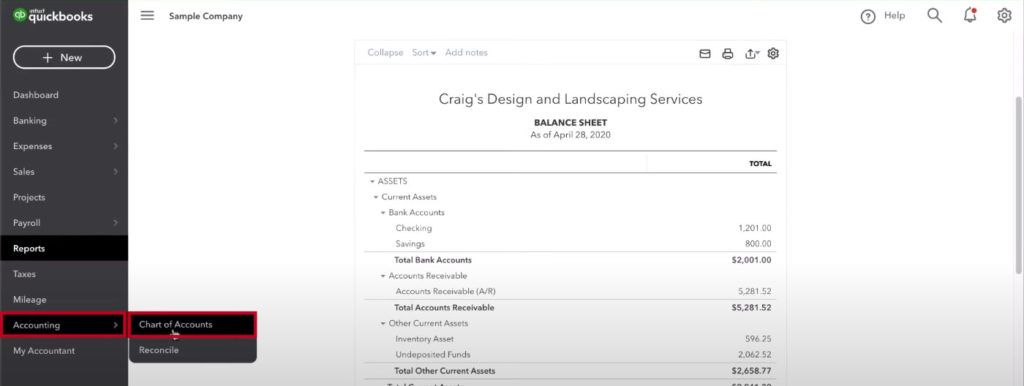
1. In the right-hand menu, select Accounting and then Chart of Accounts.
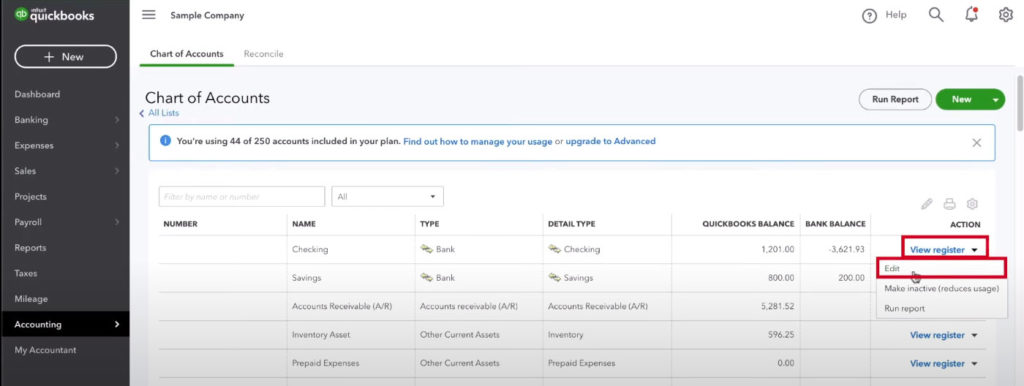
2. Click the drop-down next to View register on an account and click Edit.
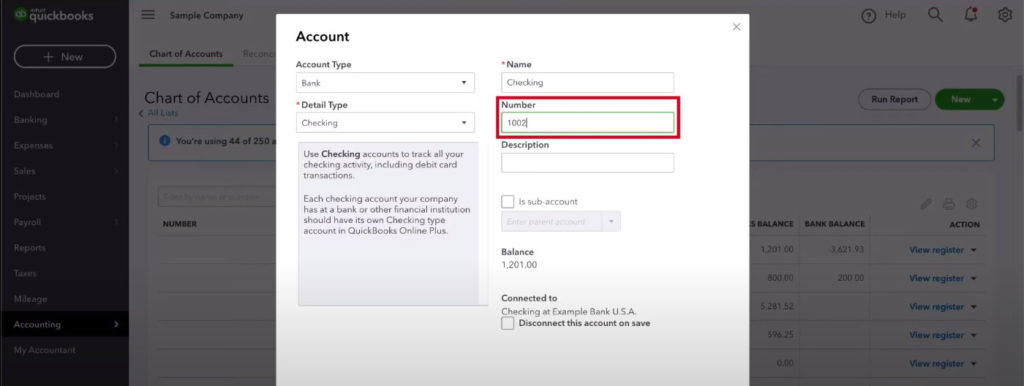
3. The Number field will be on the right under Name. Enter a number and then click the green Save and Close button in the lower right.
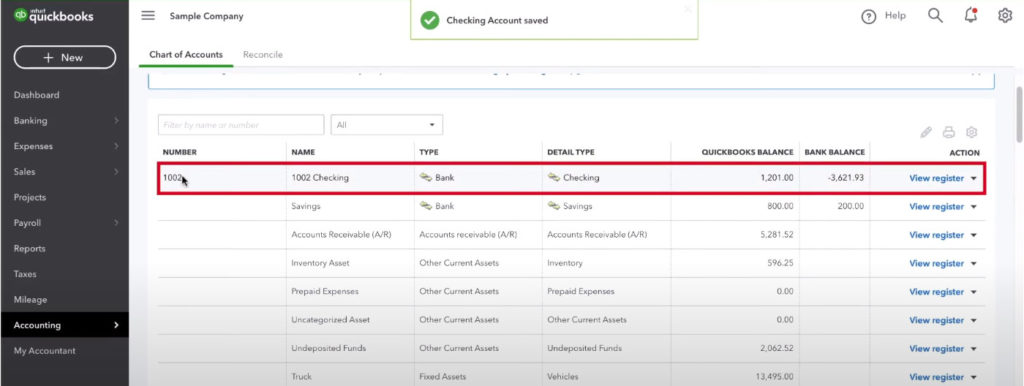
You’ll now see the number in the Number field in your Chart of Accounts. This number will also appear in the Name field in front of the account name. The account name has not changed; this is just how Quickbooks displays it.
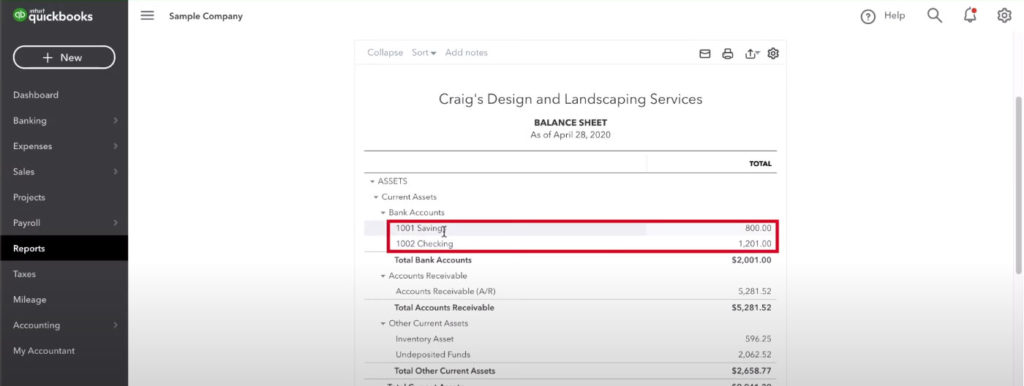
If you view your Balance Sheet, you will see your accounts in order by number instead of alphabetically. This can be a great way to organize your accounts better and may be something your accountant requires.
☕ If you found this helpful, you can say “thanks” by buying me a coffee…
https://www.buymeacoffee.com/gentlefrog
If you have questions about QuickBooks Online, click the green button below to schedule a free consultation.

