Have you ever wondered how to hide an individual account in your chart of accounts?
In your chart of accounts, you’ll find all the accounts in your general ledger. If you’re setting up your chart of accounts and you’re seeing stuff you don’t need or do not find relevant, you may want to hide some of these individual accounts.
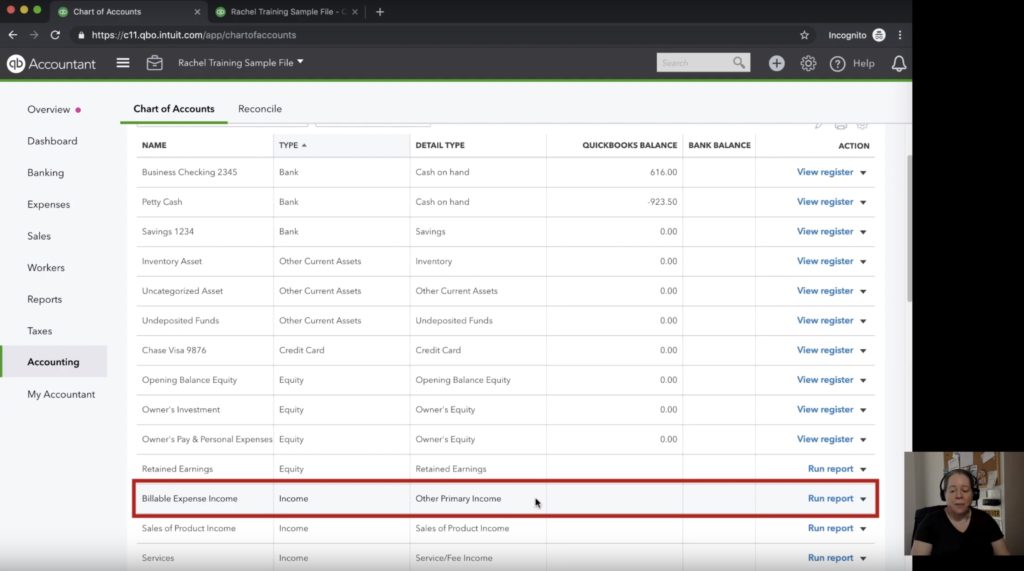
Have a look in our example below. For the purposes of this tutorial, we’ll say that this Billable Expense Income is unecessary and we’ll go ahead and hide it.
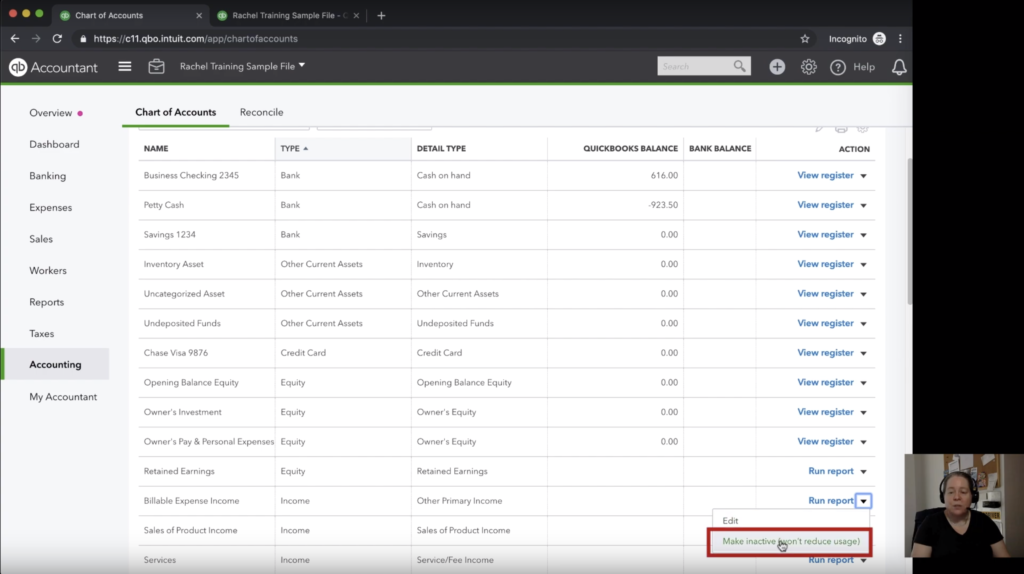
Now to hide it, we’re going to look all the way to the right of the account name and click on the downward pointing arrow. Once the drop down menu is brought up, click the “make inactive” section.
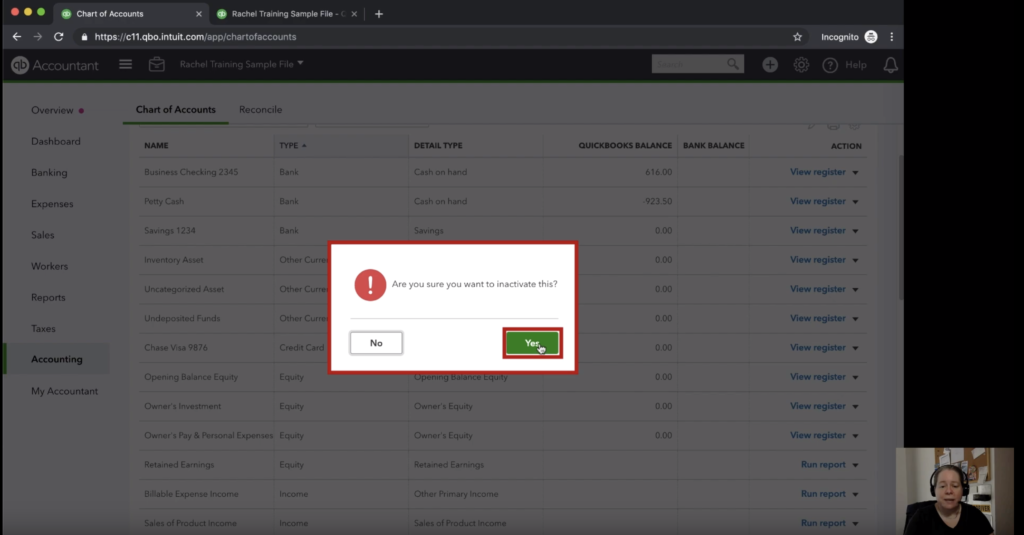
On the next screen, you’ll get a confirmation window to ask if you really want to make it inactive, and click yes.
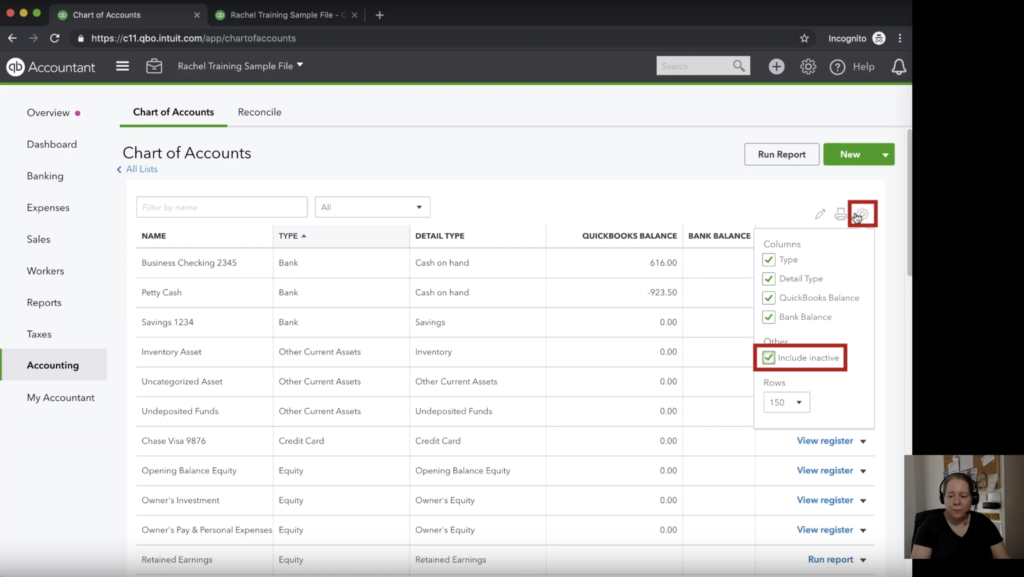
Now what if you accidentally clicked the wrong account and made it inactive? How would you get it back? Not to worry, reactivating that account is simple! Just click the gear in the top right-hand corner.
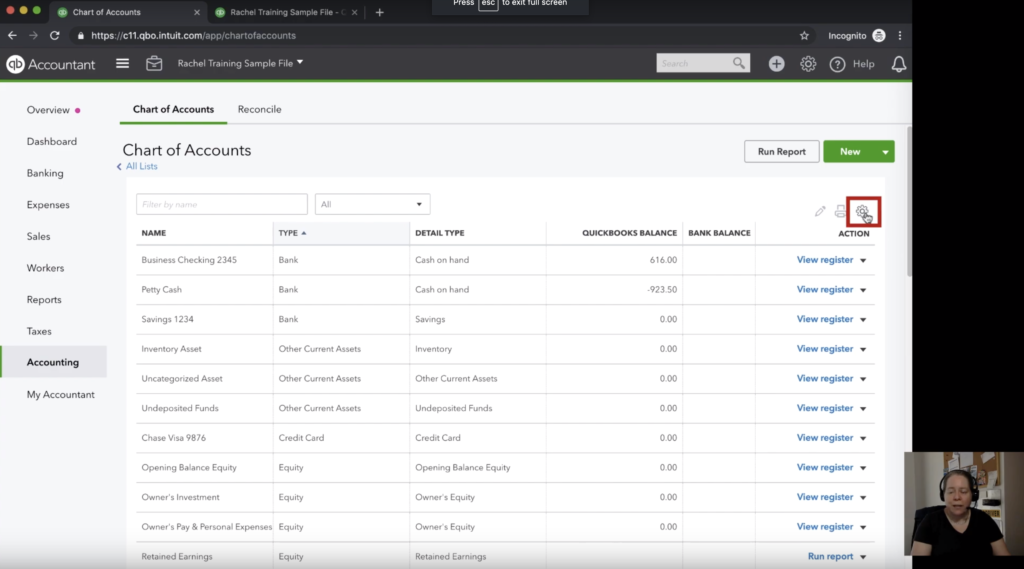
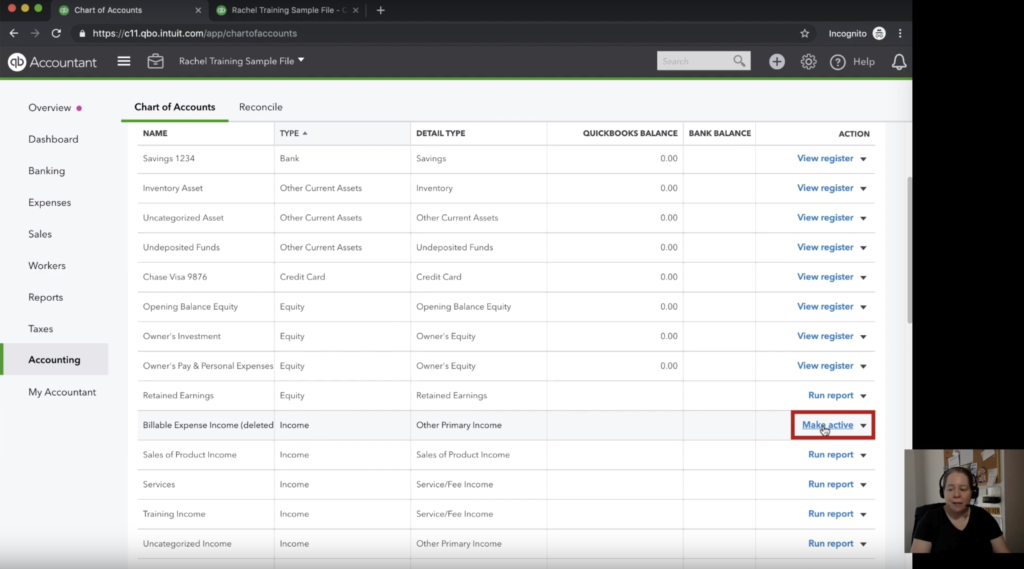
Once you click the gear, you’re going to select the “include inactive” box. What this is going to do is show us all the accounts that we’ve made inactive in QuickBooks Online. Now we can change the status of the inactive accounts that were previously invisible to us to “make active.”
It’s as simple as that! To summarize, you’ve learned what the chart of accounts holds, how to hide an account, and how to reactive a hidden account.
☕ If you found this helpful you can say “thanks” by buying me a coffee…
https://www.buymeacoffee.com/gentlefrog
You can watch a video guide of how to accomplish this below:


